
I remember years ago, trying to come up with something truly unique for our annual Halloween gathering. I wanted something beyond the usual sweets, something with a bit of a theatrical flair. That's when the idea of a deeply black bread, almost like something pulled from a witch's cauldron, popped into my head. I tinkered and experimented, and honestly, the first few attempts were... well, let's just say they were character-building. But then, I found the secret to that perfect, eerie shade, coupled with a wonderfully soft texture. Now, this brimstone bread is a staple. My kids just adore the mystery of it, and watching everyone's faces light up (or gasp a little!) when they see it on the table? That's my favorite part. It’s more than just bread; it's a little piece of Halloween magic.
Why You'll Adore This Spooky Bread
-
It has a truly striking, dramatic black color that's perfect for Halloween.
-
The texture is wonderfully soft and chewy, just like your favorite homemade loaf.
-
It's surprisingly easy to make, even for a beginner baker looking for a fun challenge.
-
This bread makes an incredible centerpiece for any spooky feast or party.
-
The subtle flavor is versatile and pairs well with both savory and slightly sweet spreads.
-
It’s just plain fun to bake something so unique and visually impactful!
This bread is absolutely brilliant for Halloween! It's spooky and delicious all at once. My guests couldn't stop talking about how cool it looked, and it was so soft with dinner. A total hit!
Essential Ingredient Guide
- Active Dry Yeast: Make sure your yeast is fresh! If it doesn't foam when mixed with warm water and sugar, it's probably dead, and your bread won't rise. A fresh packet is always a good idea, honestly.
- All-Purpose Flour: Standard all-purpose flour works beautifully here. For a slightly chewier loaf, you could try bread flour, but it's not strictly necessary. Just remember to measure it correctly, don't pack it into the cup.
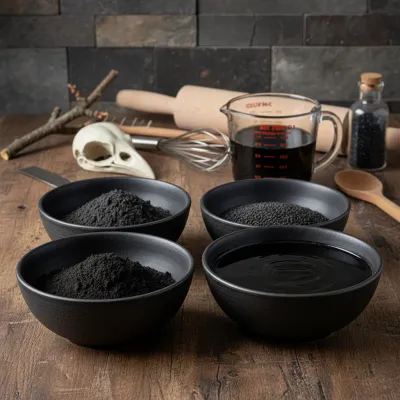
- Activated Charcoal Powder: This is what gives our bread its deep, dramatic black color. Be sure to use food-grade activated charcoal. A quick note: activated charcoal can interact with certain medications, so if you're concerned, please use a high-quality black food gel instead. Safety first, my friends!
- Warm Water: The temperature is key here. Too hot, and you'll kill the yeast; too cold, and it won't activate. Think bathwater warm – 105-115°F (40-46°C) is perfect. A kitchen thermometer is super helpful!
- Olive Oil: A good quality olive oil adds tenderness and a lovely subtle flavor to the bread. It also helps with that beautiful, soft crumb.
Birria Tacos: Easy & Flavorful Recipe
Tender, slow-braised beef tacos pan-fried to perfection with a rich, savory consomé for dipping.
Complete Cooking Process
-
Activate the Yeast (The Magic Start):
-
Warm your water to the perfect temperature (105-115°F). Not too hot, not too cold!
-
Stir in the sugar until it dissolves.
-
Sprinkle the active dry yeast over the water, give it a gentle stir, and let it sit for about 5-10 minutes. You're looking for a lovely, foamy surface – that means your yeast is alive and ready!
-
-
Mix and Knead (The Arm Workout):
-
In a separate, larger bowl, whisk together your flour and salt.
-
If using activated charcoal powder, now's the time to whisk it into the dry ingredients until everything looks uniformly gray-black.
-
Add the olive oil to your bubbly yeast mixture.
-
Gradually add the dry ingredients to the wet, mixing with a sturdy spoon until a shaggy, cohesive dough forms.
-
If using black food gel, knead it in once the dough comes together, until the color is consistent throughout.
-
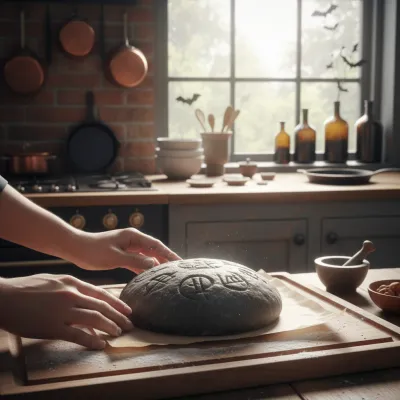
Turn the dough out onto a lightly floured surface and knead, knead, knead! This takes about 8-10 minutes until the dough is smooth, elastic, and feels happy.
-
-
First Rise (The Patience Game):
-
Lightly grease a clean bowl with a little olive oil.
-
Place your beautiful black dough in the bowl, turning it once to coat.
-
Cover the bowl with plastic wrap or a clean, damp kitchen towel.
-
Find a warm, cozy spot (no drafts!) and let your dough rise for 60-90 minutes, or until it has gloriously doubled in size. This is where the flavor develops, so don't rush it!
-
-
Shape and Second Rise (Anticipation Builds):
-
Once risen, gently 'punch down' the dough to release the air. It's so satisfying!
-
Turn it out onto your lightly floured surface and shape it into a neat loaf, tucking the ends under.
-
Place the shaped loaf into a lightly greased 9x5-inch loaf pan.
-
Cover it again and let it rise for another 30-45 minutes. It should look plump and almost doubled again.
-
-
Bake and Enjoy (The Grand Reveal):
-
Preheat your oven to 375°F (190°C) while the bread is on its second rise.
-
Bake for 30-35 minutes. You'll know it's done when it's dark and glorious, and if you tap the bottom, it sounds hollow.
-
As soon as it comes out, turn it onto a wire rack to cool completely. Resist cutting into it right away; it needs to set up for the best texture. I know, it's tough with that amazing aroma filling the kitchen!
-
If you want a softer crust, brush the still-warm loaf with a little melted butter or olive oil.
-

Easy Skillet Chicken Thighs Recipe
Garlic cream sauce skillet chicken thighs for a delicious and simple weeknight dinner.
Your Spooky Bread Questions, Answered!
→ Can I use black food gel instead of activated charcoal?
Absolutely! If you're concerned about activated charcoal interacting with medications or just prefer an alternative, a high-quality black food gel (like Wilton or AmeriColor) works wonderfully. Just add it when you mix your dough until you reach your desired dark shade.
→ My yeast didn't foam. What went wrong?
Oh, that happens sometimes! It usually means your water wasn't the right temperature (too hot kills the yeast, too cold doesn't wake it up) or your yeast is old. Always check the expiration date, and use a thermometer for the water if you can. Best to start over with fresh yeast and correct water temperature.
→ How can I tell if my bread is properly kneaded?
A well-kneaded dough will be smooth and elastic. When you gently poke it with your finger, it should spring back. It won't stick to your hands much either. This develops the gluten, which gives your bread its structure and chewiness.
→ Can I make this bread ahead of time?
Yes! You can bake it the day before your event. Once completely cooled, store it in an airtight container or bread bag at room temperature. It's lovely toasted the next day too!
→ What can I serve with Black Halloween Brimstone Bread?
It's surprisingly versatile! It's fantastic with savory dips like a black bean dip, hummus, or a creamy spinach dip. It's also great for spooky sandwiches, or alongside a hearty chili or stew. Even a little butter or cream cheese is delicious!
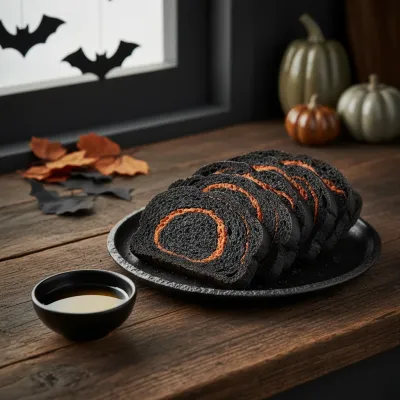
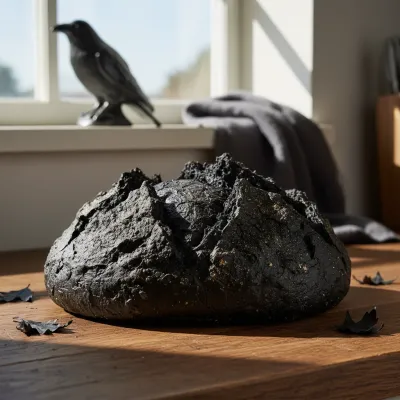
Black Halloween Brimstone Bread
Bake this spooky black Halloween brimstone bread! Soft, striking, and sure to wow your friends. Perfect for any Halloween party or themed dinner.
Timing
Prep Time
25 minutes
Cook Time
30-35 minutes
Total Time
2 hours 30 minutes
Recipe Details
Ingredients
For the Dough
-
01
1 cup warm water (105-115°F / 40-46°C)
-
02
2 1/4 teaspoons active dry yeast (one standard packet)
-
03
1 tablespoon granulated sugar
-
04
3 cups all-purpose flour, plus more for dusting
-
05
1 teaspoon salt
-
06
2 tablespoons olive oil, plus more for greasing
-
07
1-2 tablespoons food-grade activated charcoal powder OR 1-2 teaspoons black food gel
For Brushing (Optional)
-
01
1 tablespoon melted butter OR olive oil
Instructions
In a large bowl, combine the warm water, sugar, and yeast. Stir gently and let it sit for 5-10 minutes until foamy. This means your yeast is active and ready to work its magic!
In a separate bowl, whisk together the flour and salt. If using activated charcoal, add it to the dry ingredients now and whisk until thoroughly combined. If using black food gel, you'll add it in the next step.
Add the olive oil to the yeast mixture. Gradually add the dry ingredients to the wet ingredients, mixing with a wooden spoon until a shaggy dough forms. If using black food gel, add it now and mix well until the dough is uniformly black.
Turn the dough out onto a lightly floured surface and knead for 8-10 minutes. You want a smooth, elastic dough that springs back when gently poked. This step is a little arm workout, but so worth it!
Lightly grease a clean bowl with olive oil. Place the dough in the bowl, turning it once to coat. Cover the bowl with plastic wrap or a clean kitchen towel and let it rise in a warm place for 60-90 minutes, or until doubled in size. This is where the patience comes in, hon.
Once risen, gently punch down the dough to release the air. Turn it out onto a lightly floured surface and shape it into a loaf. Place the loaf into a lightly greased 9x5-inch loaf pan.
Cover the loaf pan with plastic wrap or a towel and let it rise again in a warm spot for another 30-45 minutes, or until it has nearly doubled in size and looks puffy.
Preheat your oven to 375°F (190°C). Once preheated, bake the bread for 30-35 minutes, or until the top is deeply colored and the bottom sounds hollow when tapped. If it's getting too dark too quickly, you can tent it loosely with foil.
Remove the loaf from the oven and immediately turn it out onto a wire rack to cool completely. If you like, brush with a little melted butter or olive oil while it's still warm for a soft crust. Resist the urge to slice it warm; it needs time to set! But yeah, it smells incredible, I know.
Notes & Tips
-
1
If your kitchen is cold, warm your bowl slightly before starting to help the yeast along.
-
2
Don't over-flour your surface when kneading; too much extra flour can make the bread tough.
-
3
To make this recipe vegan, ensure your sugar is vegan-friendly (bone char-free) and use olive oil for brushing instead of butter.
-
4
If you want to add seeds (like sesame or poppy for a 'dark earth' look), sprinkle them on top after the second rise and before baking.

Easy Slow Cooker Pot Roast
The ultimate set-it-and-forget-it meal. Tender beef and hearty vegetables simmered to perfection in the slow cooker.
Tools You'll Need
-
Large mixing bowls
-
Measuring cups and spoons
-
Whisk or spoon
-
Clean kitchen towel or plastic wrap
-
9x5-inch loaf pan
-
Wire cooling rack
-
Optional: Kitchen thermometer for water temperature
Must-Know Tips
-
Always check your yeast for freshness by letting it foam in warm water and sugar.
-
Measure flour by spooning it into the measuring cup and leveling off, not scooping directly.
-
Knead the dough until it's smooth and elastic – this builds gluten for a great texture.
-
Find a warm, draft-free spot for rising – an oven with just the light on can be perfect.
-
Don't slice the bread until it's completely cool; it needs time to set its structure.
Professional Secrets
-
For an extra 'brimstone' look, lightly dust the top of the loaf with a tiny bit more activated charcoal before baking.
-
Place a shallow pan of hot water on the bottom rack of your oven while baking for a steamier environment, which can give a lovely crust.
-
A tiny pinch of espresso powder (just a pinch!) can deepen the black color without affecting the flavor.
-
Brush the top with an egg wash (egg yolk + a splash of water) before baking for a shinier, slightly crisper crust.
-
If you want a slightly savory flavor, add a teaspoon of dried herbs like oregano or thyme to the flour mixture.

Recipe by
Grace Lawson“Butter, sugar, and a little love — that’s my baking philosophy! Let’s make your kitchen smell amazing.” 🍰❤️
Get Delicious Recipes Weekly
Join 25,000+ home cooks getting our best recipes straight to their inbox.
Free forever • No spam • Unsubscribe anytime