
The American chocolate chip cookie is a relatively modern marvel, born not from an ancient tradition, but from a serendipitous moment in the 1930s at the Toll House Inn. While traditional cookies often relied on a crisp snap, the evolution toward the 'chewy' texture became a cultural obsession, favoring the moisture provided by brown sugar over the crunch of white sugar.
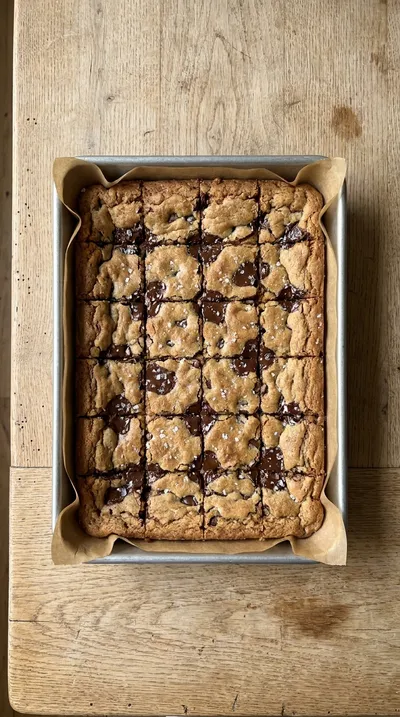
Adapting this classic into a bar format reflects the practical nature of home baking in the mid-century era. By shifting from individual rounds to a single baking pan, the edges caramelize against the metal while the center retains a soft, fudge-like consistency. This method ensures a more uniform chew across every single bite.
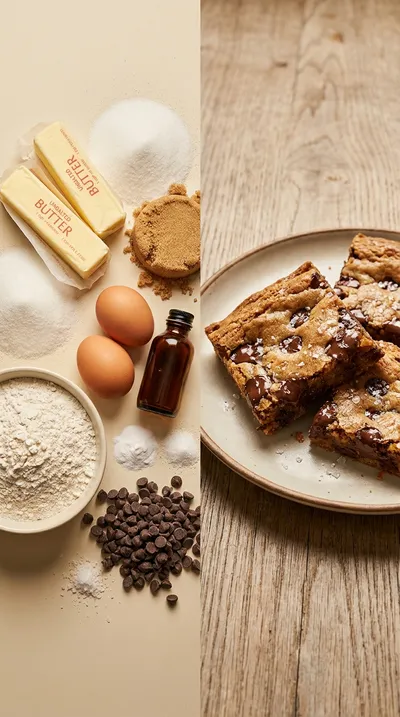
These chewy chocolate chip cookie bars represent the intersection of convenience and nostalgia. The use of simple pantry staples—all-purpose flour, baking soda, and salt—creates a canvas that lets the rich, semi-sweet chocolate chips take center stage, echoing the timeless appeal of a homemade treat shared among friends and family.
Why You'll Love It
-
- Honestly, there is something so grounding about a pan of these; they have that perfect, melt-in-your-mouth chewiness that just feels like a hug from the inside.
-
- I mean, who has the patience to scoop individual cookies? These bars are just so much easier, and they keep that soft, buttery center I've always loved.
-
- Well, look, the way the semi-sweet chocolate chips get all gooey and warm... it's just a little piece of heaven in every single square.
-
- It reminds me of the treats I used to make for family get-togethers, where the whole house smelled like brown sugar and warmth. Just pure comfort, yeah.
"Honestly, these are the best bars I've ever made. So soft, and the chocolate is just perfect!"
Essential Ingredient Guide
- 1 cup (2 sticks) unsalted butter, softened: Butter is the heart of this recipe, so make sure it's truly softened, not melted. I find it's best to just leave it on the counter for a bit; it makes the dough so much smoother.
- 2 cups semi-sweet chocolate chips: These give us those lovely little pockets of melted chocolate. I always suggest using a good quality brand so they hold their shape just enough while staying gooey.
- Flaky sea salt for sprinkling: Now, this is optional, but oh wow, it really wakes up the chocolate. Just a tiny pinch on top adds a sophisticated little crunch that balances the sweetness.
- 1 teaspoon salt: Don't skip this, even with the sugar! It's what makes the other flavors pop, honestly, without making the bars taste salty.
- 1 teaspoon vanilla extract: A little bit of vanilla adds such a warm, aromatic depth. It's that secret scent that makes the kitchen feel so cozy while they bake.
- 3/4 cup packed light brown sugar: The brown sugar is what gives us that wonderful chew and a hint of caramel. Just make sure to pack it firmly into your measuring cup, yeah.
Complete Cooking Process
-
Ingredient Readiness:
I always start by making sure my butter and eggs are at room temperature. It just helps everything emulsify better, so you don't end up with any little lumps in your batter.
-
Flavor Development:
The magic happens when you cream the butter with the granulated sugar and light brown sugar. Taking those few minutes to get it light and fluffy really lets that buttery sweetness bloom.
-
Texture Control:
When adding the flour, baking soda, and salt, just mix on low. If you overwork the dough, the bars can get tough, and we definitely want them to stay soft and tender.
-
Finishing Touches:
Once they come out of the oven, I like to let them cool completely in the pan. If you're feeling fancy, a light sprinkle of flaky sea salt on top is the perfect final touch.
-
Serving Timing:
These are wonderful warm, but waiting until they're fully cooled makes cutting them into clean squares so much easier. Just lift them out using the parchment paper overhang.
-
Use a bit more brown sugar than granulated sugar if you want an extra chewy result.
-
Be careful not to overbake; err on the side of slightly underbaked for the softest bars.
-
Always line your pan with parchment paper to make lifting and removing the bars a breeze.
-
Make sure your butter and eggs are room temperature for a consistent, smooth texture.
Pro Tips
You've got this, just trust your instincts and enjoy the process!
 Dinner
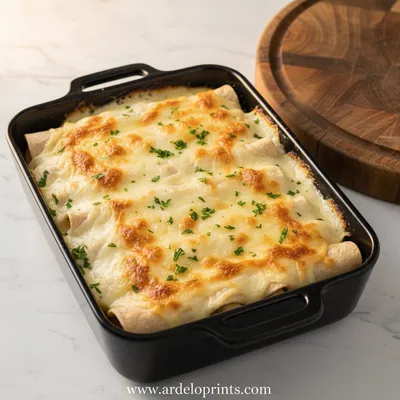
Easy White Chicken Enchiladas with Creamy Sauce
Quick white chicken enchiladas ready in 30 minutes with a luscious creamy sauce.
Better For You Treats
Ways to Make it Your Own
Serving Suggestions
Frequently Asked Questions
→ How do I know when the bars are actually done baking?
Look for the edges to be golden brown. A toothpick in the center should have a few moist crumbs, but not be wet, yeah.
→ Can I store these in the freezer for later?
Oh, absolutely. Just pop them in an airtight container or freezer bag for up to 2 months and thaw them at room temperature.
→ What if I don't have parchment paper?
Ugh, I've been there! You can grease the pan well with butter, but the parchment really is the best way to lift them out without any breaking.
Nutrition Facts
per serving
320
Calories
5g
Protein
38g
Carbs
16g
Fat
Taste Profile
A rich, buttery sweetness balanced by deep chocolate and a hint of salt.
Ingredient Substitutions
Don't have an ingredient? Try these alternatives
If using salted butter, reduce the added salt by a pinch.
Gives a more intense chocolate flavor and a different texture.
Works well, though the chewiness may vary slightly.
Recipe Variations
Try these delicious twists on the original
Peanut Butter Chocolate Chip Cookie Bars
For a delicious peanut butter twist, just stir in 1/2 cup of peanut butter along with the wet ingredients.
Salted Caramel Chocolate Chip Cookie Bars
Make it a bit more indulgent by drizzling caramel sauce over the baked bars before cutting and finishing with a sprinkle of sea salt.
Common Mistakes to Avoid
Learn from others' mistakes for perfect results
- Overmixing the batter, which makes the bars cakey instead of chewy.
- Baking until the center is completely dry, resulting in a crumbly texture.
- Cutting the bars while they are still hot, which causes them to fall apart.
Meal Prep & Storage
Make Ahead Tips
You can bake these in advance and store them in an airtight container for up to 3 days, or freeze them for up to 2 months for a quick treat.
Leftover Ideas
Keep leftover bars in a sealed container at room temperature. If you want them warm again, a quick 10 seconds in the microwave makes them taste fresh-baked.
Perfect Pairings
Serve this with...
Cooking Timeline
Preheat oven and line the baking pan.
Cream butter and sugars, then beat in eggs and vanilla.
Whisk dry ingredients and slowly mix into the wet batter.
Fold in chocolate chips and spread dough into the pan.
Bake for 25-30 minutes and let cool completely.
 International_Cuisine
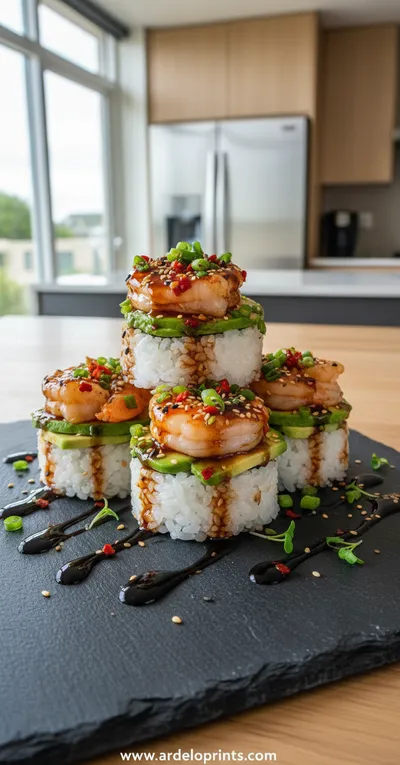
Spicy Shrimp Sushi Stacks
A fresh, vibrant bite combining seasoned shrimp, rice, and crisp toppings.
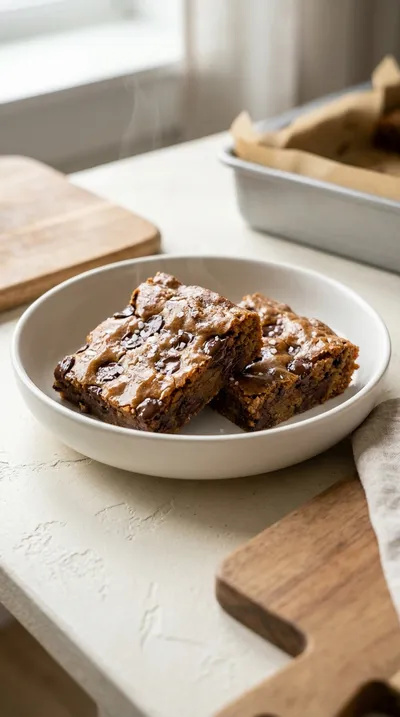
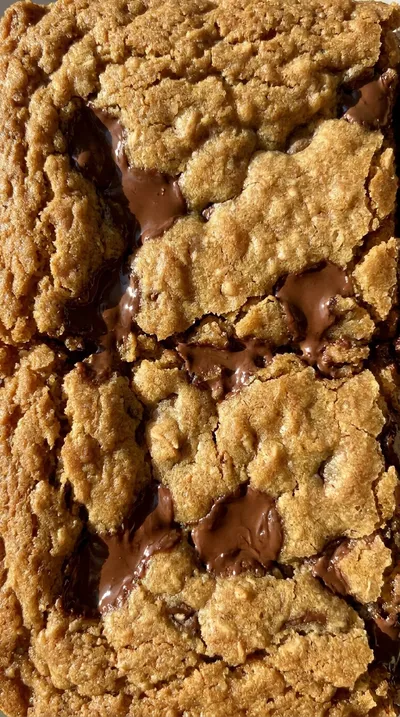
Chewy Chocolate Chip Cookie Bars Recipe
Warm your kitchen with the scent of brown sugar and vanilla. These chewy chocolate chip cookie bars are a soft, buttery delight that brings a little bit of comfort to any afternoon.
Timing
Prep Time
15 Minutes
Cook Time
25-30 Minutes
Total Time
40-45 Minutes
Recipe Details
Ingredients
Main Ingredients
-
01
1 cup (2 sticks) unsalted butter, softened
-
02
3/4 cup granulated sugar
-
03
3/4 cup packed light brown sugar
-
04
2 large eggs
-
05
1 teaspoon vanilla extract
-
06
2 1/4 cups all-purpose flour
-
07
1 teaspoon baking soda
-
08
1 teaspoon salt
-
09
2 cups semi-sweet chocolate chips
Garnish
-
01
Optional: Flaky sea salt for sprinkling
Instructions
First things first, go ahead and preheat your oven to 350°F (175°C). Line your 9x13 inch baking pan with parchment paper, and honestly, make sure you leave a little overhang on the sides—it makes lifting the bars out so much easier later on.
In a large mixing bowl, cream together the softened butter, granulated sugar, and brown sugar. You want them to be light and fluffy, which usually takes about 3-5 minutes with an electric mixer. It's a lovely, sweet scent that always fills the kitchen.
Now, beat in the eggs one at a time. I mean, just take your time with them, then stir in the vanilla extract until everything is well combined.
While that's settling, grab a medium mixing bowl and whisk together the flour, baking soda, and salt. Simple as that.
Gradually add those dry ingredients into the wet ones. Use a low speed and mix until they're just combined. Oh, and please be careful not to overmix! We want these to stay chewy, not tough.
Gently stir in the chocolate chips until they're evenly distributed throughout the dough. It's the best part, really.
Spread the dough evenly into your prepared baking pan. Just a heads up, the dough will be quite thick, so you might need to press it down a bit.
Bake for 25-30 minutes. You're looking for edges that are golden brown and a center that's set. If you poke a toothpick in the center, a few moist crumbs are fine, but it shouldn't be wet.
Now comes the hard part: let the cookie bars cool completely in the pan. Once they're cold, use that parchment paper overhang to lift them right out.
Cut them into squares and enjoy! If you're feeling a bit fancy, go ahead and sprinkle some flaky sea salt on top.
Notes & Tips
-
1
Using room temperature butter and eggs makes the batter much smoother.
-
2
The parchment paper is a lifesaver for clean removal.
-
3
A toothpick with a few moist crumbs is the secret to a chewy center.

Tools You'll Need
-
9x13 inch baking pan for a perfect rectangle
-
Parchment paper for easy lifting
-
Large and medium mixing bowls
-
Electric mixer (handheld or stand mixer) for creaming butter
-
Measuring cups and spoons
-
Spatula or wooden spoon for folding in chips
Must-Know Tips
-
Brown sugar ratio, For extra chewy bars, use slightly more brown sugar than granulated sugar to add moisture.
-
Avoid overbaking, Overbaking results in dry, crumbly bars; it's better to err on the side of slightly underbaked.
-
Temperature control, Using room temperature ingredients ensures a consistent texture throughout.
Professional Secrets
-
The 'underbake' method ensures the bars stay soft for days.
-
Creaming butter and sugar for a full 5 minutes creates a better lift and fluffier base.
-
The salt contrast—adding flaky sea salt on top cuts through the richness of the semi-sweet chocolate.

Recipe by
Mason Cole“Sweet cravings are my specialty! I turn sugar, chocolate, and imagination into pure dessert magic.” 🍰✨
Get Delicious Recipes Weekly
Join 25,000+ home cooks getting our best recipes straight to their inbox.
Free forever • No spam • Unsubscribe anytime