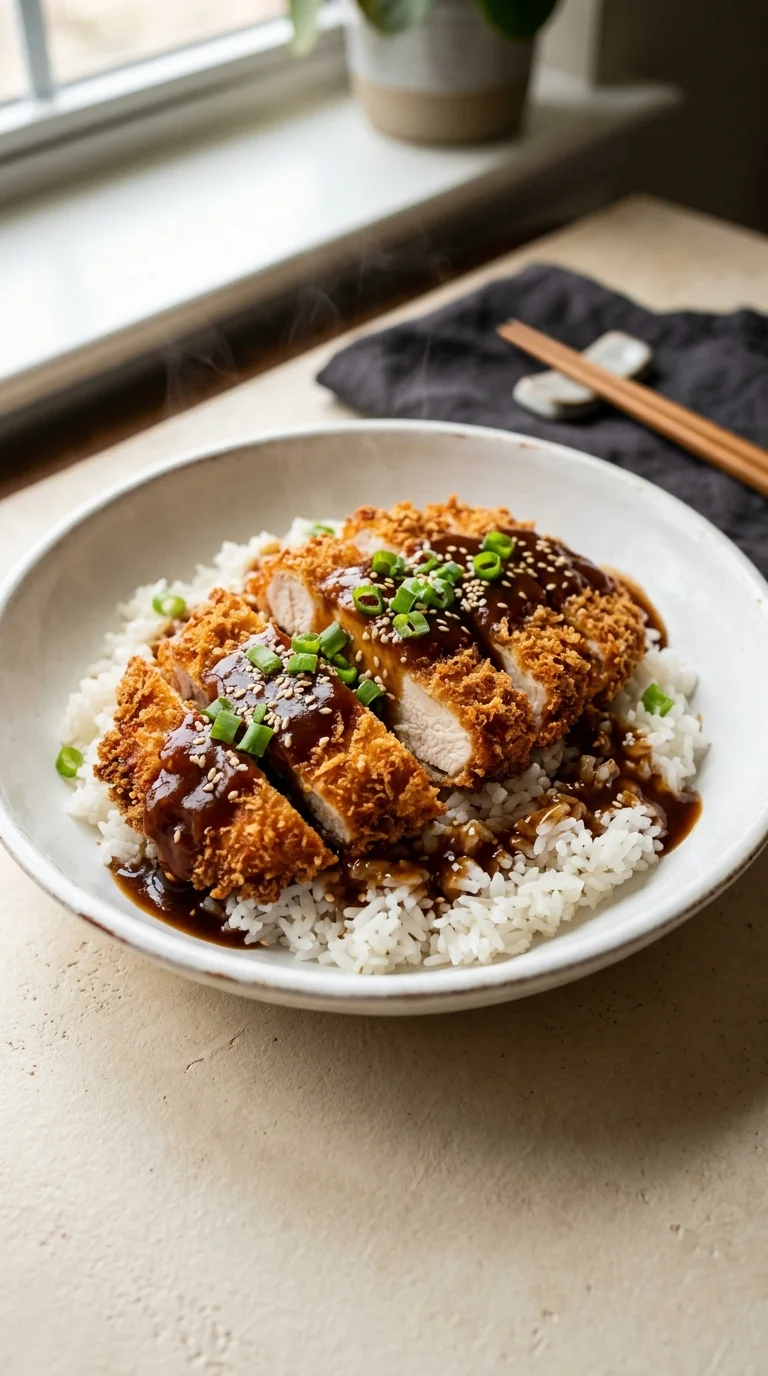
The story of katsu is a fascinating example of culinary evolution, born from the Japanese adaptation of European breaded cutlets. During the Meiji era, Japan began integrating Western influences, transforming the French côtelette into something uniquely their own. By substituting traditional crumbs with the lighter, airier panko, they created a texture that was lighter yet crunchier.
Over time, this dish became a staple of 'Yoshoku'—Western-style Japanese cuisine. The accompanying tonkatsu sauce, a complex blend of fruits and vegetables, provides the essential acidic balance to the richness of the fried meat. It is a dish that represents a bridge between cultures.
Today, crispy chicken katsu with tonkatsu sauce is loved globally, not just for its flavor, but for its satisfying contrast of textures. It remains a symbol of comfort and accessibility, blending traditional Japanese precision with a hearty, universal appeal.
Why You'll Love It
-
- Honestly, that first crunch of the panko breadcrumbs is just pure magic, followed by the tender, juicy chicken inside.
-
- The tonkatsu sauce has this lovely, tangy depth that reminds me of old family dinners—so comforting and savory.
-
- It's a wonderful way to bring a little bit of Japanese comfort into your own kitchen without needing any fancy equipment.
-
- Well, look, serving it over a bed of fluffy jasmine rice makes it a complete, grounding meal that really satisfies everyone.
"My kids usually push their dinner around, but they absolutely devoured this. That crunch is just something else!"
Essential Ingredient Guide
- boneless, skinless chicken breasts: These are the heart of the dish. I always make sure to pound them to a uniform thickness so they cook evenly and stay juicy, not dry.
- panko breadcrumbs: Panko gives you that distinct, airy crunch that regular crumbs just can't match. It's what makes this katsu feel truly special.
- cooked jasmine rice: This is optional, but honestly, it's the perfect soft pillow for the crispy chicken to rest on. It soaks up the extra sauce beautifully.
- salt and black pepper: Simple seasonings, but they're so important. Seasoning the meat directly before the flour ensures every bite is flavorful.
- rice vinegar: Just 1 tsp adds a subtle brightness to the sauce. It cuts through the richness of the fried chicken and wakes everything up.
- sugar: A little bit of sugar helps balance the saltiness of the soy sauce. It gives the tonkatsu sauce that gentle, rounded sweetness.
 Dinner
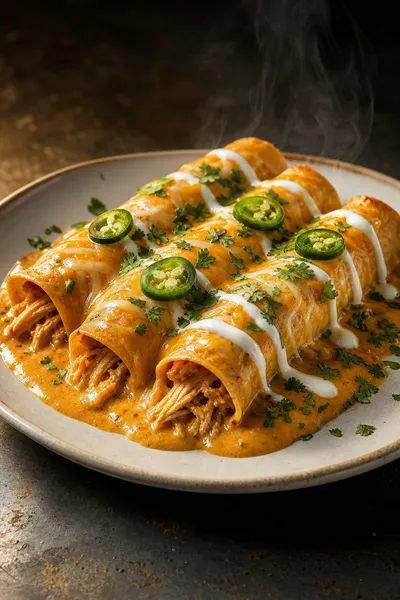
Easy White Chicken Enchiladas with Creamy Sauce
Quick white chicken enchiladas ready in 30 minutes with a luscious creamy sauce.
Complete Cooking Process
-
Ingredient Readiness:
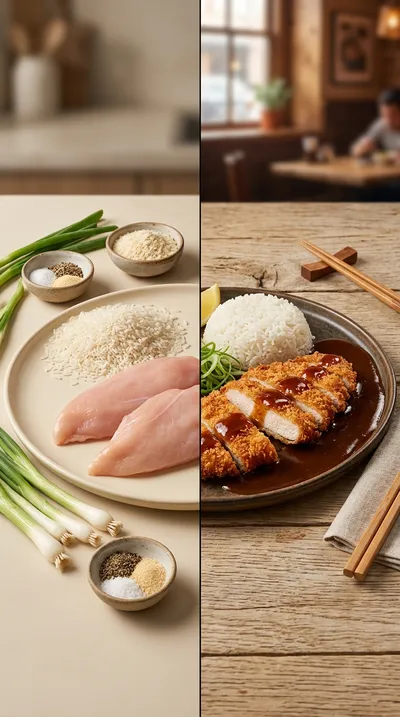
I like to start by pounding the chicken breasts to a half-inch thickness and setting up my dredging bowls. Getting the flour, beaten eggs, and panko ready beforehand makes the whole process feel so much calmer.
-
Flavor Development:
The real magic happens in the small saucepan where the ketchup, soy sauce, mirin, and aromatics simmer. That gentle heat melds the flavors into a thick, savory glaze.
-
Texture Control:
Frying in vegetable oil over medium-high is key. You want that oil shimmering so the panko turns a beautiful golden brown while the inside stays moist.
-
Finishing Touches:
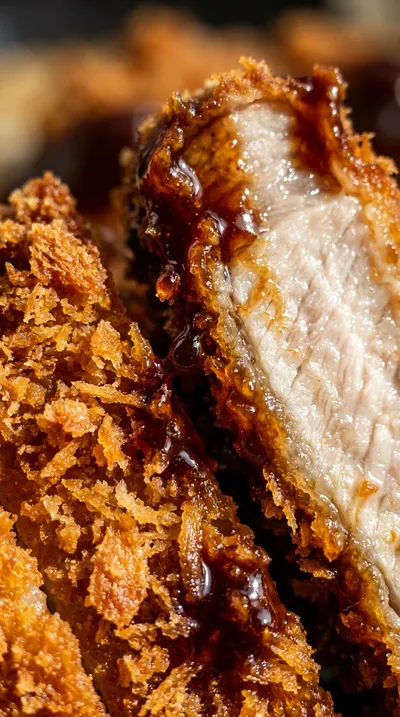
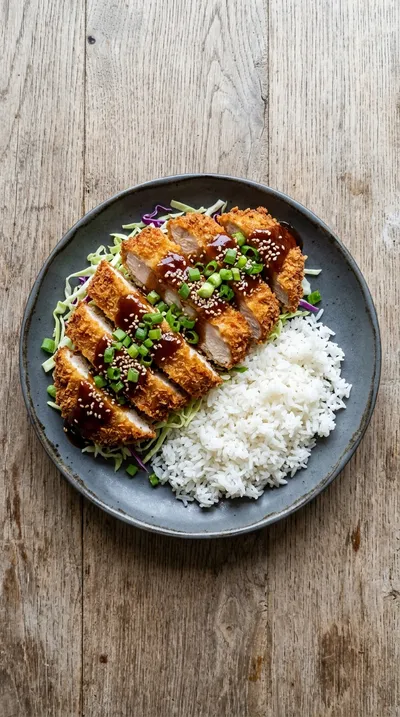
After a quick rest on paper towels, slicing the cutlets into 3 cm strips lets you see that lovely contrast of golden crust and white meat.
-
Serving Timing:
I always serve this immediately while the chicken is still hot and crisp. Drizzling the warm sauce over the rice and chicken just before the plate hits the table is the best way.
-
Let the panko-coated chicken rest for 10 minutes before frying to help the coating set.
-
Rest the fried katsu for a few minutes after cooking so the juices redistribute.
-
Keep your tonkatsu sauce warm for a minute before drizzling to keep the flavors bright.
-
Use a sharp knife to slice the strips so you don't crush that lovely crispy crust.
Pro Tips
You've got this, just take your time and enjoy the process.
 International_Cuisine
Spicy Shrimp Sushi Stacks
A fresh, vibrant bite combining seasoned shrimp, rice, and crisp toppings.
Better For You Treats
This meal is a wonderful source of protein from the chicken and energy from the jasmine rice. To keep it balanced, I like to remember that the tonkatsu sauce is a bit high in sodium, so a little goes a long way.
Ways to Make it Your Own
If you're feeling bold, try adding 1 tsp sriracha to the sauce for a spicy kick. Or, for a plant-based twist, replace the chicken with firm tofu cubes—they get just as golden and lovely with the panko.
Serving Suggestions
I think this pairs beautifully with an Asian slaw or some pickled cucumber for a bit of acidity. A side of sautéed bok choy or a sprinkle of aonori seaweed flakes adds a nice touch of greenery to the plate.
Frequently Asked Questions
→ What if my panko coating is falling off?
Oops, that happens! Just make sure you press the chicken firmly into the panko and let it rest for 10 minutes before frying.
→ Can I make the tonkatsu sauce in advance?
Yes, you certainly can. Just keep it in the fridge and warm it up gently before serving so the flavors stay vivid.
→ How do I know when the chicken is perfectly cooked?
Look for a deep golden brown color, but the most reliable way is using a thermometer to hit 165 °F.
Nutrition Facts
per serving
580
Calories
38g
Protein
48g
Carbs
22g
Fat
Taste Profile
A savory, umami-rich experience balanced by the tang of the tonkatsu sauce.
Ingredient Substitutions
Don't have an ingredient? Try these alternatives
It won't be as airy or crunchy, but it still works in a pinch.
Add a tiny splash of rice vinegar to balance the extra sweetness.
Recipe Variations
Try these delicious twists on the original
Spicy Tonkatsu Sauce
For those who like a little heat, just stir in 1 tsp of sriracha or your favorite chili paste into the sauce mix.
Vegetarian Tofu Katsu
You can swap the chicken for firm tofu cubes. Just follow the same coating and frying method until golden brown.
Common Mistakes to Avoid
Learn from others' mistakes for perfect results
- Overcrowding the skillet, which drops the oil temperature and makes the chicken greasy.
- Flipping the chicken too often, which can break the panko coating.
- Forgetting to pound the chicken, leading to uneven cooking where edges burn before the center is done.
Meal Prep & Storage
Make Ahead Tips
You can prepare the tonkatsu sauce a day in advance and keep it chilled. You can also bread the chicken and store it in the fridge for a few hours, though frying immediately is usually best for the crust.
Leftover Ideas
Store in an airtight container for 3 days. To keep the crunch, reheat in a 350°F oven for 10–12 minutes rather than using a microwave.
Perfect Pairings
Serve this with...
Cooking Timeline
Simmer the tonkatsu sauce and let it cool.
Pound chicken to uniform thickness and season.
Bread the chicken using the flour, egg, and panko station.
Fry chicken until golden brown and 165°F internal.
Rest, slice, and assemble over rice with sauce and garnish.
Crispy Chicken Katsu with Tonkatsu Sauce
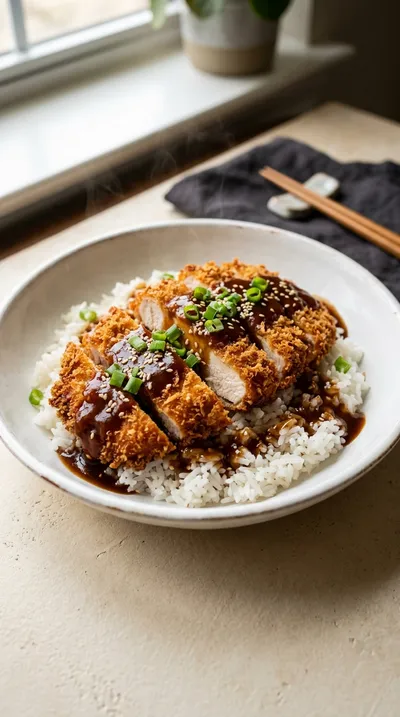
There is something so comforting about the sound of a knife slicing through a golden crust. This crispy chicken katsu with tonkatsu sauce brings together the crunch of panko breadcrumbs and a rich, tangy glaze for a dinner that feels like a warm hug.
Timing
Prep Time
20 Minutes
Cook Time
15 Minutes
Total Time
35 Minutes
Recipe Details
Ingredients
Chicken and Breading
-
01
4 boneless, skinless chicken breasts
-
02
1/2 cup all-purpose flour
-
03
1 tsp salt
-
04
1/2 tsp black pepper
-
05
2 large eggs, beaten
-
06
1 cup panko breadcrumbs
-
07
2 tbsp vegetable oil
Tonkatsu Sauce
-
01
3 tbsp ketchup (classic tonkatsu brand)
-
02
2 tbsp Worcestershire sauce
-
03
2 tbsp soy sauce
-
04
1 tbsp mirin
-
05
1 tsp sugar
-
06
1 tsp rice vinegar
-
07
1 tsp grated fresh ginger
-
08
1 tsp minced garlic
-
09
pinch ground black pepper
Serving and Garnish
-
01
2 cups cooked jasmine rice (optional)
-
02
Sesame seeds, chopped green onions for garnish
Instructions
First, let's get that lovely sauce started. In a small saucepan over low heat, gently stir together your ketchup, Worcestershire sauce, soy sauce, mirin, sugar, rice vinegar, grated ginger, minced garlic, and a pinch of black pepper. Just let it simmer softly for about 5 minutes until it thickens up a bit, then take it off the heat and let it cool down.
Now for the chicken. Place each boneless, skinless chicken breast between two sheets of plastic wrap—it keeps things clean, honestly. Use a meat mallet or a rolling pin to pound them to a uniform thickness of about ½ inch. Once they're even, season both sides with your salt and black pepper.
Set up your little dredging station so you're not running back and forth. Put the flour, salt, and pepper in bowl 1, your beaten eggs in bowl 2, and the panko breadcrumbs in bowl 3.
Coat each chicken breast first in the seasoned flour—just tap off any excess—then dip it into the beaten eggs, and finally press it firmly into the panko. You want a good, sturdy coating here.
Heat up 1–2 tbsp vegetable oil in your skillet over medium-high heat. Look for the oil to shimmer; once it does (but before it starts to smoke), carefully add your coated chicken.
Fry them for about 3–4 minutes per side. You're looking for a beautiful golden brown color and an internal temperature of 165°F (74°C). Use your tongs to flip them gently so you don't disturb the crust.
Transfer the cooked katsu to a plate lined with paper towels. This lets the excess oil drain away and, wow, it really helps that crust stay crisp.
Using a sharp knife, slice each cutlet into 3 cm wide strips. I like to let them sit for a moment first.
On your serving platter, spread out the cooked jasmine rice in a shallow layer and arrange those golden sliced chicken katsu strips right on top.
Finally, pour that warm tonkatsu sauce generously over the chicken and rice. Sprinkle on some toasted sesame seeds and chopped green onions for a little pop of color.
Notes & Tips
-
1
Allowing the panko to set before frying improves the crust's stability.
-
2
Resting the meat after cooking helps the juices redistribute for a moister bite.
-
3
Warm sauce tends to carry the flavors of ginger and garlic more effectively than cold sauce.
Tools You'll Need
-
Medium skillet for frying the chicken
-
2 medium bowls for the dredging process
-
Meat mallet or rolling pin for flattening the breasts
-
Plastic wrap to protect the meat during pounding
-
Tongs for careful flipping
-
Measuring spoons for precise sauce ingredients
-
Small saucepan for simmering the sauce
-
Sharp knife for slicing the cutlets
-
Cutting board for prep work
-
Paper towel‑lined plate for draining oil
-
Ladle for serving the sauce
-
Serving platter for the final presentation
Must-Know Tips
-
Panko Resting, let the coated chicken rest for 10 minutes before frying to help the coating set.
-
Sauce Temperature, keep the tonkatsu sauce warm in a short-stir to prevent flavor loss.
-
Meat Resting, let the katsu rest for a few minutes after frying to ensure the meat stays moist.
Professional Secrets
-
The uniform ½ inch thickness ensures the chicken cooks through exactly when the panko turns golden.
-
Dredging in the specific order of flour, egg, then panko creates an unbreakable bond between meat and crust.
-
The shimmer of the oil is the precise indicator that the pan is ready, preventing the panko from absorbing too much grease.
What readers are saying
Community reviews from home cooks like you
The flavors were spot on. I really liked how the 4 boneless, skinless chicken breasts and 1/2 cup all-purpose flour came together. Next time I'll double the sauce. Will be making this regularly.
Will definitely make this again. I really liked how the 4 boneless, skinless chicken breasts and 1/2 cup all-purpose flour came together. Thanks for sharing this one!
Will definitely make this again. I really liked how the 4 boneless, skinless chicken breasts and 1/2 cup all-purpose flour came together. My kids even asked for seconds.
I was surprised how good this turned out. I really liked how the 4 boneless, skinless chicken breasts and 1/2 cup all-purpose flour came together. I swapped one ingredient and it still worked. Perfect as written.
I was surprised how good this turned out. I really liked how the 4 boneless, skinless chicken breasts and 1/2 cup all-purpose flour came together. Already shared it with a friend.
So easy and delicious. I really liked how the 4 boneless, skinless chicken breasts and 1/2 cup all-purpose flour came together. Great addition to my recipe rotation.
Perfect for a busy weeknight. I really liked how the 4 boneless, skinless chicken breasts and 1/2 cup all-purpose flour came together. Perfect as written.
This was a hit with my family. I really liked how the 4 boneless, skinless chicken breasts and 1/2 cup all-purpose flour came together. Saving this for later.
Nice base recipe. The breasts flavor was nice, but i added a bit more seasoning next time. I might try it again with some adjustments.
Pretty good overall. The breasts flavor was nice, but my oven needed an extra 5 minutes. I might try it again with some adjustments.
Good, but not amazing. The breasts flavor was nice, but my oven needed an extra 5 minutes. I might try it again with some adjustments.
This exceeded my expectations. I really liked how the 4 boneless, skinless chicken breasts and 1/2 cup all-purpose flour came together. I swapped one ingredient and it still worked. Highly recommend giving it a try.
I wanted to love this dish, but it didn't quite work for me. It took slightly longer than the recipe said. I think with some tweaks it could be really good.
Will definitely make this again. I really liked how the 4 boneless, skinless chicken breasts and 1/2 cup all-purpose flour came together. I added a bit more seasoning next time. Saving this for later.
Nice base recipe. The breasts flavor was nice, but my oven needed an extra 5 minutes. I might try it again with some adjustments.
Absolutely loved this recipe! I really liked how the 4 boneless, skinless chicken breasts and 1/2 cup all-purpose flour came together. Thanks for sharing this one!
My new favorite way to make Crispy Chicken Katsu with Tonkatsu Sauce. I really liked how the 4 boneless, skinless chicken breasts and 1/2 cup all-purpose flour came together. Great addition to my recipe rotation.
The flavors were spot on. I really liked how the 4 boneless, skinless chicken breasts and 1/2 cup all-purpose flour came together. I added a bit more seasoning next time. Saving this for later.
Will definitely make this again. I really liked how the 4 boneless, skinless chicken breasts and 1/2 cup all-purpose flour came together. Saving this for later.
The flavors were spot on. I really liked how the 4 boneless, skinless chicken breasts and 1/2 cup all-purpose flour came together. I found it a bit sweet for my taste. Will be making this regularly.
Absolutely loved this recipe! I really liked how the 4 boneless, skinless chicken breasts and 1/2 cup all-purpose flour came together. I found it a bit sweet for my taste. Saving this for later.

Recipe by
Sofia Marin“Dinner is where stories are shared and flavors shine. I craft comforting recipes perfect for family nights.” 🍷🍲
Get Delicious Recipes Weekly
Join 25,000+ home cooks getting our best recipes straight to their inbox.
Free forever • No spam • Unsubscribe anytime