
I remember when my kids were small, Halloween was less about elaborate parties and more about those quiet moments at home. One year, we decided to skip the store-bought treats and make our own cookies. It was messy, yes, but oh so joyful. We'd put on some spooky music, lay out all the sprinkles and icing, and just let our imaginations go wild. Honestly, some of those early attempts were hilariously 'rustic,' but they were perfect in their imperfection. That's what I love about decorating cookies – it's not about perfection, it's about the shared laughter, the sticky fingers, and the sweet memories you bake right into them. It’s like a little art project, but you get to eat the art!
Why You'll Adore These Halloween Cookie Decorating Ideas
-
Unleashes creativity for all ages – perfect for a family activity!
-
Transforms simple cookies into edible works of spooky art.
-
Customizable designs mean endless possibilities for every skill level.
-
Makes wonderful homemade treats or gifts for neighbors and friends.
-
Creates lasting, sweet memories in the kitchen, filled with laughter.
-
A fantastic way to celebrate the magic of Halloween with a personal touch.
My goodness, these ideas are just what I needed! I always struggle to get creative, but these tips made it so easy and fun. My kids absolutely adored the ghost cookies, and the spiderweb design? So clever! We had the best time. Thank you for making Halloween baking so delightful!
Essential Ingredient Guide
- Royal Icing: This is your main medium! Getting the right consistency for outlining and flooding is crucial. Too thick, and it’s hard to pipe; too thin, and it'll run everywhere. Practice on parchment paper first, seriously.
- Food Coloring Gels: Gels give you vibrant, rich colors without adding too much liquid to your icing, which can thin it out. Liquid food coloring can be a bit tricky, so stick with gels for the best results.
- Assorted Sprinkles & Candies: These are your jewelry for the cookies! Bats, pumpkins, ghosts, or just simple nonpareils add texture and charm. Don't be afraid to mix and match; sometimes, the unexpected combinations are the cutest.
- Candy Eyes: Honestly, these are a game-changer! Pop them on any cookie, and suddenly you have a character. Monsters, mummies, ghosts – they all come to life with a pair of googly candy eyes. So fun!
- Sturdy Cookie Base: A good sugar cookie or gingerbread cookie holds its shape well and provides a sturdy canvas for all your decorating efforts. You don't want a cookie that crumbles under pressure, do you?
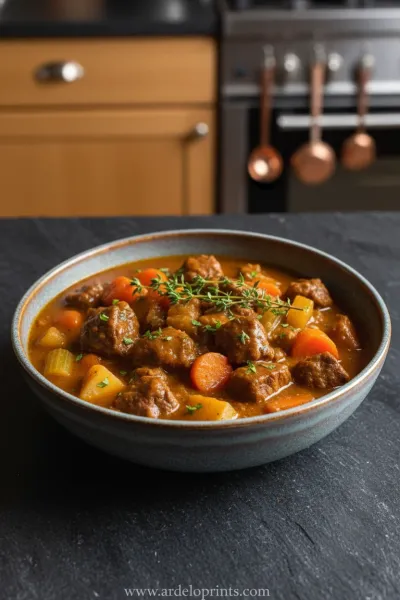
Birria Tacos: Easy & Flavorful Recipe
Tender, slow-braised beef tacos pan-fried to perfection with a rich, savory consomé for dipping.
Complete Cooking Process
-
Getting Started: Your Decorating Canvas:
-
Bake and cool your cookies completely. This is so important – warm cookies will melt your icing!
-
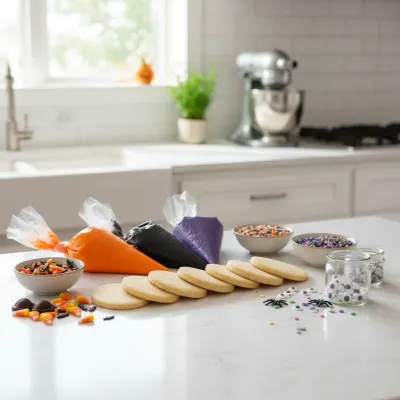
Gather all your sprinkles, candies, and food colorings in one spot.
-
Prepare your royal icing from scratch or use a good quality mix. Divide into several bowls.
-
-
Mastering Icing Consistencies & Colors:
-
Tint your icing with gel food colors. Start with a tiny bit, you can always add more.
-
Adjust icing consistency: for outlining, it should be like thick toothpaste; for flooding, like honey or shampoo.
-
Fill your piping bags or squeeze bottles with the different colors and consistencies.
-
-
Bringing Spooky Designs to Life:
-
Outline your cookie shapes with the thicker icing, creating a 'dam' for your flood icing.
-
Flood the outlined areas with thinner icing, spreading gently with a scribe tool or toothpick.
-
While the flood icing is wet, add details for spiderwebs or marbling, then let it dry for 10-15 minutes.
-
Once a base layer is dry, add details like mummy bandages, monster eyes, or Frankenstein stitches with thicker icing.
-
-
The Finishing Touches & Drying Game:
-
Place candy eyes, sprinkles, or other small candies onto wet icing to secure them.
-
Allow cookies to dry undisturbed on a parchment-lined baking sheet for several hours, or overnight, until completely hardened. This step can't be rushed, hon!
-
Store your beautiful creations in an airtight container once fully dry.
-
Easy Skillet Chicken Thighs Recipe
Garlic cream sauce skillet chicken thighs for a delicious and simple weeknight dinner.
Frequently Asked Questions About Halloween Cookie Decorating
→ Can I use store-bought icing for decorating?
You absolutely can, but royal icing (even from a mix!) tends to give you a much crisper line and a harder finish, which is perfect for detailed work and stacking. Store-bought tubes can be a bit too soft for intricate designs, but they work great for a super casual decorating session with little ones.
→ How do I get the right icing consistency?
This is the trickiest part, honestly! For outlining, you want it like toothpaste – it holds its shape. For flooding, it should be like honey or shampoo; when you drop a bit back into the bowl, it should disappear in about 10-15 seconds. If it's too thick, add water a tiny drop at a time. Too thin? Add more powdered sugar. Just go slow.
→ How long do decorated cookies last?
Once fully dry, royal icing acts like a protective shell! You can store decorated cookies in an airtight container at room temperature for up to 1-2 weeks. If you stack them, place a piece of parchment paper between layers to prevent sticking, just to be safe.
→ What kind of cookies work best for decorating?
Sturdy, flat cookies are your best friends here. Sugar cookies, gingerbread cookies, or shortbread are ideal because they hold their shape beautifully during baking and provide a smooth, firm canvas for your icing art. Avoid soft, crumbly cookies.
→ What if I don't have piping bags and tips?
No worries! You can use Ziploc bags. Just snip a tiny corner off one of the bottom edges to create a small hole for piping. It might not be as precise as a professional tip, but it works wonderfully for basic outlining and flooding. I've done it many times!
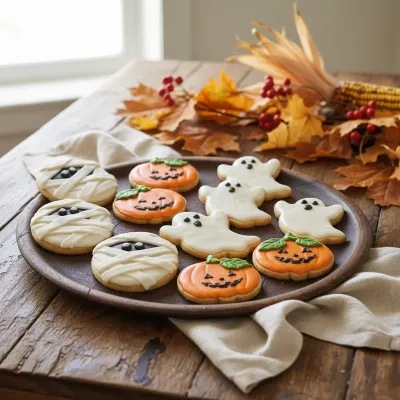

Halloween Cookie Decorating Ideas
Find Halloween cookie decorating ideas perfect for ghouls and guests! Get inspired to create spooky, whimsical, and utterly delicious cookies for your Halloween celebrations. It's all about getting creative in the kitchen.
Timing
Prep Time
30 minutes
Cook Time
1-2 hours (decorating)
Total Time
1.5 - 2.5 hours
Recipe Details
Ingredients
For Your Spooky Cookie Base (assuming pre-baked)
-
01
24 pre-baked sugar cookies (or your favorite sturdy roll-out cookie recipe)
-
02
1 batch royal icing (white, for flooding)
-
03
Food coloring gels (black, orange, green, purple, red)
-
04
Assorted Halloween sprinkles (bats, pumpkins, ghosts, nonpareils)
-
05
Candy eyes (various sizes)
-
06
Mini chocolate chips
-
07
Crushed chocolate sandwich cookies (for 'dirt' or textures)
-
08
Pretzel sticks (for broom handles or bones)
-
09
Small candy corns or other Halloween candies (for accents)
Essential Decorating Tools
-
01
Piping bags or squeeze bottles
-
02
Assorted piping tips (e.g., round #1, #2, #3 for outlining and details)
-
03
Scribe tool or toothpicks (for marbling and fixing mistakes)
-
04
Small offset spatula (for spreading)
-
05
Small bowls for mixing colors and consistencies
-
06
Baking sheets lined with parchment paper (for drying cookies)
-
07
Wire rack (for initial drying)
Instructions
Before you begin, ensure your cookies are completely cooled. Gather all your decorating tools, food coloring, and sprinkles. A clean, organized workspace makes everything so much easier, honestly.
Prepare your royal icing. Divide it into separate bowls and tint with food coloring gels to achieve your desired Halloween shades (black, orange, green, purple, etc.). Adjust consistency: a thicker icing for outlining (like toothpaste) and a thinner 'flood' icing (like honey) for filling.
For basic designs, outline the area you want to fill with the thicker icing. Let it set for a few minutes. Then, fill the outlined area with the thinner flood icing, using a scribe tool or toothpick to gently guide it to the edges and pop any air bubbles.
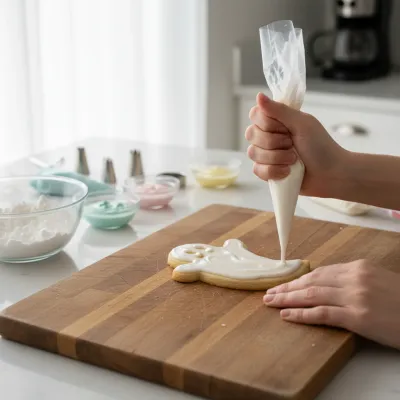
Ghost Cookies: Flood a round or ghost-shaped cookie with white icing. While still wet, gently drag a toothpick from the bottom edge upwards in wavy lines to create a 'swirl' effect. Once dry, pipe on two small black dots for eyes.
Spiderweb Cookies: Flood a round cookie with white or orange icing. While still wet, pipe concentric circles of black icing. Immediately drag a toothpick from the center outwards to create a web design. So clever, right?
Mummy Cookies: Flood an oval or rectangular cookie with white icing and let it dry completely. Then, using thicker white icing and a small round tip, pipe criss-cross 'bandage' lines over the cookie, leaving a small gap for candy eyes. Place the candy eyes once you're done piping.
Monster Eye / Frankenstein Cookies: Flood round cookies with green or yellow icing. Once dry, pipe a large black circle in the center, then a smaller colored circle (like blue or green) inside that, and finally a tiny white dot for a 'glint.' For Frankenstein, flood a rectangular cookie green, pipe on a black hair zig-zag line, and add candy eyes and a stitched mouth.
For extra sparkle, add sprinkles while the flood icing is still wet. Allow all decorated cookies to dry completely (this can take several hours, or even overnight) before stacking or packaging. Patience is key here, hon!
Notes & Tips
-
1
Involve children in the decorating process! It's a fantastic sensory activity and encourages creativity, even if it gets a little messy.
-
2
Don't feel pressured to create perfect designs. Often, the most charming cookies are the ones with a bit of handmade character.
-
3
Consider themed cookie cutters to make your decorating even easier – ghosts, pumpkins, bats, and witches hats are always a hit.
-
4
Take photos of your creations! It's lovely to look back at your Halloween baking adventures each year.
-
5
If you're making a large batch, consider having a 'prep day' for baking cookies and an entirely separate 'decorating day' to spread out the fun.
Easy Slow Cooker Pot Roast
The ultimate set-it-and-forget-it meal. Tender beef and hearty vegetables simmered to perfection in the slow cooker.
Tools You'll Need
-
Pre-baked cookies
-
Royal icing (homemade or mix)
-
Food coloring gels
-
Piping bags/squeeze bottles
-
Piping tips (small round)
-
Scribe tool/toothpicks
-
Small bowls
-
Parchment paper
-
Baking sheets
-
Wire rack
-
Assorted sprinkles & candies
-
Candy eyes
Must-Know Tips
-
Always start with completely cooled cookies – warmth is the enemy of royal icing!
-
Prepare all your icing colors and consistencies before you start decorating.
-
Practice piping on a piece of parchment paper first to get a feel for the pressure.
-
Don't rush the drying process; let each layer set before adding the next for crisp designs.
-
Less is more with food coloring gels – they're highly concentrated!
-
Have fun! Embrace imperfections; they make your cookies uniquely yours.
Professional Secrets
-
Use a small fan or even a dehydrator on a low setting to speed up the drying process for royal icing, which helps prevent 'craters' and gives a nice sheen.
-
Add a tiny drop of lemon extract or vanilla bean paste to your royal icing for a subtle flavor boost that elevates your cookies.
-
For extra dimension, pipe some details with a slightly thicker icing after the flood layer is completely dry.
-
Edible markers are fantastic for adding fine details like pupils to candy eyes or tiny stitches on a Frankenstein monster.
-
If you want really vibrant, smooth flood icing, strain it through a fine-mesh sieve before using to catch any lumps or undissolved sugar.

Recipe by
Mason Cole“Sweet cravings are my specialty! I turn sugar, chocolate, and imagination into pure dessert magic.” 🍰✨
Get Delicious Recipes Weekly
Join 25,000+ home cooks getting our best recipes straight to their inbox.
Free forever • No spam • Unsubscribe anytime