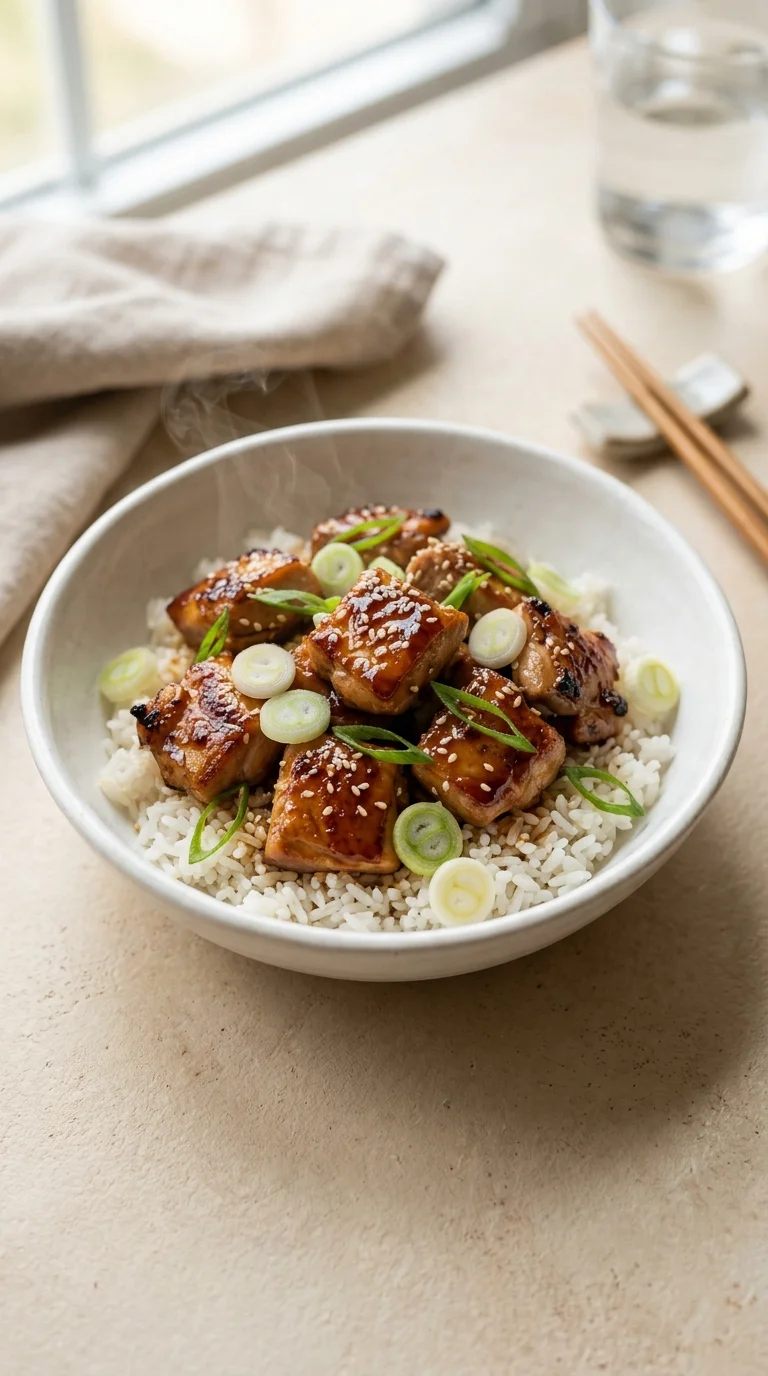
The word teriyaki comes from the Japanese words 'teri,' meaning luster, and 'yaki,' meaning grilled. This cooking style is deeply rooted in Japanese tradition, focusing on the beautiful, glossy finish that occurs when sugar and soy are heated together. While many modern versions use thickeners, the traditional heart of the dish is the balance of salty and sweet.
Historically, these flavors were crafted to complement the natural richness of the protein, often using mirin and sake to add layers of complexity and acidity. The transition of these bowls into global home kitchens has turned them into a symbol of efficient yet mindful eating, blending ancestral techniques with the pace of modern life.
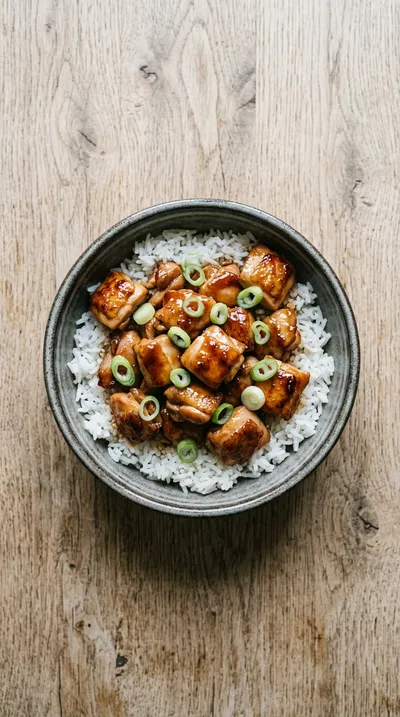
Homemade chicken teriyaki bowls reflect this evolution, utilizing a simple glaze of soy sauce and honey to achieve that signature sheen. By searing the chicken thighs first, the cook locks in the juices before introducing the aromatics, honoring the traditional focus on texture and visual appeal.
Why You'll Love It
-
- Honestly, there is something so comforting about that glossy glaze clinging to the chicken. It just feels like a warm hug in a bowl after a long day.
-
- I mean, it only takes about 30 minutes total, so it's just perfect for those nights when you're exhausted but still want something that tastes like you spent hours on it.
-
- Well, look, using 1‑lb boneless, skinless chicken thighs makes it so juicy. I remember trying breasts once, but thighs just stay tender, you know?
-
- Yeah, the smell of the 1 tbsp grated fresh ginger and 2 cloves garlic hitting the pan... wow, it just fills the whole kitchen with such a lovely, bright aroma.
"Honestly, my kids actually asked for seconds! It's so much better than the store-bought stuff and takes no time at all."
Essential Ingredient Guide
- 1‑lb boneless, skinless chicken thighs: I always go for thighs because they're so much more forgiving than breasts. Just cut them into 1‑inch pieces so they cook evenly and stay nice and succulent.
- 1/4 cup soy sauce (low‑sodium): This provides that deep, salty base we all love. I use the low‑sodium version because, ugh, too much salt can really overwhelm the other delicate flavors.
- 1 tsp cornstarch + 1 tsp cold water: Now, this is optional, but it's what gives the sauce that beautiful, professional gloss. It just makes the glaze cling to the chicken so much better.
- 1 tbsp grated fresh ginger: Please, use the fresh stuff here. It adds a little zing and a warmth that you just can't get from a jar, honestly.
- 1/4 cup mirin: Mirin adds a subtle sweetness and a bit of acidity that balances the soy. It's a quiet little secret that makes the sauce taste authentic.
- 2 tbsp honey: I love using honey for a gentle, floral sweetness. It helps the sauce caramelize beautifully in the skillet, giving it that rich, golden color.
 Dinner
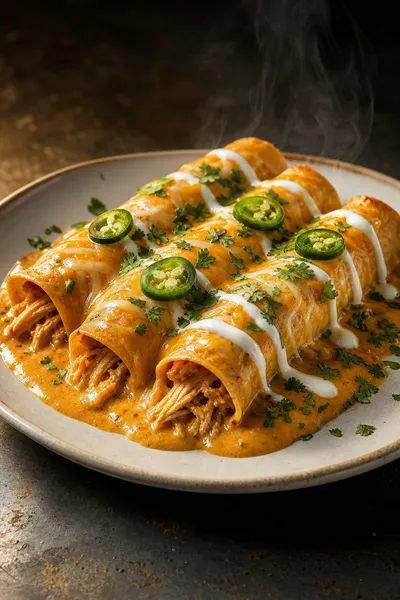
Easy White Chicken Enchiladas with Creamy Sauce
Quick white chicken enchiladas ready in 30 minutes with a luscious creamy sauce.
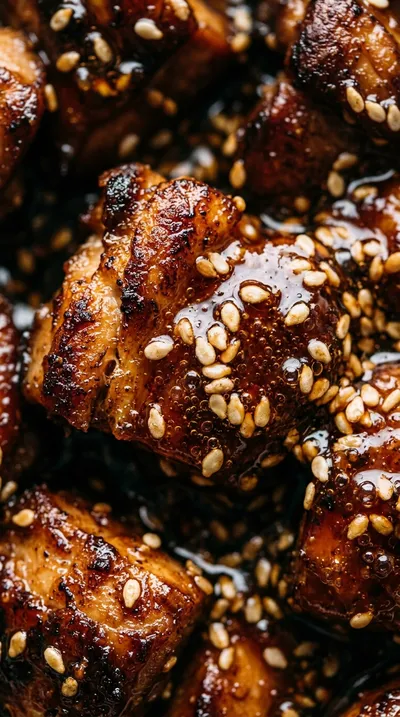
Complete Cooking Process
-
Getting Ready:
First, I like to have my 2 cloves garlic, minced and my ginger grated and ready. Whisking the glaze together beforehand means you aren't rushing while the pan is hot.
-
Building the Flavor:
Searing the chicken in 3 tbsp vegetable oil until golden brown is where the magic starts. Then, letting the glaze simmer for a few minutes really lets those aromatics wake up.
-
Perfecting the Glaze:
The key is that optional cornstarch slurry. Stirring it in for a minute or two turns the sauce from a liquid into a rich, glossy coat that looks just lovely.
-
The Final Coat:
Returning the chicken to the pan and spooning that sauce over every piece is so satisfying. Just two more minutes and everything is heated through and glistening.
-
Plating the Bowls:
I divide the 2 cups cooked jasmine rice into bowls while the sauce finishes. It's best served immediately so the rice stays fluffy and the chicken stays hot.
-
Marinate the chicken in the teriyaki glaze for 15 minutes before searing for deeper flavor.
-
Use a silicone spatula to stir the sauce; it helps prevent sticking and scorching.
-
Add a dash of rice vinegar to the sauce for a subtle brightness that balances the sweetness.
-
Sear the chicken in a single layer to ensure it gets a nice, golden-brown crust.
Pro Tips
Just take your time and enjoy the process, you've got this!
 International_Cuisine
Spicy Shrimp Sushi Stacks
A fresh, vibrant bite combining seasoned shrimp, rice, and crisp toppings.
Better For You Treats
I like to keep things balanced, so using low‑sodium soy sauce is a gentle way to be mindful of salt. Plus, using skinless chicken thighs keeps it lighter while still feeling like a treat.
Ways to Make it Your Own
If you like a little kick, try the Spicy Teriyaki version with 1 tsp sriracha or some red pepper flakes. Or, if you're avoiding meat, cubed extra‑firm tofu works just as well as the chicken.
Serving Suggestions
I think these are wonderful with a side of pickled daikon or some cucumber ribbons for a bit of crunch. For a full meal, maybe a little miso soup or some steamed edamame on the side.
Frequently Asked Questions
→ Can I use chicken breasts instead of thighs?
You can, but honestly, they can dry out so quickly. If you do, just be very careful not to overcook them.
→ How do I store the leftovers for meal prep?
Just let them cool completely and put them in a sealed container in the fridge for up to 3 days. A quick zap in the microwave does the trick!
→ Can I freeze these bowls?
I wouldn't recommend it, dang. The rice tends to get a bit soggy when you thaw it out, and it just isn't the same.
Nutrition Facts
per serving
480
Calories
34g
Protein
42g
Carbs
18g
Fat
Taste Profile
A classic balance of salty soy and sweet honey with a rich, savory chicken base.
Ingredient Substitutions
Don't have an ingredient? Try these alternatives
Works well for a slightly different woody sweetness
Maintains the acidic depth
Adds more fiber and a nuttier flavor
Recipe Variations
Try these delicious twists on the original
Spicy Teriyaki Bowls
For those who like a little kick, stir in 1 tsp sesame oil, 1 tsp sriracha, or a pinch of crushed red pepper flakes into the glaze.
Tofu Teriyaki Bowls
A wonderful plant-based option; just replace the chicken with cubed extra-firm tofu and sear until golden before adding the sauce.
Common Mistakes to Avoid
Learn from others' mistakes for perfect results
- Overcrowding the pan, which causes the chicken to steam instead of sear
- Burning the honey in the sauce by using heat that is too high
- Adding the slurry to a cold pan rather than a simmering sauce
Meal Prep & Storage
Make Ahead Tips
You can prepare the glaze in advance and keep it in the fridge. The full bowls can be assembled and stored for up to 3 days.
Leftover Ideas
Store in sealed containers in the refrigerator. Reheat in the microwave with a splash of water to keep the rice from drying out.
Perfect Pairings
Serve this with...
Cooking Timeline
Whisk the teriyaki glaze ingredients together
Sear the chicken pieces until golden brown
Simmer the glaze and thicken with slurry
Combine chicken and sauce to coat
Assemble bowls with rice and garnish
Homemade Chicken Teriyaki Bowls
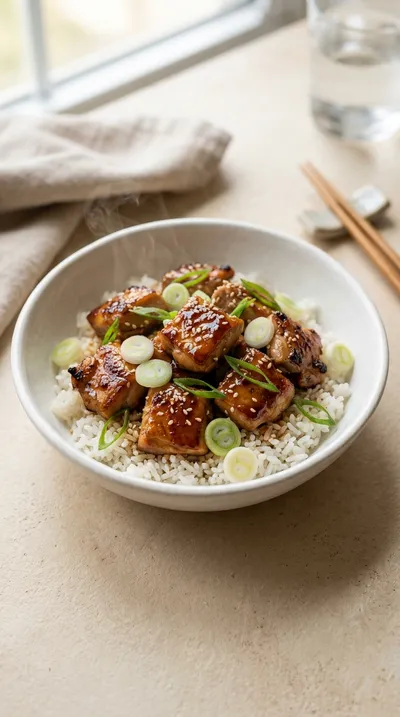
There is something so comforting about the scent of honey and ginger simmering in a pan. These homemade chicken teriyaki bowls bring together tender chicken thighs and a glossy glaze for a dinner that feels like a hug.
Timing
Prep Time
15 Minutes
Cook Time
15 Minutes
Total Time
30 Minutes
Recipe Details
Ingredients
Main Ingredients
-
01
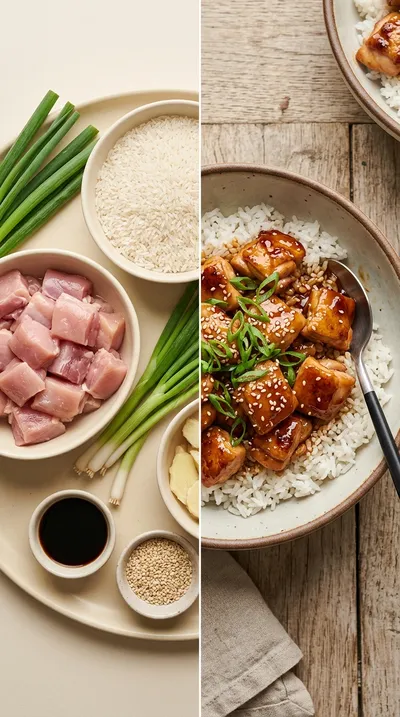
1-lb boneless, skinless chicken thighs, cut into 1-inch pieces
-
02
3 tbsp vegetable oil
-
03
2 cups cooked jasmine rice, cooled to room temperature
Teriyaki Glaze
-
01
1/4 cup soy sauce (low-sodium)
-
02
1/4 cup mirin
-
03
2 tbsp sake
-
04
2 tbsp honey
-
05
1 tbsp grated fresh ginger
-
06
2 cloves garlic, minced
-
07
1 tsp toasted sesame oil
Garnish and Thickener
-
01
1 tbsp toasted sesame seeds
-
02
4 scallions, sliced
-
03
1 tsp cornstarch + 1 tsp cold water (optional slurry to thicken)
Instructions
First, let's get our flavor ready. In a small bowl, whisk together the soy sauce (low-sodium), mirin, sake, honey, ginger, garlic, and sesame oil. It smells just lovely once those aromas start mixing, doesn't it?
Heat 1 tbsp vegetable oil in a large skillet over medium-high heat. Once it's shimmering, add your chicken pieces in a single layer. Let them sear for 3-4 minutes per side until they're a beautiful golden brown. I mean, don't rush them; that crust is where the magic happens. Transfer the chicken to a plate for a moment.
Now, add the remaining 2 tbsp oil to that same skillet, give it a little swirl, and pour in your prepared glaze. Bring it to a gentle simmer and cook for about 4 minutes, stirring every now and then, until it starts to thicken up slightly.
If you like your sauce a bit more clingy, go ahead and whisk the cornstarch and water together. Stir that slurry into the sauce and cook for another 1-2 minutes. Wow, it gets so glossy and pretty.
Bring the seared chicken back into the skillet. Spoon that glaze over the meat and cook for just 2 more minutes. You want the chicken heated through and every single piece coated in that savory sauce.
While the sauce is finishing, divide your cooked jasmine rice into four serving bowls. Sprinkle each one with 1 tbsp toasted sesame seeds and a few sliced scallion leaves. Simple, but it looks so professional.
Carefully drop the glazed chicken into each bowl of rice. Drizzle any leftover sauce from the pan right over the top, then finish with a few more sesame seeds and scallions.
There we go. Serve these immediately while they're hot, or if you're planning your week, pack them into airtight containers for later.
Notes & Tips
-
1
Use low-sodium soy sauce to keep the salt levels balanced
-
2
Cooling the jasmine rice to room temperature helps it hold its texture in the bowl
-
3
Ensure chicken is seared in a single layer to avoid steaming the meat
Tools You'll Need
-
Cutting board for prepping chicken and scallions
-
Sharp knife for precise 1-inch chicken pieces
-
Large skillet for searing and glazing
-
Small saucepan or bowl for mixing the glaze
-
Measuring cups and spoons for exact ratios
-
Mixing bowl for the slurry
-
Spatula for stirring without scorching
-
Serving bowls for the final presentation
Must-Know Tips
-
Marination, if you have 15 minutes, let the chicken sit in the glaze before searing for deeper flavor
-
Spatula choice, use a silicone spatula to prevent the sugars in the honey from sticking to the pan
-
Acid balance, adding a dash of rice vinegar can bring a brightness that cuts through the sweetness
Professional Secrets
-
The Glossy Finish, using a cornstarch slurry at the very end creates that restaurant-style mirror glaze
-
Temperature Control, searing chicken on medium-high creates the Maillard reaction for a deeper savory taste
-
Texture Layering, adding toasted sesame seeds both to the rice and as a topping adds nutty depth
What readers are saying
Community reviews from home cooks like you
My new favorite way to make Homemade Chicken Teriyaki Bowls. I really liked how the 1-lb boneless, skinless chicken thighs, cut into 1-inch pieces and 3 tbsp vegetable oil came together. Saving this for later.
My new favorite way to make Homemade Chicken Teriyaki Bowls. I really liked how the 1-lb boneless, skinless chicken thighs, cut into 1-inch pieces and 3 tbsp vegetable oil came together. I added a bit more seasoning next time. Already shared it with a friend.
I wanted to love this dish, but it didn't quite work for me. The texture was a touch off, but the flavor saved it. I think with some tweaks it could be really good.
Good, but not amazing. The pieces flavor was nice, but my oven needed an extra 5 minutes. I might try it again with some adjustments.
I was surprised how good this turned out. I really liked how the 1-lb boneless, skinless chicken thighs, cut into 1-inch pieces and 3 tbsp vegetable oil came together. It took slightly longer than the recipe said. Perfect as written.
Will definitely make this again. I really liked how the 1-lb boneless, skinless chicken thighs, cut into 1-inch pieces and 3 tbsp vegetable oil came together. Saving this for later.
Decent result for the effort. The pieces flavor was nice, but next time i'll double the sauce. I might try it again with some adjustments.
Will definitely make this again. I really liked how the 1-lb boneless, skinless chicken thighs, cut into 1-inch pieces and 3 tbsp vegetable oil came together. Next time I'll double the sauce. Perfect as written.
This was a hit with my family. I really liked how the 1-lb boneless, skinless chicken thighs, cut into 1-inch pieces and 3 tbsp vegetable oil came together. Highly recommend giving it a try.
The flavors were spot on. I really liked how the 1-lb boneless, skinless chicken thighs, cut into 1-inch pieces and 3 tbsp vegetable oil came together. Already shared it with a friend.
I wanted to love this dish, but it didn't quite work for me. I swapped one ingredient and it still worked. I think with some tweaks it could be really good.
I was surprised how good this turned out. I really liked how the 1-lb boneless, skinless chicken thighs, cut into 1-inch pieces and 3 tbsp vegetable oil came together. Highly recommend giving it a try.
Will definitely make this again. I really liked how the 1-lb boneless, skinless chicken thighs, cut into 1-inch pieces and 3 tbsp vegetable oil came together. Perfect as written.
This was a hit with my family. I really liked how the 1-lb boneless, skinless chicken thighs, cut into 1-inch pieces and 3 tbsp vegetable oil came together. Perfect as written.
My new favorite way to make Homemade Chicken Teriyaki Bowls. I really liked how the 1-lb boneless, skinless chicken thighs, cut into 1-inch pieces and 3 tbsp vegetable oil came together. My kids even asked for seconds.
This exceeded my expectations. I really liked how the 1-lb boneless, skinless chicken thighs, cut into 1-inch pieces and 3 tbsp vegetable oil came together. I would reduce the salt a little. Will be making this regularly.
Absolutely loved this recipe! I really liked how the 1-lb boneless, skinless chicken thighs, cut into 1-inch pieces and 3 tbsp vegetable oil came together. My kids even asked for seconds.
Perfect for a busy weeknight. I really liked how the 1-lb boneless, skinless chicken thighs, cut into 1-inch pieces and 3 tbsp vegetable oil came together. I found it a bit sweet for my taste. Will be making this regularly.
So easy and delicious. I really liked how the 1-lb boneless, skinless chicken thighs, cut into 1-inch pieces and 3 tbsp vegetable oil came together. It took slightly longer than the recipe said. Perfect as written.

Recipe by
Sofia Marin“Dinner is where stories are shared and flavors shine. I craft comforting recipes perfect for family nights.” 🍷🍲
Get Delicious Recipes Weekly
Join 25,000+ home cooks getting our best recipes straight to their inbox.
Free forever • No spam • Unsubscribe anytime