
The concept of cheesecake dates back to ancient Greece, where it was served to athletes during the first Olympic games in 776 BC as an energy-rich food. These early versions were simple mixtures of cheese, honey, and wheat, believed to provide sustained energy for competitors. Over centuries, cheesecake evolved through Roman conquests and European traditions before arriving in America, where cream cheese became the standard. Today's protein-packed versions honor that original purpose of providing nourishment and energy, while adapting to modern dietary needs with gluten-free crusts and protein enhancements.
Why You'll Love It
-
Each mini cheesecake packs a protein punch to keep you satisfied
-
Gluten-free crust made from simple, wholesome ingredients
-
Perfect portion control with individual servings
-
Creamy texture that feels truly indulgent
'My family can't believe these are healthy! They're so creamy and satisfying, perfect for our after-dinner treat.'
Essential Ingredient Guide
- Greek yogurt: This gives the cheesecakes their creamy base and adds protein. Use full-fat for the richest texture, but low-fat works too. Make sure it's well-drained and thick.
- Vanilla protein powder: Choose a quality powder that you enjoy the taste of. Whey or plant-based both work beautifully. It should mix smoothly into the batter without clumping.
- Almond flour: Creates that gluten-free crust with a lovely nutty flavor. It browns beautifully and gives a delicate crunch that complements the creamy filling.
- Maple syrup: Our natural sweetener that adds depth beyond just sweetness. Grade A has a lighter flavor, while Grade B brings more maple character.
- Lemon juice: Just a splash brightens all the flavors and cuts through the richness. Freshly squeezed makes a noticeable difference in the final taste.
- Eggs: They help set the filling and create that classic cheesecake structure. Room temperature eggs incorporate better into the mixture.
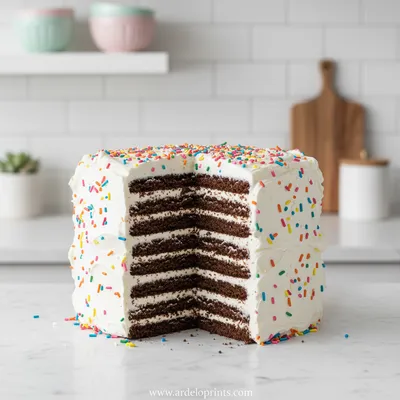
 Desserts
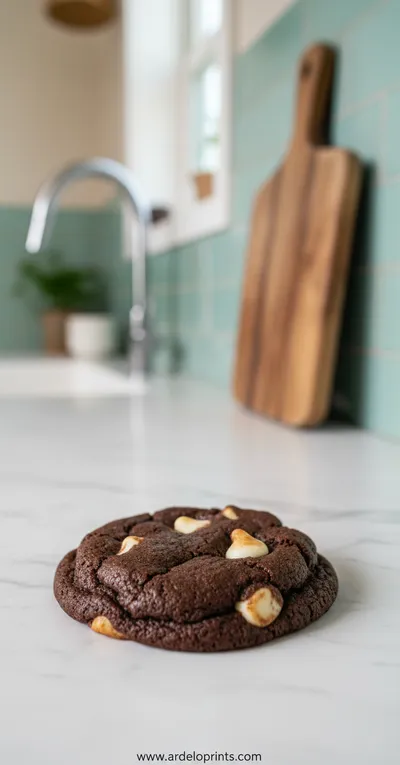
Inside Out Chocolate Chip Cookies
Chewy cookies with crisp edges and a melt‑in‑your‑mouth center.
Complete Cooking Process
-
Ingredient Readiness:
All ingredients should be at room temperature before you begin. The cream cheese and Greek yogurt need to be soft enough to blend smoothly, and cold eggs can cause the batter to break. I usually take everything out about an hour before starting.
-
Flavor Development:
The flavors really come together during the mixing stage. When you blend the vanilla protein powder with the Greek yogurt and cream cheese, that's when the magic happens. The lemon juice added at the end brightens everything up.
-
Texture Control:
The key to perfect texture is not overmixing once the eggs are added. Gentle folding keeps the filling light and prevents too much air from incorporating, which can cause cracking during baking.
-
Finishing Touches:
Cooling slowly in the turned-off oven prevents the cheesecakes from collapsing. This gradual temperature change is crucial for that smooth, professional-looking top.
-
Serving Timing:
These are best served chilled, after at least four hours in the refrigerator. The flavors deepen and the texture firms up beautifully overnight.
-
Line your muffin tin with parchment liners for easy removal
-
Tap the tin gently on the counter to release air bubbles before baking
-
Use a cookie scoop for perfectly even filling distribution
-
Chill thoroughly before serving for the best texture
Pro Tips
You know, I've made these so many times now that I've learned all the little tricks. The parchment liners are honestly a game-changer - no more stuck cheesecakes! And that tapping step? It makes such a difference in getting that smooth, professional look.
Another thing I've noticed is that patience really pays off with these. Letting them chill properly might test your willpower, but it's worth it. The texture becomes so much creamier and the flavors meld together beautifully. They're even better the next day, if you can wait that long.
 Desserts
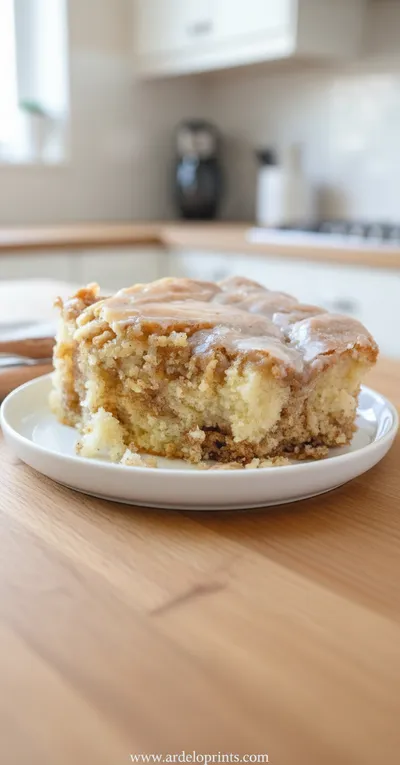
Cinnamon Roll Cake Recipe
Fluffy cinnamon roll cake with caramelized swirl, ideal for breakfast or snack.
The essence of the dish:
What makes these mini cheesecakes special is how they bridge the gap between indulgence and nourishment. They have that rich, creamy texture we associate with traditional cheesecake, but each bite delivers protein and uses wholesome ingredients. It's the kind of dessert that satisfies both your sweet tooth and your body's needs.
A fun fact or historical angle:
The concept of protein-enhanced desserts isn't new - ancient Greek athletes ate cheese and honey cakes for energy. Our modern version just updates this ancient wisdom with today's ingredients and nutritional knowledge.
Flavor or sensory focus:
The first thing you'll notice is the creamy, luxurious texture that melts on your tongue. Then the subtle vanilla and light tang from the Greek yogurt come through, followed by the nutty crust that provides the perfect textural contrast.
You Must Know
-
Room temperature ingredients are non-negotiable for smooth batter
-
Don't overmix after adding eggs to prevent cracking
-
Cooling slowly prevents shrinkage and sinking
-
Chill thoroughly before serving for perfect texture
Frequently Asked Questions
→ Can I use a different protein powder?
Absolutely, just make sure it's one you enjoy the taste of. Vanilla works best for this recipe, but chocolate or unflavored would work too. Plant-based powders might require slight adjustments to liquid.
→ How long do these keep in the refrigerator?
They'll stay fresh for about 5 days when stored in an airtight container. The texture actually improves over the first 24 hours as the flavors meld together.
→ Can I freeze these mini cheesecakes?
Yes! They freeze beautifully for up to 3 months. Wrap each one individually in plastic wrap before freezing. Thaw overnight in the refrigerator.
→ What can I use instead of almond flour for the crust?
You could use oat flour or crushed gluten-free cookies. If you're not avoiding gluten, graham cracker crumbs work wonderfully too.
→ My cheesecakes cracked - what went wrong?
Cracking usually happens from overmixing or cooling too quickly. Next time, mix gently after adding eggs and cool them slowly in the turned-off oven with the door slightly ajar.
→ Can I make these without eggs?
I haven't tested an egg-free version, but you might try using a flax egg substitute. The texture will be different, but it should still work.

Nutrition Facts
per serving
145
Calories
8g
Protein
8g
Carbs
9g
Fat
Taste Profile
Creamy vanilla with subtle tang and natural sweetness
Ingredient Substitutions
Don't have an ingredient? Try these alternatives
Adjust sweetness accordingly if using pre-sweetened crackers
Flavor will change slightly but texture remains similar
Recipe Variations
Try these delicious twists on the original
Chocolate Protein Version
Swap vanilla protein powder for chocolate and add 2 tablespoons cocoa powder for a rich chocolate variation
Lemon Blueberry
Increase lemon juice to 2 tablespoons and fold in 1/2 cup fresh blueberries for a bright, fruity twist
Common Mistakes to Avoid
Learn from others' mistakes for perfect results
- Using cold ingredients causes lumpy batter
- Overmixing after adding eggs leads to cracking
- Skipping the slow cooling step results in sunken centers
- Not chilling long enough yields soft texture
Meal Prep & Storage
Make Ahead Tips
You can prepare the crusts up to 2 days in advance and store them covered at room temperature. The filled cheesecakes need at least 4 hours to chill, making them perfect for preparing the day before serving. They actually taste better after overnight refrigeration.
Leftover Ideas
Leftovers keep beautifully in the refrigerator. The texture actually improves over the first day. Enjoy cold straight from the fridge - they're perfect for a quick healthy snack throughout the week.
Perfect Pairings
Serve this with...
Cooking Timeline
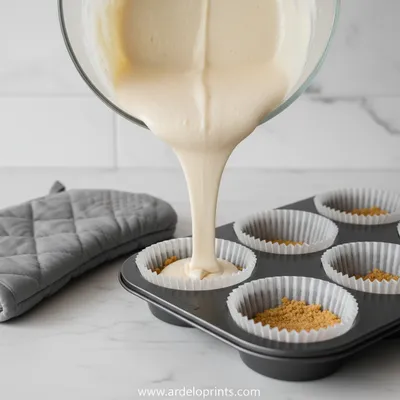
Prep ingredients and make crust mixture. Line muffin tin and press crusts into bottom of each liner.
Bake crusts for 8 minutes until lightly golden. Remove and let cool slightly while making filling.
Prepare cheesecake filling by creaming ingredients together. Fill each crust with batter.
Bake cheesecakes for 18-22 minutes until set around edges but jiggly in center.
Cool in turned-off oven with door ajar for 30 minutes, then cool completely at room temperature.
Chill in refrigerator for at least 4 hours, preferably overnight, before serving.
 Desserts
Easy Ice Cream Sandwich Cake
Cool, creamy ice cream sandwich cake that's simple, fun, and perfect for any sweet craving.
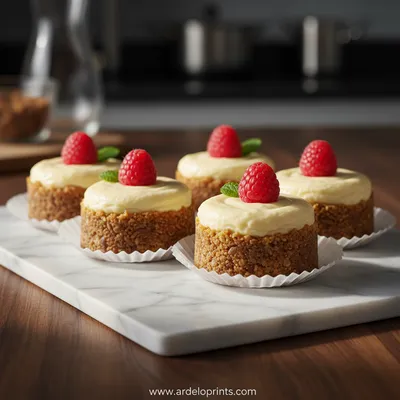
Mini Protein Cheesecakes (Healthy & Gluten Free)
These delightful mini protein cheesecakes are the perfect solution when you're craving something sweet but want to keep it healthy. Honestly, they're so rich and creamy, nobody would guess they're packed with protein and completely gluten-free. I mean, the texture is just dreamy.
Timing
Prep Time
20 Minutes
Cook Time
25 Minutes
Total Time
4 Hours 45 Minutes
Recipe Details
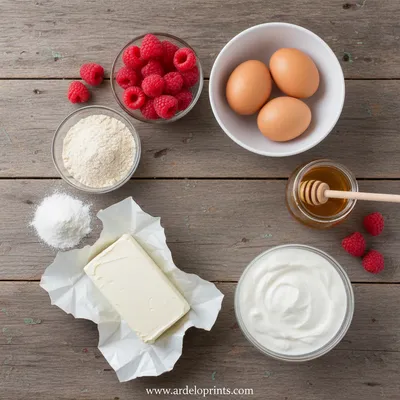
Ingredients
For the Crust
-
01
1 cup almond flour
-
02
2 tablespoons maple syrup
-
03
2 tablespoons melted coconut oil
-
04
Pinch of sea salt
For the Filling
-
01
8 oz cream cheese, room temperature
-
02
1 cup Greek yogurt, room temperature
-
03
1/2 cup vanilla protein powder
-
04
1/4 cup maple syrup
-
05
2 large eggs, room temperature
-
06
1 teaspoon vanilla extract
-
07
1 tablespoon lemon juice
Instructions
Preheat your oven to 325°F (165°C). Line a 12-cup muffin tin with parchment paper liners. In a medium bowl, mix together the almond flour, 2 tablespoons maple syrup, melted coconut oil, and salt until it resembles wet sand.
Press about 1 tablespoon of the crust mixture into the bottom of each liner, using the back of a spoon to create an even layer. Honestly, you want it pressed firmly but not too thick. Bake for 8 minutes, then remove and let cool slightly while you make the filling.
In a large bowl, beat the cream cheese until smooth and creamy. Add the Greek yogurt, protein powder, and 1/4 cup maple syrup, mixing until well combined. Scrape down the sides as needed to make sure everything is incorporated evenly.
Add the eggs one at a time, mixing on low speed just until combined after each addition. Stir in the vanilla extract and lemon juice. Be careful not to overmix at this stage - you want to keep the batter smooth but not aerated.
Divide the filling evenly among the prepared crusts, filling each about 3/4 full. Tap the muffin tin gently on the counter a few times to release any air bubbles. This little trick makes such a difference in getting that smooth top.
Bake for 18-22 minutes, until the edges are set but the centers still have a slight jiggle. Turn off the oven, crack the door open slightly, and let the cheesecakes cool in the oven for 30 minutes. This slow cooling helps prevent cracking.
Remove from the oven and let cool completely at room temperature, then transfer to the refrigerator. Chill for at least 4 hours, preferably overnight, before serving. The wait is worth it, I promise.
Notes & Tips
-
1
Make sure all ingredients are at room temperature for smoothest batter
-
2
Don't skip the slow cooling step - it prevents cracking
-
3
Chill thoroughly before serving for best texture
-
4
Store leftovers in an airtight container in the refrigerator
Tools You'll Need
-
12-cup muffin tin
-
Parchment paper liners
-
Mixing bowls
-
Electric mixer or whisk
-
Measuring cups and spoons
-
Rubber spatula
Must-Know Tips
-
Room temperature ingredients blend smoothly and prevent lumps
-
Don't overmix after adding eggs to avoid cracking
-
Tap the pan to release air bubbles for smooth tops
-
Cool slowly to prevent shrinkage
Professional Secrets
-
Room temperature ingredients ensure even mixing and smooth texture
-
Gentle folding after adding eggs prevents over-aeration
-
Slow cooling preserves the delicate structure
-
Thorough chilling sets the creamy texture perfectly

Recipe by
Mason Cole“Sweet cravings are my specialty! I turn sugar, chocolate, and imagination into pure dessert magic.” 🍰✨
Get Delicious Recipes Weekly
Join 25,000+ home cooks getting our best recipes straight to their inbox.
Free forever • No spam • Unsubscribe anytime