I remember making these with my daughter one crisp autumn afternoon a few years back. We had just come back from the pumpkin patch, all rosy-cheeked and bundled up, and she was begging to make something 'Halloweeny.' I dug through my recipes, and this idea just popped into my head—what if brownies became little mummies? We baked a batch of our favorite fudgy brownies, then the fun started. We melted the white chocolate, she drizzled it (a little messily, but oh so perfectly!), and those candy eyes just brought them to life. It’s funny how the simplest things become the sweetest, most cherished memories, isn't it? These brownies always take me right back to that joyful, cozy afternoon.
Why You'll Adore These Mummy Brownies
-
They're absolutely adorable and perfect for Halloween parties or fall gatherings.
-
The brownie base is super fudgy and rich—a classic crowd-pleaser!
-
They're incredibly easy to make, even for beginner bakers.
-
Decorating them is a blast, especially if you have little helpers in the kitchen.
-
You only need a few simple ingredients for maximum spooky impact.
-
These treats are truly irresistible and always disappear fast!
My kids absolutely ADORE these Mummy Brownies! They had such a blast helping to decorate them, and honestly, they disappeared faster than I could blink. So fudgy and festive, a total Halloween win!
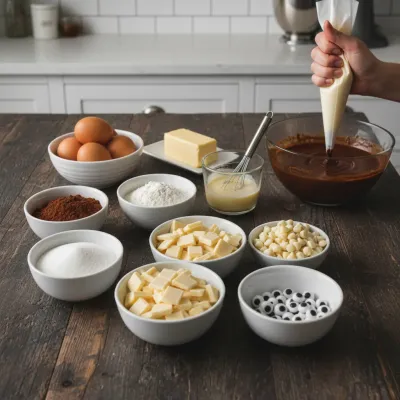
Essential Ingredient Guide
- Unsalted Butter: Using unsalted butter gives you control over the saltiness. Melting it creates that signature fudgy texture we all love in a good brownie. No need to soften, just melt and go!
- Granulated Sugar: Sweetness, obviously, but also crucial for moisture and that gorgeous crackly top on the brownies. Don't skimp here!
- Eggs: Eggs bind everything together and contribute to the rich, chewy texture. Make sure they're at room temperature for better emulsification with the butter and sugar.
- Unsweetened Cocoa Powder: This is where all that deep, chocolatey flavor comes from! Use a good quality cocoa powder for the best results. I love Dutch-processed for a darker, less bitter brownie.
- White Chocolate Chips/Candy Melts: For the mummy bandages! Candy melts are often easier to work with for piping as they set more quickly and have a smoother consistency, but good quality white chocolate chips work perfectly too. Just ensure it's melted smoothly.
- Candy Eyeballs: The star of the show for the mummy look! You can find these in most baking aisles, especially around Halloween. They really bring the brownies to life!
Birria Tacos: Easy & Flavorful Recipe
Tender, slow-braised beef tacos pan-fried to perfection with a rich, savory consomé for dipping.
Complete Cooking Process
-
Bake Your Brownies:
-
Preheat the oven and prepare your 9x13-inch baking pan with parchment paper.
-
Whisk melted butter and sugar until combined.
-
Beat in eggs one at a time, then vanilla.
-
Combine flour, cocoa powder, baking powder, and salt in a separate bowl.
-
Gradually add dry ingredients to wet, mixing until just combined—no overmixing!
-
Pour batter into the prepared pan and spread evenly.
-
Bake for 25-30 minutes until fudgy but set. Let cool completely.
-
-
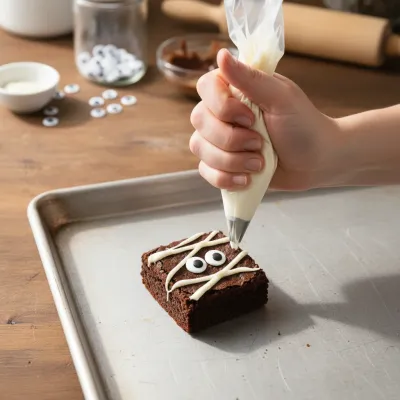
Decorate Your Mummies:
-
Once cooled, lift brownies from the pan and cut into squares or rectangles.
-
Melt white chocolate chips or candy melts until smooth, adding coconut oil if needed for consistency.
-
Transfer melted white chocolate to a piping bag with a small round tip (or a Ziploc bag with a snipped corner).
-
Pipe horizontal lines across each brownie, creating a 'bandage' effect and leaving a gap for the eyes.
-
Immediately press two candy eyeballs into the chocolate while it's still wet.
-
Allow chocolate to set at room temperature or in the fridge before serving.
-

Easy Skillet Chicken Thighs Recipe
Garlic cream sauce skillet chicken thighs for a delicious and simple weeknight dinner.
Frequently Asked Questions About Mummy Brownies
→ Can I use a box brownie mix instead of making them from scratch?
Absolutely! If you're short on time, a box brownie mix works perfectly. Just bake them according to the package directions, let them cool completely, and then proceed with the decorating steps.
→ How do I prevent the white chocolate from clumping when melting?
Make sure your bowl and utensils are completely dry. Melt the chocolate in short bursts (30 seconds in the microwave) and stir well in between. If it seems too thick, a tiny bit of coconut oil or vegetable shortening (about 1/2 tablespoon at a time) can help smooth it out.
→ Where can I find candy eyeballs?
Candy eyeballs are usually available in the baking aisle of most grocery stores, especially during the Halloween season. You can also find them at craft stores with a baking section or online.
→ How far in advance can I make these?
The brownies can be baked 2-3 days in advance and stored in an airtight container. You can decorate them a day or two before serving. Once decorated, store them in an airtight container at room temperature.
→ Can I use dark chocolate for the bandages?
While it wouldn't create the 'mummy' look, you could definitely drizzle dark chocolate for a different effect! Or, for a spooky twist, you could try green or purple candy melts for monster brownies.
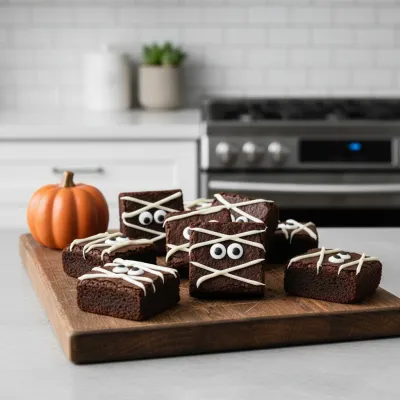

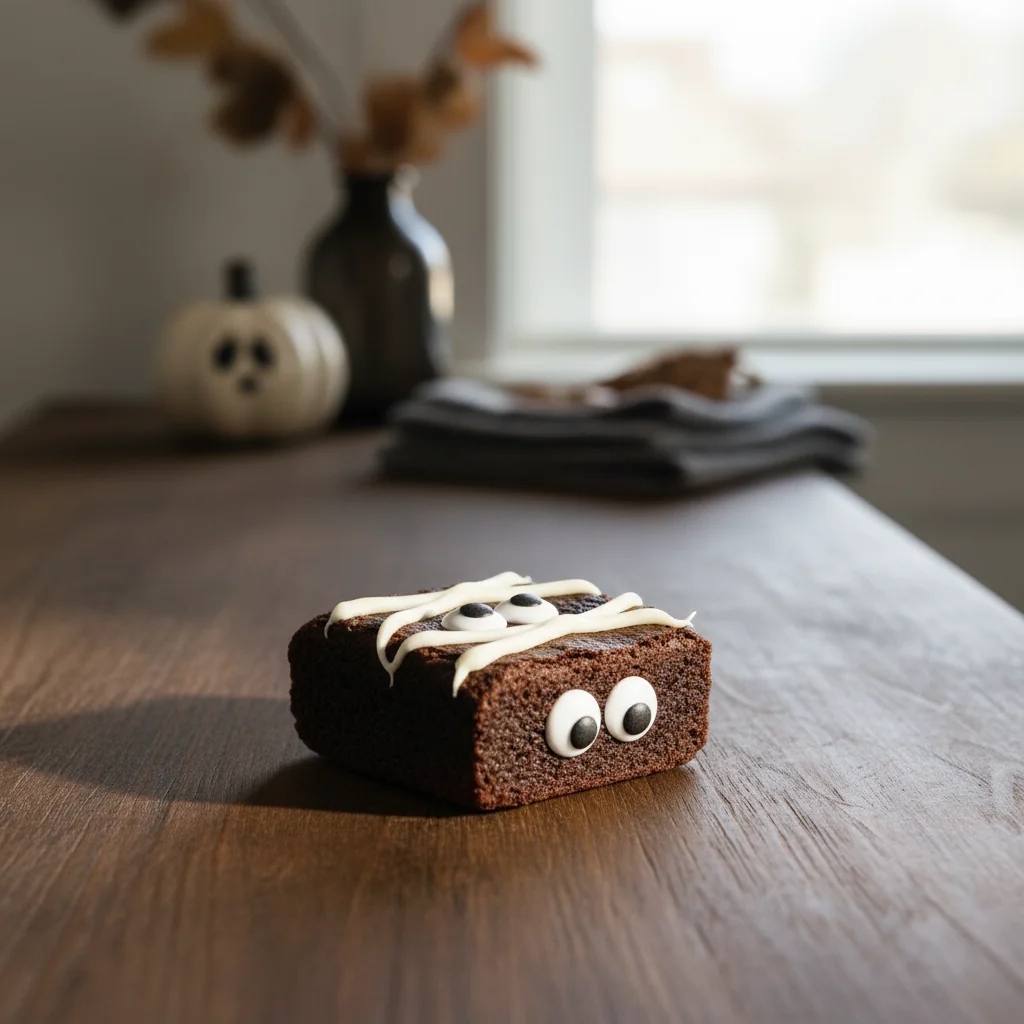
Mummy Brownies: Spooky Halloween Treat
Make spooky mummy brownies for Halloween! An easy brownie recipe decorated with white chocolate and candy eyes. A fun and tasty dessert that’s perfect for parties or a cozy autumn night in.
Timing
Prep Time
15 minutes
Cook Time
25-30 minutes
Total Time
40-45 minutes
Recipe Details
Ingredients
For the Fudgy Brownies
-
01
1 cup (2 sticks) unsalted butter, melted
-
02
2 cups granulated sugar
-
03
4 large eggs
-
04
1 teaspoon vanilla extract
-
05
1 cup all-purpose flour
-
06
3/4 cup unsweetened cocoa powder
-
07
1/2 teaspoon baking powder
-
08
1/4 teaspoon salt
For the Mummy Decoration
-
01
12 oz white chocolate chips or candy melts
-
02
1-2 tablespoons coconut oil or vegetable shortening (if needed, for thinning)
-
03
32-48 candy eyeballs (2 per brownie)
Instructions
Preheat your oven to 350°F (175°C). Line a 9x13-inch baking pan with parchment paper, leaving an overhang on the sides for easy lifting. Lightly grease the parchment paper.
In a large bowl, whisk together the melted butter and granulated sugar until well combined. This should only take about a minute.
Add the eggs one at a time, beating well after each addition. Stir in the vanilla extract until just combined. The mixture will be glossy and smooth.
In a separate medium bowl, whisk together the flour, cocoa powder, baking powder, and salt. Make sure there are no lumps.
Gradually add the dry ingredients to the wet ingredients, mixing until just combined. Be careful not to overmix; overmixing can lead to tough brownies. The batter will be thick and fudgy.
Pour the brownie batter into your prepared baking pan and spread it evenly with a spatula.
Bake for 25-30 minutes, or until a toothpick inserted into the center comes out with moist crumbs, not wet batter. Don't overbake! A slightly gooey center is perfect for fudgy brownies.
Let the brownies cool completely in the pan on a wire rack before attempting to decorate. This is important; warm brownies will melt the chocolate. Once cooled, use the parchment paper overhang to lift the brownies out and place them on a cutting board.
Cut the cooled brownies into squares or rectangles of your desired size. I usually aim for about 16-24 pieces.
Melt the white chocolate chips (or candy melts) in a microwave-safe bowl in 30-second intervals, stirring well after each, until smooth. If the chocolate is too thick, add coconut oil or shortening, 1/2 tablespoon at a time, until it reaches a good drizzling consistency.
Transfer the melted white chocolate to a piping bag with a small round tip, or a Ziploc bag with a tiny corner snipped off. This is your mummy 'bandage' tool!
Pipe horizontal lines across each brownie, leaving a small gap near the top for the 'eyes'. Overlap the lines slightly to create a bandage effect. While the chocolate is still wet, gently press two candy eyeballs into the gap you left for the mummy's face.
Let the decorated mummy brownies sit at room temperature for about 15-20 minutes, or refrigerate for 5-10 minutes, until the white chocolate has set completely. Serve and enjoy your spooky treats!
Notes & Tips
-
1
If you don't have candy eyeballs, you can use mini chocolate chips or even draw pupils with edible food markers.
-
2
For even more intense chocolate flavor, use a mix of semi-sweet chocolate chips and cocoa powder in your brownie batter.
-
3
A square brownie pan (8x8 or 9x9) will yield thicker brownies with a longer baking time; adjust accordingly.
-
4
Get creative with the white chocolate drizzles! Imperfection makes them look even more like rustic mummy bandages.
-
5
These are great to make with kids; let them do the drizzling and eye placement!

Easy Slow Cooker Pot Roast
The ultimate set-it-and-forget-it meal. Tender beef and hearty vegetables simmered to perfection in the slow cooker.
Tools You'll Need
-
9x13-inch baking pan
-
Parchment paper
-
Large mixing bowls
-
Whisk
-
Spatula
-
Measuring cups and spoons
-
Wire cooling rack
-
Sharp knife
-
Piping bag with small round tip (or Ziploc bag)
Must-Know Tips
-
Always let your brownies cool completely before cutting and decorating. Warm brownies will make the chocolate melt and smear!
-
Use parchment paper to line your pan; it makes lifting the baked brownies out incredibly easy.
-
Don't overmix the brownie batter—just mix until the dry ingredients are incorporated for a tender, fudgy brownie.
-
Work quickly when piping the white chocolate and adding the eyeballs, as the chocolate starts to set pretty fast.
-
If your white chocolate hardens in the piping bag, just microwave the bag for 10-15 seconds to re-soften it.
Professional Secrets
-
A pinch of espresso powder in the brownie batter enhances the chocolate flavor without making it taste like coffee.
-
To get really clean brownie cuts, chill the cooled brownies in the fridge for 30 minutes before slicing. Use a large, sharp knife, wiping it clean between each cut.
-
For extra fudgy brownies, reduce the flour by 1/4 cup and replace it with more cocoa powder.
-
Instead of piping, you can spread a thin layer of melted white chocolate over the brownie, let it set, then use a fork to drag lines through it for a textured bandage effect before adding eyes.
-
A tiny drop of red food coloring gel on one of the candy eyeballs before placing it can make for a fun, bloodshot eye detail for extra spookiness!

Recipe by
Mason Cole“Sweet cravings are my specialty! I turn sugar, chocolate, and imagination into pure dessert magic.” 🍰✨
Get Delicious Recipes Weekly
Join 25,000+ home cooks getting our best recipes straight to their inbox.
Free forever • No spam • Unsubscribe anytime