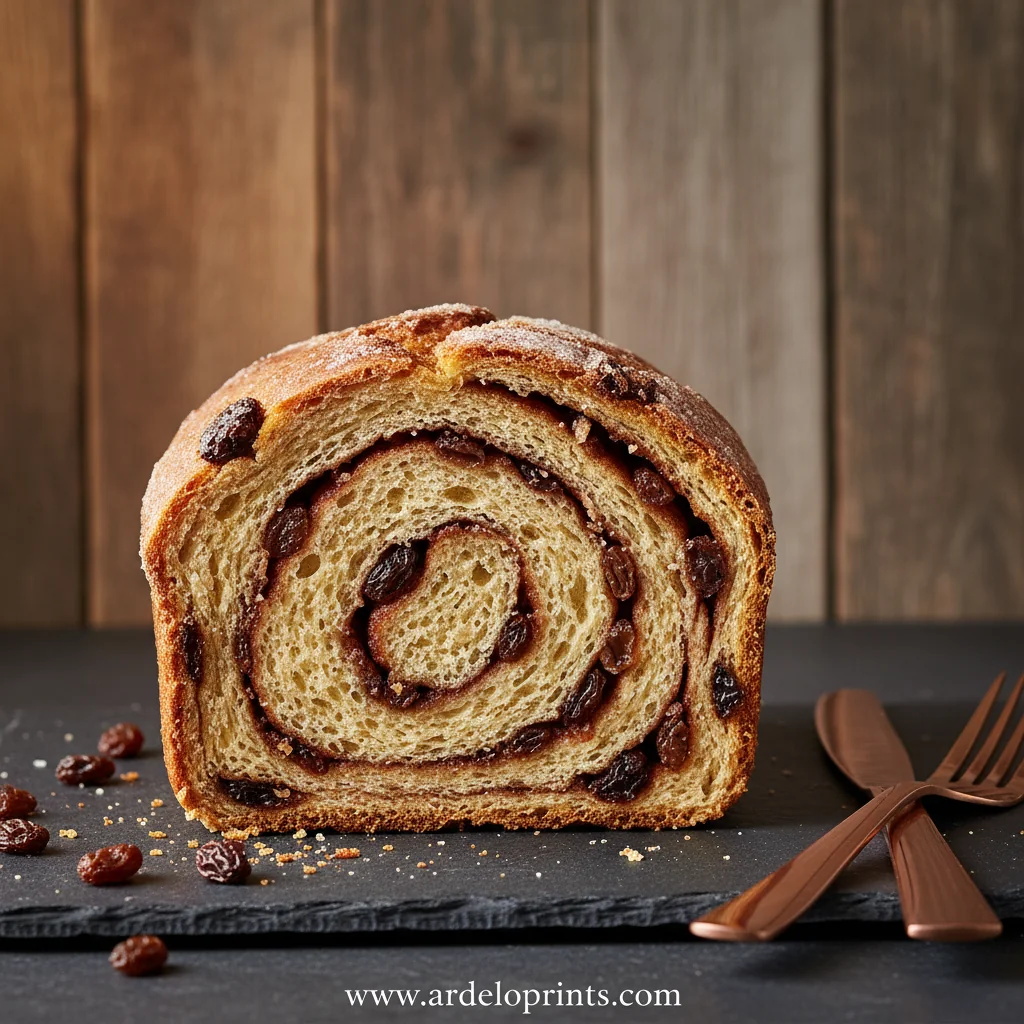
I remember my mom baking cinnamon raisin bread on chilly Saturday mornings. The whole house felt cozier. I wanted to bring that feeling into my own home, but without the complicated steps. This recipe was a happy accident, born from a lazy Sunday and a craving for something warm and sweet. It’s beautifully imperfect. It’s not about getting a perfect swirl or a flawless crumb; it’s about the slow, quiet joy of making something lovely with your own two hands. It connects me right back to those simple, happy moments.
Why This Recipe Feels So Good
-
It’s incredibly forgiving. No kneading, no stand mixer, no stress.
-
The house smells absolutely amazing while it bakes.
-
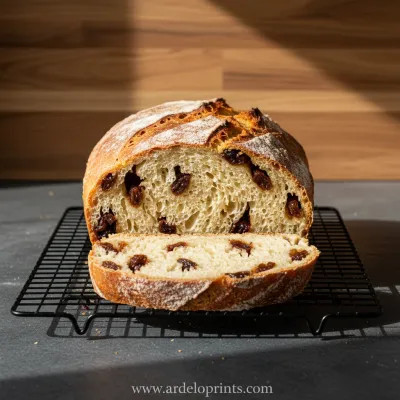
You get that artisan-style crust with a soft, chewy inside.
-
It makes the most perfect toast.
-
It feels like a special treat, but it's made with simple pantry staples.
Wow, I can't believe I made this! I’ve always been so intimidated by bread baking, but this was genuinely easy. The crust is perfectly crisp and the inside is so soft and full of flavor. My family devoured the entire loaf in one morning.
Essential Ingredient Guide
- Instant Yeast: This is the key to the 'no-knead' part. It works faster and doesn't need to be proofed first. If you only have active dry yeast, you can use it, but you might want to dissolve it in the warm water first for a few minutes.
- All-Purpose Flour: Nothing fancy needed here. Simple all-purpose flour gives this bread a lovely soft texture. Bread flour will work too, for a slightly chewier result.
- Raisins: I love classic raisins, but you could easily swap them for sultanas, cranberries, or even chopped dates. It’s your loaf, make it your own.
Birria Tacos: Easy & Flavorful Recipe
Tender, slow-braised beef tacos pan-fried to perfection with a rich, savory consomé for dipping.

Complete Cooking Process
-
Mixing the Dough (The 10-Minute Part):
-
Whisk your dry ingredients together in a big bowl.
-
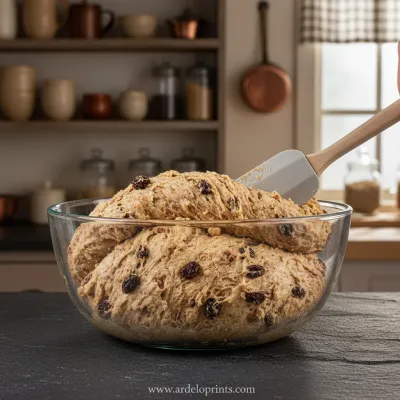
Stir in the water until a sticky, messy dough comes together.
-
That's it. Seriously. Just cover it up and walk away.
-
-
The Long, Slow Rise (Let Time Do the Work):
-
Find a cozy, draft-free spot on your counter.
-
Let the dough rest for 12 to 18 hours. Overnight is perfect.
-
You’ll see it transform, getting all bubbly and alive. It's kind of magical.
-
-
Shaping and Baking (The Grand Finale):
-
Gently turn the dough out, sprinkle with the cinnamon-sugar, and form a loose ball.
-
Let it rest while your Dutch oven gets screaming hot in the oven.
-
Bake it covered first to trap steam, then uncovered to get that gorgeous golden crust.
-

Easy Skillet Chicken Thighs Recipe
Garlic cream sauce skillet chicken thighs for a delicious and simple weeknight dinner.
A Few Common Questions
→ Can I make this without a Dutch oven?
Yes, you can. A heavy, oven-safe pot with a tight-fitting lid will work. You can also bake it on a preheated pizza stone or baking sheet, but you'll need to create steam by placing a pan of hot water on the lower rack of the oven for the first 20 minutes.
→ My dough seems really wet. Is that right?
It is! No-knead dough is supposed to be very high-hydration, which means it will be sticky and shaggy. That's what creates the wonderful open crumb and chewy texture. Just use plenty of flour on your hands and work surface when shaping.
→ How long does it need to cool?
I know it’s torture, but please let it cool for at least an hour, if not two. The bread is still cooking internally as it cools, and slicing it too soon will result in a gummy texture. It's worth the wait, I promise.
→ Can I add nuts or other spices?
Of course! Chopped walnuts or pecans would be wonderful. You could also add a pinch of nutmeg or cardamom to the cinnamon sugar for extra warmth.

No-Knead Cinnamon Raisin Bread: Easy Homemade
Discover the easiest way to bake delicious no-knead cinnamon raisin bread. Enjoy homemade comfort with this simple, flavorful recipe perfect for any baker.
Timing
Prep Time
10 minutes
Cook Time
45 minutes
Total Time
13-19 hours (including rise time)
Recipe Details
Ingredients
For the Dough
-
01
3 cups (380g) all-purpose flour, plus more for dusting
-
02
1 1/2 teaspoons instant yeast
-
03
1 1/2 teaspoons salt
-
04
1 tablespoon granulated sugar
-
05
1 1/2 cups (355ml) lukewarm water
-
06
1 cup (150g) raisins
For the Cinnamon Swirl
-
01
1/4 cup (50g) brown sugar, packed
-
02
2 teaspoons ground cinnamon
-
03
2 tablespoons melted butter (optional, for brushing)
Instructions
In a large bowl, whisk together the flour, instant yeast, salt, and granulated sugar. Add the raisins and stir to combine.
Pour in the lukewarm water. Use a spatula to mix until a shaggy, sticky dough forms. Make sure there are no dry patches of flour left.
Cover the bowl with plastic wrap or a damp cloth. Let it sit at room temperature for 12 to 18 hours. The dough will become bubbly and more than double in size.
Generously flour a work surface. Gently scrape the dough out of the bowl. It will be sticky and stringy. Lightly flour the top of the dough.
Gently press the dough into a rough rectangle. In a small bowl, mix the brown sugar and cinnamon. Sprinkle this mixture evenly over the dough.
Fold the dough over onto itself a few times to incorporate the cinnamon sugar, then gently shape it into a round ball. Don't worry about perfection here.
Place the dough on a piece of parchment paper. Let it rest for 30 minutes. Meanwhile, place a 4 to 6-quart Dutch oven with its lid in your oven and preheat to 450°F (232°C).
Carefully remove the hot Dutch oven. Lift the parchment paper with the dough and lower it into the pot. Cover with the lid and bake for 30 minutes.
Remove the lid and bake for another 10-15 minutes, or until the crust is a deep golden brown and the internal temperature reaches 200°F (93°C).
Carefully lift the bread out and place it on a wire rack to cool completely before slicing. This is important! Slicing it hot can make the texture gummy.
Notes & Tips
-
1
The rising time is very flexible. Don't stress if it's a little less than 12 hours or a little more than 18.
-
2
If your kitchen is very warm, the dough will rise faster. If it's cool, it might take a bit longer.
-
3
The cinnamon sugar will create pockets and swirls; it won't be a perfect spiral like a store-bought loaf, and that's part of its charm.
Easy Slow Cooker Pot Roast
The ultimate set-it-and-forget-it meal. Tender beef and hearty vegetables simmered to perfection in the slow cooker.
Tools You'll Need
-
Large mixing bowl
-
Spatula or wooden spoon
-
Plastic wrap
-
Parchment paper
-
4 to 6-quart Dutch oven with lid
-
Wire cooling rack
Must-Know Tips
-
Don't overwork the dough when you shape it. Be gentle to keep all those lovely air bubbles.
-
Make sure your Dutch oven is fully preheated. Placing cold dough in a hot pot is what creates that great oven spring.
-
Let the bread cool completely. This is the hardest but most important step for the best texture.
-
Use parchment paper to easily lower the dough into the hot pot without burning yourself.
Professional Secrets
-
For an extra-dark, crackly crust, spritz the dough with a little water just before you put the lid on.
-
After baking, brush the top of the hot loaf with a little melted butter for a soft, shiny crust.
-
To ensure your raisins don't burn on the outside of the loaf, try to tuck most of them inside the dough when you're shaping it.

Recipe by
Grace Lawson“Butter, sugar, and a little love — that’s my baking philosophy! Let’s make your kitchen smell amazing.” 🍰❤️
Get Delicious Recipes Weekly
Join 25,000+ home cooks getting our best recipes straight to their inbox.
Free forever • No spam • Unsubscribe anytime