The concept of the no-bake cheesecake is a clever evolution of the traditional New York style, born from a desire for lightness and convenience. While baked cheesecakes rely on eggs and heat for structure, these oreo no-bake cheesecake cups rely on the chemistry of chilled fats and aerated cream to achieve a stable, mousse-like consistency.
Integrating the iconic Oreo, which debuted in 1912, transforms a classic dessert into a nostalgic experience. The contrast between the deep, cocoa-rich crumbs and the bright, tangy cream cheese creates a flavor profile that has become a staple in modern home kitchens across the globe.
Culturally, individual dessert cups reflect a shift toward mindful portions and a more casual approach to hosting. Instead of a singular, imposing cake, these cups offer a personalized treat, making the experience of sharing a dessert feel more intimate and accessible.
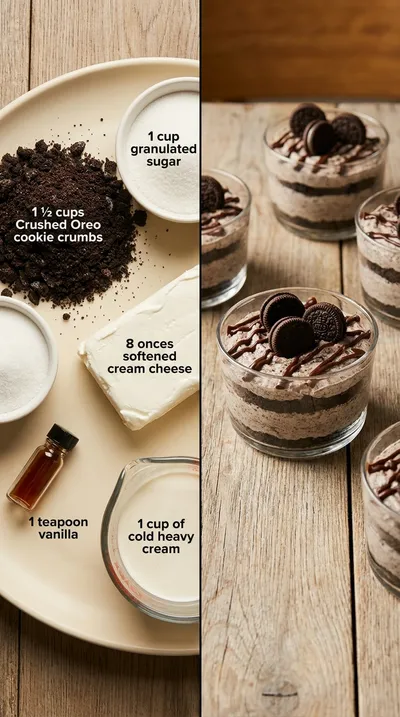
From the simple addition of 1 cup (200g) granulated sugar to the final touch of 6 Oreo cookies, coarsely chopped on top, this dish represents the intersection of industrial confectionery and artisanal home baking.
Why You'll Love It
-
- Honestly, there is something so comforting about a treat that doesn't require the oven, especially when the kitchen is already warm.
-
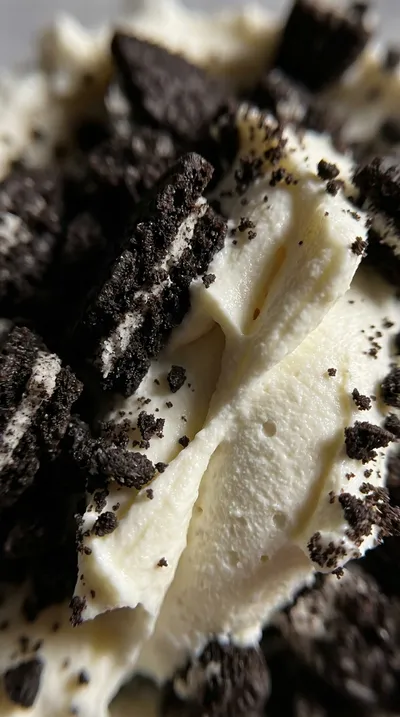
- The way the 1 ½ cups (180g) Oreo cookie crumbs create that dark, chocolatey base against the creamy filling is just a dream, yeah.
-
- It's just so simple to put together, meaning you can actually enjoy the process without feeling like you're fighting with a recipe.
-
- I remember when I first made these, the look on everyone's faces was just priceless; they're like little bites of heaven in a liner.
"Honestly, these are the only desserts I make now. My grandkids absolutely love the creamy texture and that crunchy crust!"
Essential Ingredient Guide
- 8 ounces (226g) cream cheese: Look, the secret here is making sure it's softened to room temperature. If it's too cold, you'll get lumps, and ugh, nobody wants lumpy cheesecake.
- 1 cup (240ml) heavy cream: Keep this cold until the very second you need it. It's what gives the cups that airy, cloud-like lift that makes them feel fancy.
- 6 Oreo cookies, coarsely chopped: These are just for the top, so don't crush them too small. I love those chunky bits of cookie for a bit of a crunch at the end.
- 1 teaspoon vanilla extract: Just a little splash, but it rounds out the sugar and makes the whole thing taste like a real home-baked treat.
- 5 tablespoons (70g) unsalted butter: Melt this gently so it blends perfectly with your crumbs. It's what holds that lovely crust together so it doesn't crumble away.
- 1 cup (200g) granulated sugar: This provides the sweetness we all crave. Just beat it in gradually so it incorporates smoothly into the cheese.
Complete Cooking Process
-
Getting Ready:
Before you start, make sure your cream cheese is sitting out for an hour. It's so important to have it soft so the filling stays silky.
-
Building the Base:
Mixing the 1 ½ cups (180g) Oreo cookie crumbs with melted butter creates that deep, cocoa flavor. Pressing them firmly into the liners ensures they stay put.
-
Perfecting the Texture:
Whipping the cold heavy cream to stiff peaks and folding it gently is where the magic happens. Be careful not to overmix, or you'll lose that fluffiness.
-
The Final Touch:
Just before you bring them to the table, sprinkle those 6 Oreo cookies, coarsely chopped, on top. It adds a lovely bit of texture to the creamy top.
-
The Big Wait:
Patience is key here, well, at least 4 hours in the fridge. Letting them set overnight is even better if you can resist the temptation.
-
Use a food processor for the 1 ½ cups (180g) Oreo cookie crumbs to get a perfectly fine texture.
-
Double check that your cream cheese is fully softened to avoid any stubborn lumps.
-
Keep your heavy cream and whipping bowl chilled for the most stable peaks.
-
Fold the whipped cream in gently using a rubber spatula to keep the filling light.
Pro Tips
You've got this, just take your time and enjoy the process!
 Dinner
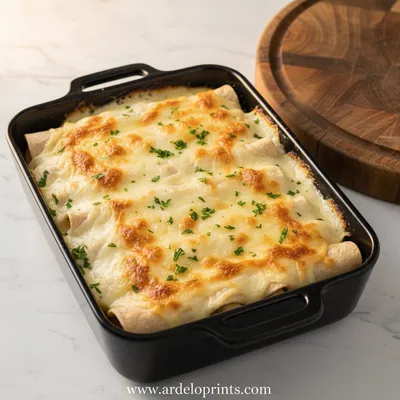
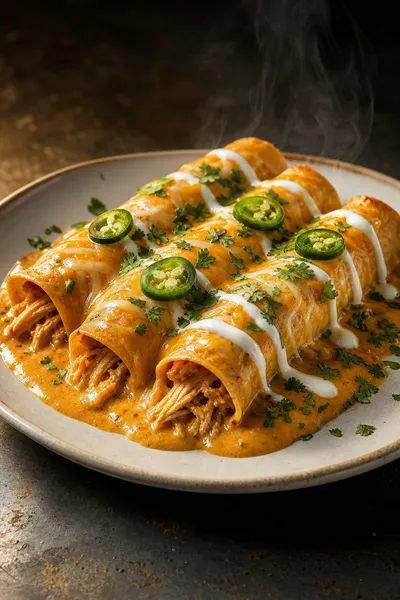
Easy White Chicken Enchiladas with Creamy Sauce
Quick white chicken enchiladas ready in 30 minutes with a luscious creamy sauce.
Better For You Treats
Ways to Make it Your Own
Serving Suggestions
Frequently Asked Questions
→ Can I make these ahead of time?
Yes, actually, I prefer it! They're wonderful if you let them set in the fridge overnight.
→ What if my filling isn't stiff enough?
Oops, that usually happens if the heavy cream wasn't cold enough or if it was overmixed. Just make sure they chill for the full 4 hours.
→ How do I store any leftovers?
Keep them in an airtight container in the fridge, or you can actually freeze them for up to a month if you're planning ahead.
Nutrition Facts
per serving
380
Calories
6g
Protein
34g
Carbs
22g
Fat
Taste Profile
A rich, creamy blend of chocolatey cocoa and sweet vanilla cheesecake.
Ingredient Substitutions
Don't have an ingredient? Try these alternatives
Keep in mind the flavor will be slightly different, but it works well.
Powdered sugar dissolves faster, which helps avoid any graininess.
Recipe Variations
Try these delicious twists on the original
Mint Chocolate Oreo Cheesecake Cups
Add 1/2 teaspoon of peppermint extract to the cheesecake filling for a refreshing mint flavor. You can also use mint Oreo cookies for the crust and topping.
Salted Caramel Oreo Cheesecake Cups
Drizzle each cheesecake cup with salted caramel sauce before chilling and sprinkle with sea salt flakes for a sweet and salty twist.
Common Mistakes to Avoid
Learn from others' mistakes for perfect results
- Overwhipping the heavy cream, which can make it grainy or buttery.
- Using cold cream cheese, which leads to lumps in the final filling.
- Overmixing the whipped cream into the cheese, which ruins the fluffiness.
Meal Prep & Storage
Make Ahead Tips
These are actually better when made ahead! Let them set in the refrigerator overnight for the best consistency.
Leftover Ideas
Store any remaining cups in an airtight container in the freezer for up to 1 month; just thaw in the fridge for 2 hours before eating.
Perfect Pairings
Serve this with...
Cooking Timeline
Mix and press Oreo crusts into liners
Beat cream cheese with sugar and vanilla
Whip heavy cream to stiff peaks
Fold fillings together and fill the cups
Refrigerate until set and garnish before serving
 International_Cuisine
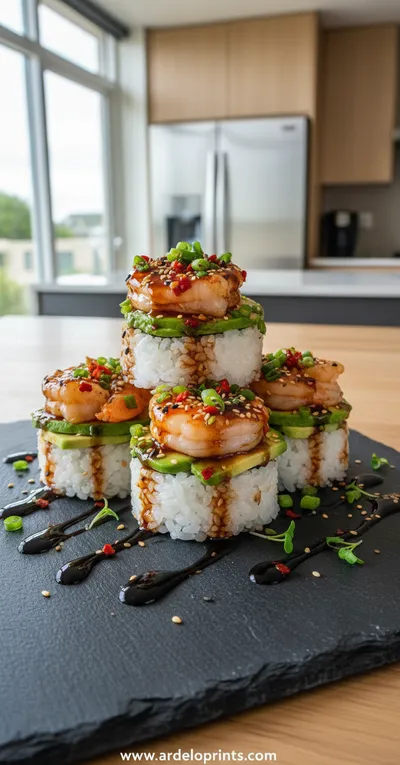
Spicy Shrimp Sushi Stacks
A fresh, vibrant bite combining seasoned shrimp, rice, and crisp toppings.

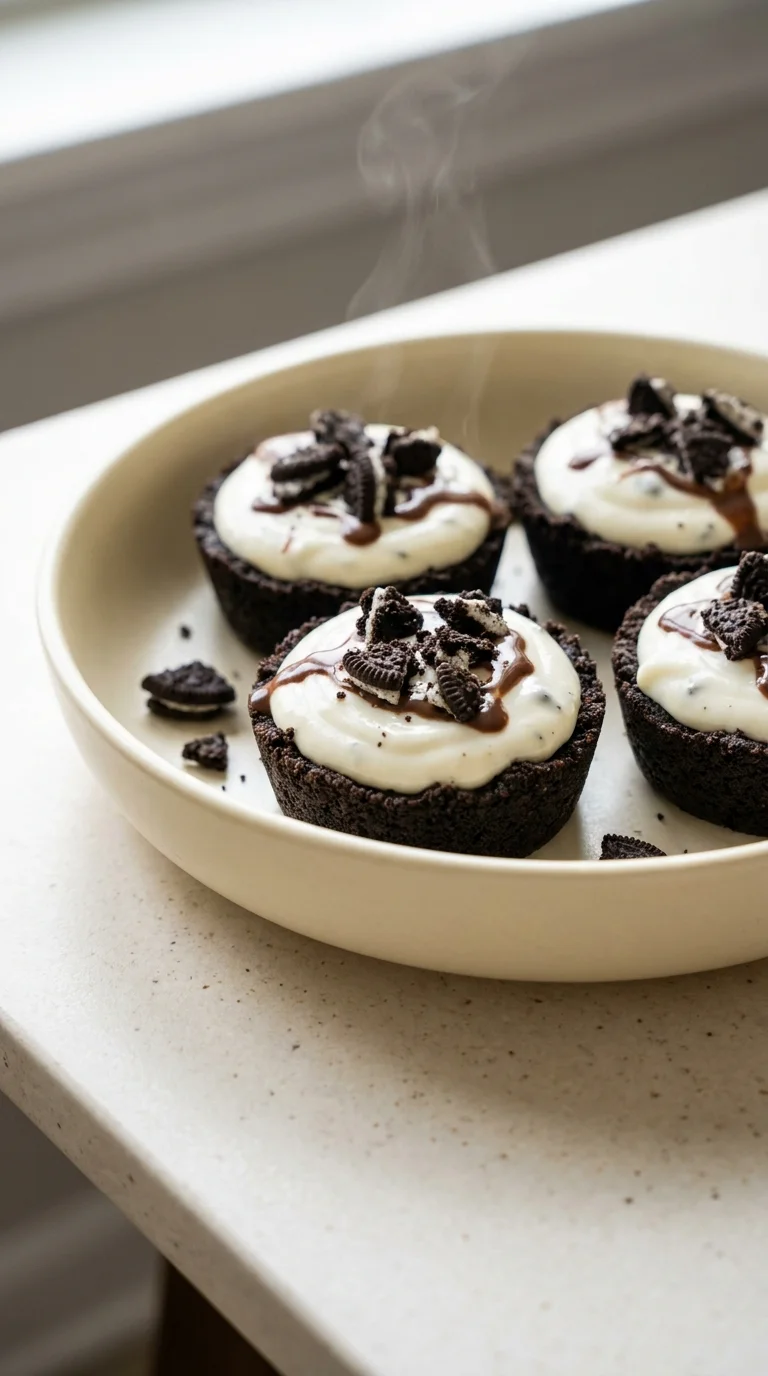
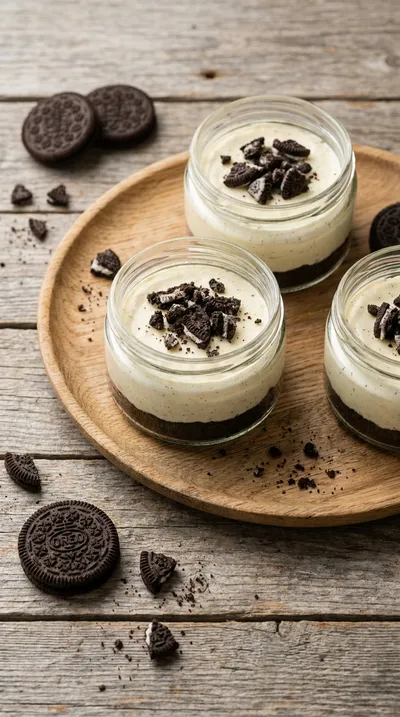
Oreo No-Bake Cheesecake Cups
These oreo no-bake cheesecake cups are a dreamy blend of buttery cookie crust and a cloud-like cream cheese filling. Each little cup is a sweet, velvety escape that tastes like a childhood treat refined for today.
Timing
Prep Time
20 Minutes
Cook Time
0 Minutes
Total Time
20 Minutes
Recipe Details
Ingredients
The Crust
-
01
1 ½ cups (180g) Oreo cookie crumbs (about 36 Oreos, finely crushed)
-
02
5 tablespoons (70g) unsalted butter, melted
Cheesecake Filling
-
01
8 ounces (226g) cream cheese, softened to room temperature
-
02
1 cup (200g) granulated sugar
-
03
1 teaspoon vanilla extract
-
04
1 cup (240ml) heavy cream, cold
Garnish
-
01
6 Oreo cookies, coarsely chopped (for topping)
Instructions
First, let's get our crust ready. In a medium bowl, combine the 1 ½ cups (180g) Oreo cookie crumbs and 5 tablespoons (70g) unsalted butter, melted. Mix it all together well until the crumbs are evenly moistened—it should look like wet sand, honestly.
Line a 12-cup muffin tin with cupcake liners. Press about 2 tablespoons of that Oreo crumb mixture firmly into the bottom of each liner. You want a nice, solid base for your cheesecake.
Pop that muffin tin into the refrigerator to chill. Just let it sit and firm up while we move on to the filling.
In a large bowl, beat the 8 ounces (226g) cream cheese, softened to room temperature, using your electric mixer. Keep going until it's completely smooth and creamy; ugh, nobody likes lumps in their cheesecake.
Now, gradually add the 1 cup (200g) granulated sugar to the cream cheese, beating it until it's all well combined. Then, stir in the 1 teaspoon vanilla extract for that lovely aroma.
In a separate, chilled bowl, whip the 1 cup (240ml) heavy cream, cold, with your mixer until stiff peaks form. Just be careful not to overwhip it, or you'll end up with butter!
Time to combine. Gently fold about 1/3 of the whipped cream into the cream cheese mixture to lighten things up. Then, gently fold in the rest of the whipped cream until just combined. I mean, don't overmix, or we'll lose that airiness.
Take your muffin tin out of the fridge and spoon that creamy cheesecake filling evenly over the Oreo crusts in each cupcake liner.
Cover the tin with plastic wrap and let them refrigerate for at least 4 hours. Well, if you can wait, overnight is even better to let them set completely.
Just before you're ready to serve, sprinkle those 6 Oreo cookies, coarsely chopped (for topping), on top of each cup. Wow, they look so professional!
Notes & Tips
-
1
Make sure the cream cheese is truly softened to avoid any stubborn lumps.
-
2
Using a cold bowl for the heavy cream helps it whip up much faster.
-
3
The overnight chill is the secret to a perfect, clean slice or bite.
Tools You'll Need
-
Mixing bowls (2 large, 1 small) for separating components
-
Electric mixer (handheld or stand mixer) for beating and whipping
-
Measuring cups and spoons for accuracy
-
Rubber spatula for gentle folding
-
12 cupcake liners to keep the cups neat
-
Muffin tin (12 cup) as the base
-
Food processor (optional, for crushing Oreos quickly)
Must-Know Tips
-
Crumb Texture, For an even finer Oreo crumb texture, pulse the Oreos in a food processor instead of crushing them by hand.
-
Softening, Ensure your cream cheese is fully softened to avoid lumps in the filling. Leaving it out for about an hour is ideal.
-
Cream Stability, Chilling the heavy cream before whipping helps it to stiffen more easily and create a stable cheesecake filling.
Professional Secrets
-
The Folding Technique, Mixing the whipped cream in thirds prevents the heavy cream from deflating, keeping the dessert airy.
-
The Temperature Trick, Using a chilled bowl for whipping cream ensures the fat molecules stay stable for maximum volume.
-
The Press-Down, Pressing the crust firmly prevents the base from crumbling when you lift the treat out of the liner.

Recipe by
Mason Cole“Sweet cravings are my specialty! I turn sugar, chocolate, and imagination into pure dessert magic.” 🍰✨
Get Delicious Recipes Weekly
Join 25,000+ home cooks getting our best recipes straight to their inbox.
Free forever • No spam • Unsubscribe anytime