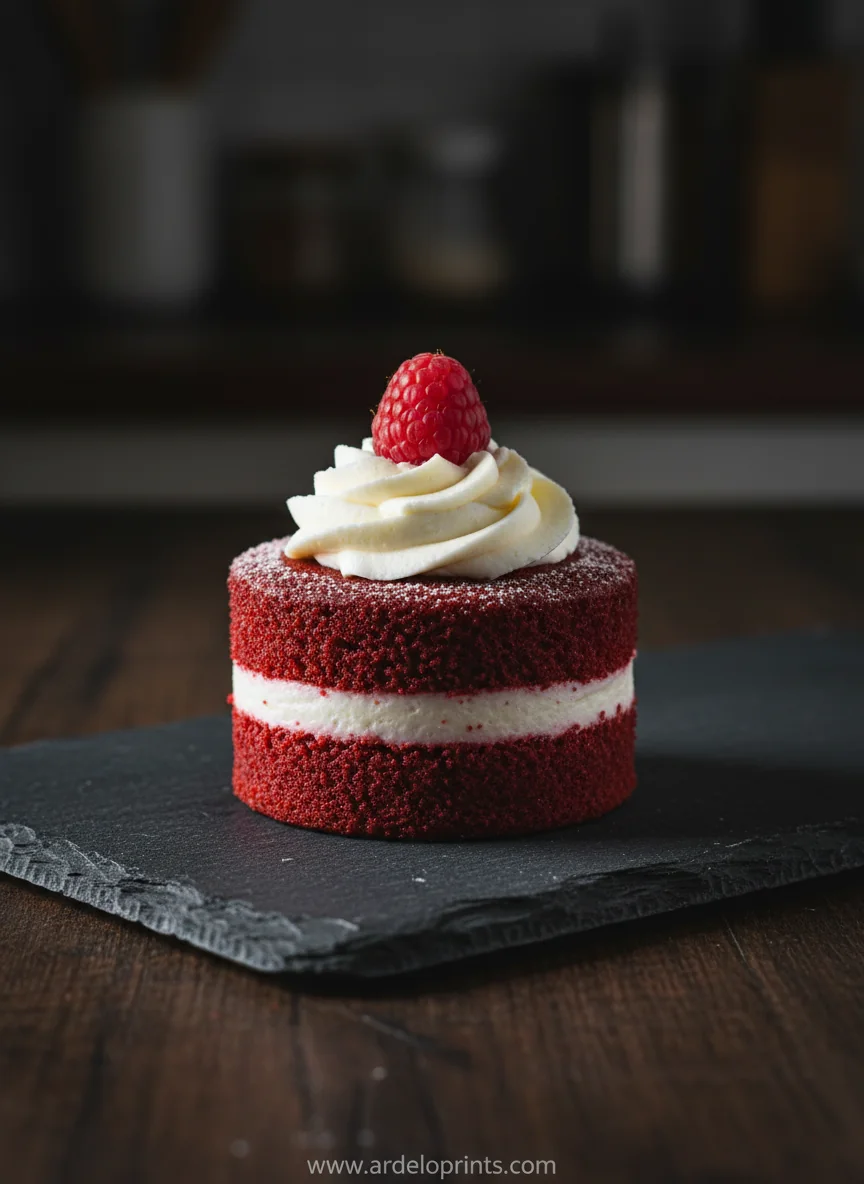
Red velvet cake has a history that stretches back to the early 1900s, originally gaining fame at New York City's Waldorf-Astoria Hotel. The unique reaction between natural cocoa powder and acidic ingredients like buttermilk and vinegar creates both the signature tangy flavor and that beautiful red hue. Over the decades, this dessert became a symbol of celebration and Southern hospitality. These mini versions maintain all the classic characteristics while offering modern convenience and portion control for today's gatherings.
Why You'll Love It
-
Perfect portion control for satisfying dessert cravings
-
Rich red velvet flavor in every single bite
-
Beautiful presentation that impresses guests
-
Easy to make ahead for parties and gatherings
My family can't get enough of these little cakes! They're moist, perfectly sweet, and the cream cheese frosting is divine.
Essential Ingredient Guide
- Buttermilk: This is the secret to red velvet's tender crumb and slight tang. If you don't have buttermilk, you can make a quick substitute by adding 1 tablespoon of white vinegar to 1 cup of milk and letting it sit for 5 minutes.
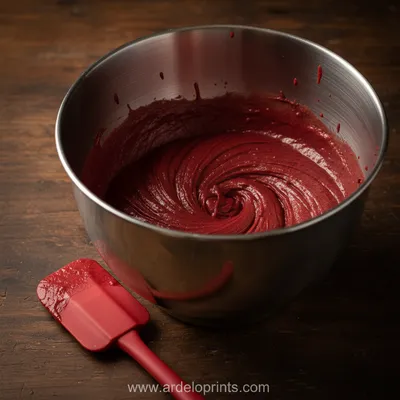
- Natural cocoa powder: Use natural, not Dutch-process cocoa for the authentic flavor and color reaction. The acidity helps create that signature red velvet taste.
- White vinegar: Just a small amount works with the baking soda to give the cakes their light, airy texture while enhancing the red color development.
- Red food coloring: Gel food coloring gives the most vibrant red color without thinning the batter. Start with a little and add more until you reach your desired shade.
- Cream cheese: Use full-fat cream cheese at room temperature for the smoothest, creamiest frosting that holds its shape beautifully.
- Confectioners' sugar: Also known as powdered sugar, it dissolves easily into the frosting without graininess, creating that silky smooth texture we all love.
Complete Cooking Process
-
Ingredient Readiness:
Everything should be at room temperature, especially the eggs, buttermilk, and butter. Cold ingredients don't incorporate well and can result in a dense cake. I like to take everything out about an hour before I start baking.
-
Flavor Development:
The magic happens when the cocoa, buttermilk, and vinegar come together. The chemical reaction not only creates the color but builds that complex flavor profile that makes red velvet so distinctive from regular chocolate cake.
-
Texture Control:
Don't overmix the batter once you add the dry ingredients. Stir just until everything is combined - a few small lumps are okay. Overmixing develops too much gluten and makes the cakes tough instead of tender.
-
Finishing Touches:
Let the mini cakes cool completely before frosting. If they're even slightly warm, the frosting will melt and slide right off. Patience here makes all the difference in presentation.
-
Serving Timing:
These taste best when served the same day they're made, but they'll keep well in the refrigerator for up to 3 days. Bring them to room temperature for about 20 minutes before serving for the best texture.
-
Use a cookie scoop to fill the mini muffin tins evenly for uniform baking
-
Tap the pan gently on the counter to remove air bubbles before baking
-
Check for doneness with a toothpick - it should come out with a few moist crumbs
-
Pipe the frosting for a professional look - it's easier than spreading with a knife
Pro Tips
I've made these little cakes more times than I can count, and each time I'm reminded how special they feel. There's something about serving individual desserts that makes people feel cared for. They're perfect for when you want to make something like banana bread but need something a bit more festive.
When I'm planning a brunch or afternoon tea, I often make these alongside other favorites. They pair beautifully with a simple overnight oats bar for a balanced spread that satisfies both the sweet tooth and practical needs.
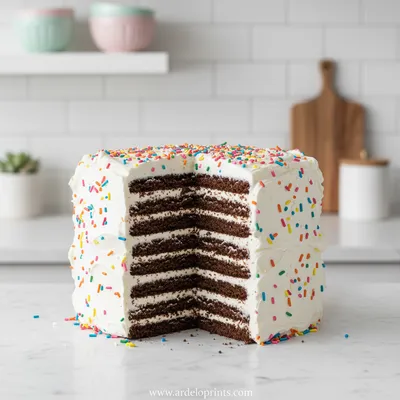
 Desserts
Inside Out Chocolate Chip Cookies
Chewy cookies with crisp edges and a melt‑in‑your‑mouth center.
The essence of the dish:
These mini cakes capture the full experience of red velvet - the visual drama of that rich red color against white frosting, the tender crumb that melts on your tongue, and that perfect balance of chocolate flavor with a subtle tang.
A fun fact or historical angle:
During World War II, bakers used beet juice to enhance the color of red velvet cakes when food coloring was rationed. The vegetable added moisture and natural sweetness while giving that characteristic red hue.
Flavor or sensory focus:
The first thing you'll notice is the visual contrast - that vibrant red against the pure white frosting. Then comes the texture - incredibly soft and moist with just the right amount of crumb. Finally, the flavor - not too sweet, with cocoa notes and that distinctive tang from the buttermilk.
You Must Know
-
Room temperature ingredients are non-negotiable for the best texture
-
Don't skip the vinegar - it's essential for both flavor and leavening
-
Use gel food coloring for the most vibrant red color without thinning the batter
-
Let cakes cool completely before frosting to prevent melting
Frequently Asked Questions
→ Can I make these without red food coloring?
Absolutely, though they won't have the classic red velvet appearance. The flavor will still be wonderful - they'll just look like light chocolate cakes. You could add a bit of beet powder for natural color if you prefer.
→ How long do these keep fresh?
Store them in an airtight container in the refrigerator for up to 3 days. The frosting may start to weep after that. You can also freeze the unfrosted cakes for up to 2 months.
→ Can I use a different frosting?
While cream cheese frosting is traditional, you could use buttercream or even a simple glaze. The tang of cream cheese really complements the cake's flavor though, so I'd recommend sticking with it if possible.
→ Why did my cakes turn out dry?
This usually means they were overbaked. Mini cakes cook quickly, so check them a couple minutes before the recommended time. Also make sure you measured your flour correctly - spoon it into the measuring cup rather than scooping.
→ Can I make these as regular cupcakes?
Yes, just increase the baking time to 18-22 minutes. The mini version is nice because you get more frosting-to-cake ratio in each bite, but full-sized cupcakes work beautifully too.
→ What's the best way to store these?
In an airtight container in the refrigerator. If stacking, place parchment paper between layers to protect the frosting. Bring to room temperature for about 20 minutes before serving for the best texture.

Nutrition Facts
per serving
180
Calories
2g
Protein
26g
Carbs
8g
Fat
Taste Profile
Balanced sweet with subtle tang from buttermilk and cream cheese
Ingredient Substitutions
Don't have an ingredient? Try these alternatives
Let sit for 5 minutes before using to mimic buttermilk's acidity
Will result in a slightly sweeter, less tangy frosting
Recipe Variations
Try these delicious twists on the original
Chocolate Chip Version
Add 1/2 cup mini chocolate chips to the batter for extra chocolate flavor and texture
Lemon Zest Twist
Add the zest of one lemon to the frosting for a bright, citrusy contrast to the rich cake
Common Mistakes to Avoid
Learn from others' mistakes for perfect results
- Using cold ingredients results in dense cakes
- Overmixing the batter develops too much gluten
- Overbaking makes the cakes dry - they continue cooking after removal
- Frosting warm cakes causes melting and sliding
Meal Prep & Storage
Make Ahead Tips
You can bake the cakes up to 2 days ahead and store them unfrosted in an airtight container. Frost them the day you plan to serve for the freshest taste and appearance. The frosting can also be made 2-3 days ahead and stored in the refrigerator.
Leftover Ideas
Store leftover frosted cakes in the refrigerator. They're best within 3 days. The texture may change slightly after refrigeration, but they'll still taste delicious. Bring to room temperature before serving.
Perfect Pairings
Serve this with...
Cooking Timeline
Preheat oven, prepare ingredients, mix dry ingredients
Mix wet ingredients, combine with dry ingredients, fill muffin pan
Bake mini cakes, cool in pan for 5 minutes
Cool cakes completely on wire rack, make frosting
Frost cakes, chill briefly if desired, serve
 Desserts
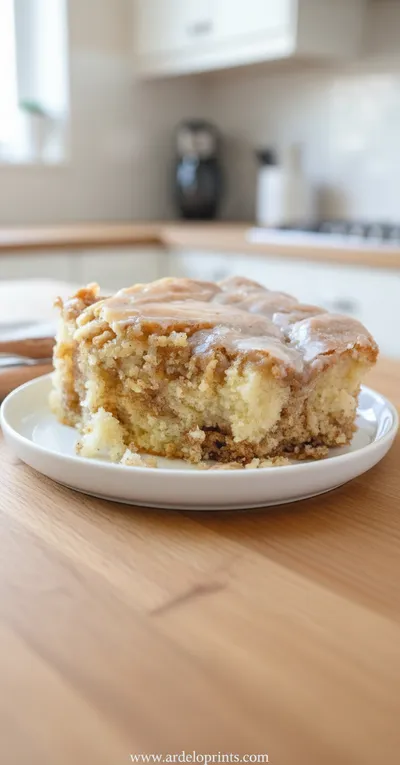
Cinnamon Roll Cake Recipe
Fluffy cinnamon roll cake with caramelized swirl, ideal for breakfast or snack.
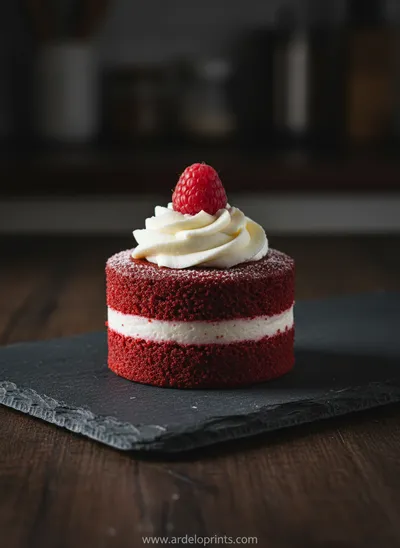
Red Velvet Cake Minis Recipe
These delightful red velvet cake minis are perfect bite-sized desserts with rich flavor and creamy frosting that melt in your mouth with every little bite.
Timing
Prep Time
25 Minutes
Cook Time
12 Minutes
Total Time
37 Minutes
Recipe Details
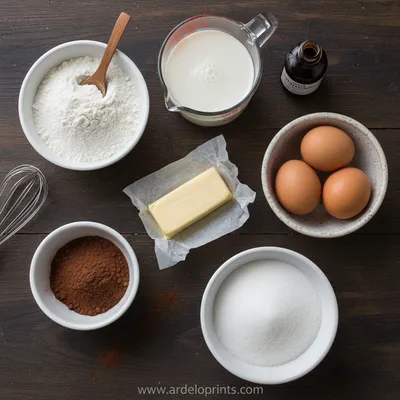
Ingredients
For the Mini Cakes
-
01
2 cups all-purpose flour
-
02
1 cup granulated sugar
-
03
1/2 cup packed brown sugar
-
04
1 teaspoon baking soda
-
05
1 teaspoon salt
-
06
2 tablespoons natural cocoa powder
-
07
1 cup buttermilk, room temperature
-
08
2 large eggs, room temperature
-
09
1/2 cup unsalted butter, melted and cooled
-
10
2 teaspoons vanilla extract
-
11
1 tablespoon white vinegar
-
12
2 tablespoons red gel food coloring
For the Cream Cheese Frosting
-
01
8 ounces cream cheese, softened
-
02
1/2 cup unsalted butter, softened
-
03
4 cups confectioners' sugar
-
04
1 teaspoon vanilla extract
-
05
Pinch of salt
Instructions
Preheat your oven to 350°F (175°C). Grease a 24-cup mini muffin pan or line with paper liners. In a medium bowl, whisk together the flour, both sugars, baking soda, salt, and cocoa powder. Set this aside for now.
In a larger bowl, whisk together the buttermilk, eggs, melted butter, vanilla extract, vinegar, and red food coloring until everything is well combined and smooth. The color should be evenly distributed throughout the liquid mixture.
Gradually add the dry ingredients to the wet ingredients, stirring gently with a spatula until just combined. Be careful not to overmix - a few small lumps are perfectly fine. Overmixing will make the cakes tough.
Using a small cookie scoop or tablespoon, fill each mini muffin cup about 3/4 full. Tap the pan gently on the counter to remove any air bubbles. Bake for 10-12 minutes, or until a toothpick inserted into the center comes out clean or with a few moist crumbs.
Let the cakes cool in the pan for 5 minutes, then transfer them to a wire rack to cool completely. They must be completely cool before frosting, otherwise the frosting will melt right off.
While the cakes cool, make the frosting. Beat the softened cream cheese and butter together until light and fluffy. Gradually add the confectioners' sugar, vanilla, and salt, beating until smooth and spreadable. If the frosting seems too thin, add more sugar; if too thick, add a teaspoon of milk.
Once the cakes are completely cool, pipe or spread the frosting onto each mini cake. You can use a piping bag with a star tip for a pretty swirl, or simply spread with a small knife. Serve immediately or refrigerate until ready to serve.
Notes & Tips
-
1
These freeze beautifully without the frosting. Wrap tightly and freeze for up to 2 months.
-
2
For neater frosting, chill the frosted cakes for 15 minutes to set the frosting before serving.
-
3
If you don't have mini muffin pans, you can use regular muffin tins - just increase baking time to 18-20 minutes.
 Desserts
Easy Ice Cream Sandwich Cake
Cool, creamy ice cream sandwich cake that's simple, fun, and perfect for any sweet craving.
Tools You'll Need
-
Mini muffin pan (24-cup)
-
Mixing bowls
-
Whisk
-
Spatula
-
Electric mixer
-
Measuring cups and spoons
-
Wire rack
-
Piping bag (optional)
Must-Know Tips
-
Room temperature ingredients are crucial for proper mixing and texture
-
Don't overmix the batter - stir until just combined
-
Test for doneness a minute early - mini cakes bake quickly
-
Let cakes cool completely before frosting to prevent melting
Professional Secrets
-
Sift your dry ingredients for the lightest texture
-
Use a cookie scoop for evenly sized mini cakes
-
Chill the frosted cakes briefly to set the frosting
-
Add a pinch of salt to the frosting to balance the sweetness

Recipe by
Mason Cole“Sweet cravings are my specialty! I turn sugar, chocolate, and imagination into pure dessert magic.” 🍰✨
Get Delicious Recipes Weekly
Join 25,000+ home cooks getting our best recipes straight to their inbox.
Free forever • No spam • Unsubscribe anytime