
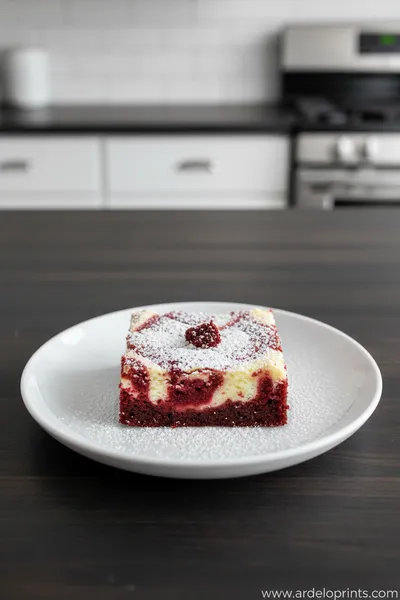
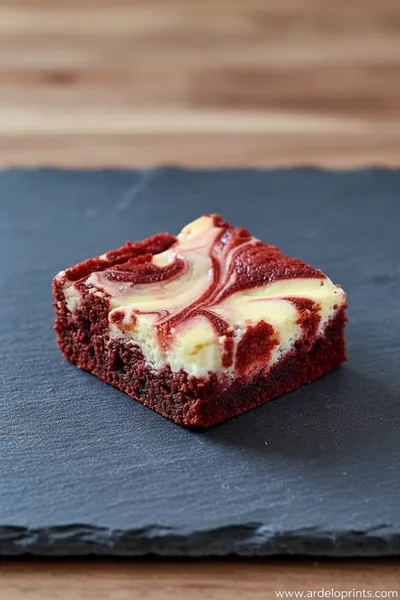
Red velvet's origins trace back to the early 1900s, when bakers discovered that the reaction between natural cocoa powder and acidic ingredients like buttermilk created a distinctive reddish hue. Combined with the rich tradition of cheesecake dating back to ancient Greece, these brownies represent a modern fusion of two timeless classics. The marbled effect created by swirling cheesecake into red velvet batter is both visually stunning and delightfully textured.
Why You'll Love It
-
The stunning marbled appearance makes them perfect for holidays and special occasions
-
You get two desserts in one - rich brownie base with creamy cheesecake swirls
-
They're surprisingly easy to make despite looking impressively fancy
-
The tangy cream cheese balances the sweetness of the red velvet perfectly
"I've never had a dessert disappear so quickly at a gathering! The creamy cheesecake swirls perfectly complement the rich red velvet base."
Essential Ingredient Guide
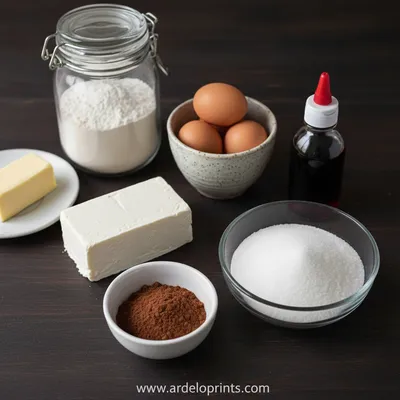
- Cream cheese: Use full-fat cream cheese at room temperature for the smoothest, creamiest swirls that won't sink into the brownie batter.
- Cocoa powder: Natural cocoa powder works best for that authentic red velvet flavor and helps create the signature color reaction.
- Buttermilk: The acidity in buttermilk tenderizes the crumb and reacts with the cocoa to enhance the red hue.
- Red food coloring: While traditional red velvet gets color from the cocoa reaction, a little food coloring ensures that vibrant red we all love.
- Vanilla extract: Use pure vanilla for the best flavor - it enhances both the chocolate notes and the creamy cheesecake elements.
- Eggs: Room temperature eggs incorporate better into both batters for a smooth, even texture throughout.
 Desserts
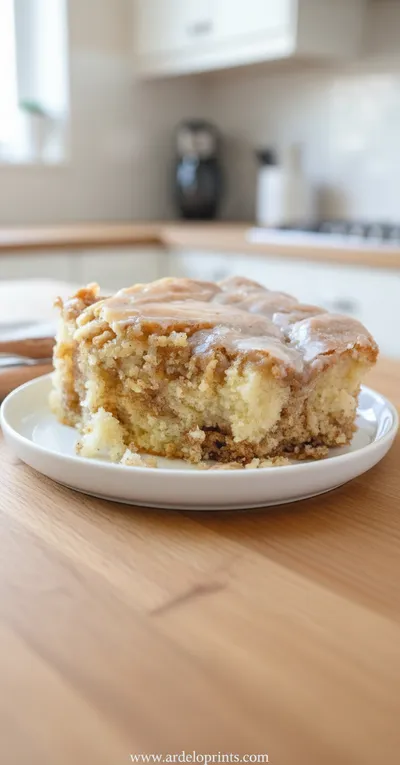
Cinnamon Roll Cake Recipe
Fluffy cinnamon roll cake with caramelized swirl, ideal for breakfast or snack.
Complete Cooking Process
-
Ingredient Readiness:
Having everything at room temperature is crucial here. Cold cream cheese will create lumps in your cheesecake swirl, and cold eggs won't incorporate smoothly into the brownie batter. I usually take everything out about an hour before I start baking. It makes such a difference in how the batters come together.
-
Flavor Development:
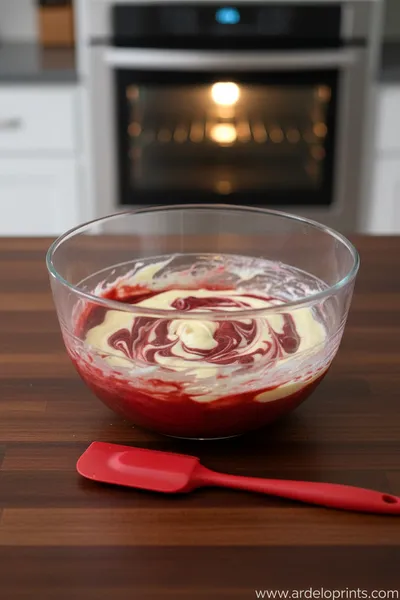
The magic happens when the cocoa powder meets the buttermilk and vinegar - that's where you get that distinct red velvet flavor. And when you swirl the cheesecake through, each bite becomes a little surprise of tangy creaminess against the rich chocolate background.
-
Texture Control:
Don't overmix the brownie batter - you want it to be fudgy, not cakey. And when swirling the cheesecake, use a light hand. You want ribbons, not a blended mess. I use a butter knife and make about 4-5 passes through the pan, no more.
-
Finishing Touches:
The toothpick test can be tricky with these since you have two different textures. Look for the edges to be set and the center to have just a slight jiggle. They'll continue cooking as they cool in the pan.
-
Serving Timing:
These are actually best the next day, after the flavors have melded together beautifully. But honestly, waiting is the hardest part - the aroma filling your kitchen is almost too much to bear.
-
Line your pan with parchment paper with overhanging edges for easy removal
-
Use a light touch when swirling - think gentle figure eights rather than vigorous mixing
-
Let them cool completely before cutting for clean, beautiful slices
-
Chill in the refrigerator for 30 minutes before slicing if you want super sharp edges
Pro Tips
I've made these brownies more times than I can count, and each time I'm reminded how something so impressive can be so approachable. The first time I tried them, I was honestly nervous about the swirling technique, but it's really quite forgiving. The key is to trust the process and not overthink it.
What I love most is how these brownies feel both fancy and comforting at the same time. They're perfect for when you want to make something special without spending hours in the kitchen. The contrast between the rich red velvet and the creamy cheesecake is just wonderful - it's like having your cake and eating it too, literally.
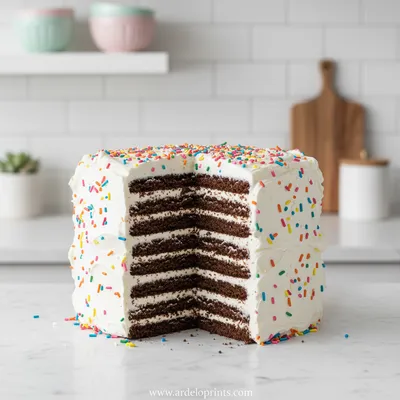 Desserts
Easy Ice Cream Sandwich Cake
Cool, creamy ice cream sandwich cake that's simple, fun, and perfect for any sweet craving.
The essence of the dish:
It's that magical moment when your fork cuts through the creamy cheesecake swirl and hits the fudgy red velvet base. The way the tangy cream cheese balances the sweetness, creating this perfect harmony in every bite. It's celebration food that feels like a warm hug.
A fun fact or historical angle:
Red velvet cake became particularly popular during the Great Depression, when bakeries would use beet juice to enhance the color and add moisture to cakes when ingredients were scarce. The combination with cheesecake is a more modern innovation that showcases how classic desserts evolve.
Flavor or sensory focus:
You'll notice the rich chocolate aroma first, then the slight tang from the cream cheese, and finally that beautiful moist crumb that just melts in your mouth. The visual marbling is almost as satisfying as the taste itself.
You Must Know
-
Don't skip the buttermilk - it's essential for authentic red velvet flavor
-
Room temperature ingredients are non-negotiable for smooth batters
-
Use a light hand when swirling to maintain distinct layers
-
Allow proper cooling time for the best texture and clean cuts
Frequently Asked Questions
→ Can I make these without food coloring?
Absolutely! The red velvet flavor will still be there, but the color will be more of a reddish-brown. You could try using beet powder for natural coloring if you prefer to avoid food dyes.
→ How do I get clean slices?
Chill the brownies completely, then use a sharp knife dipped in hot water and wiped clean between each cut. The cold helps the cheesecake layer firm up for neater slices.
→ Can I freeze these brownies?
Yes, they freeze beautifully! Wrap individual portions tightly in plastic wrap and then foil. They'll keep for up to 3 months. Thaw in the refrigerator overnight.
→ Why did my cheesecake swirl sink?
This usually happens if the cream cheese mixture is too thin or if you overmix it into the batter. Make sure your cream cheese is properly softened but not warm, and swirl gently.
→ Can I use Greek yogurt instead of buttermilk?
You can, but thin it with a little milk first. The texture might be slightly different, but it will work in a pinch.
→ How long do these keep fresh?
They'll stay fresh in an airtight container in the refrigerator for about 5 days. The flavor actually improves after a day or two as everything melds together.
Nutrition Facts
per serving
285
Calories
4g
Protein
34g
Carbs
16g
Fat
Taste Profile
Rich chocolate flavor balanced by tangy cream cheese with a perfect sweetness level
Ingredient Substitutions
Don't have an ingredient? Try these alternatives
Use ¼ cup yogurt mixed with 1 tablespoon milk to achieve similar consistency
Will create a richer, slightly sweeter cheesecake swirl
Works perfectly for gluten-free adaptation without other changes
Recipe Variations
Try these delicious twists on the original
Chocolate Chip Version
Add ½ cup of semi-sweet chocolate chips to the red velvet batter for extra chocolate richness
Nutty Crunch
Sprinkle chopped pecans or walnuts over the top before baking for texture contrast
White Chocolate Drizzle
Melt white chocolate and drizzle over the cooled brownies for an elegant finish
Common Mistakes to Avoid
Learn from others' mistakes for perfect results
- Using cold ingredients leads to lumpy batters
- Overmixing the brownie batter makes them tough
- Swirling too vigorously blends the layers instead of creating ribbons
- Overbaking results in dry brownies - remember they continue cooking as they cool
Meal Prep & Storage
Make Ahead Tips
You can prepare the batters up to a day ahead and keep them covered in the refrigerator. Let them come to room temperature before assembling and baking. The baked brownies also improve with a day of resting.
Leftover Ideas
Leftovers keep beautifully in the refrigerator. They're actually delicious cold, but you can also warm them slightly in the microwave for 10-15 seconds if you prefer them warm.
Perfect Pairings
Serve this with...
Cooking Timeline
Prep ingredients and line baking pan with parchment paper
Prepare red velvet batter and cheesecake swirl mixture
Layer and swirl the batters in the prepared pan
Bake until set and cool completely before slicing
Chill if desired for cleaner slices, then serve and enjoy
Red Velvet Cheesecake Brownies
These rich red velvet cheesecake brownies combine two beloved desserts into one decadent and festive treat that's perfect for celebrations or when you want something special.
Timing
Prep Time
20 Minutes
Cook Time
35 Minutes
Total Time
55 Minutes
Recipe Details
Ingredients
Red Velvet Brownie Layer
-
01
1 cup unsalted butter, melted and cooled
-
02
1 ½ cups granulated sugar
-
03
2 large eggs, room temperature
-
04
1 teaspoon vanilla extract
-
05
1 tablespoon red food coloring
-
06
¼ cup buttermilk, room temperature
-
07
1 ¼ cups all-purpose flour
-
08
½ cup natural cocoa powder
-
09
¼ teaspoon salt
-
10
½ teaspoon baking powder
Cheesecake Swirl
-
01
8 ounces cream cheese, softened
-
02
¼ cup granulated sugar
-
03
1 large egg, room temperature
-
04
½ teaspoon vanilla extract
Instructions
Preheat your oven to 350°F (175°C). Line an 8x8 inch baking pan with parchment paper, leaving some overhang on two sides for easy removal. This little trick saves so much frustration later, trust me.
Start with the red velvet layer: In a medium bowl, whisk together the melted butter and sugar until well combined. Add the eggs one at a time, mixing well after each addition. Stir in the vanilla and red food coloring. The color should be vibrant and beautiful already.
In a separate bowl, whisk together the flour, cocoa powder, salt, and baking powder. Gradually add this to the wet ingredients, mixing until just combined. Stir in the buttermilk until the batter is smooth. Don't overmix here - we want fudgy brownies, not tough ones.
For the cheesecake swirl: In another bowl, beat the softened cream cheese until smooth. Add the sugar, egg, and vanilla, and mix until creamy and well combined. No lumps should remain.
Spread about two-thirds of the red velvet batter into your prepared pan. Dollop the cheesecake mixture over the top, then spoon the remaining red velvet batter around. Now for the fun part: take a butter knife and gently swirl through the batters to create a marbled effect. Remember, light touches work best.
Bake for 30-35 minutes, or until the edges are set and the center has just a slight jiggle. A toothpick inserted should come out with moist crumbs, not wet batter. The aroma filling your kitchen will be absolutely heavenly.
Allow the brownies to cool completely in the pan on a wire rack. This is crucial for the texture to set properly. Once cooled, use the parchment paper to lift them out before cutting into squares.
Notes & Tips
-
1
For neater slices, chill the brownies for 30 minutes before cutting
-
2
You can use either liquid or gel food coloring - gel will give you a more vibrant color with less product
-
3
These taste even better the next day after the flavors have had time to meld
-
4
If you don't have buttermilk, you can make a substitute by adding 1 teaspoon of vinegar to ¼ cup of milk and letting it sit for 5 minutes
 Desserts
Strawberry Puff Pastry Danishes Recipe
Flaky puff pastry filled with sweet strawberry filling, perfect for a special breakfast or dessert.
Tools You'll Need
-
8x8 inch baking pan
-
Parchment paper
-
Mixing bowls
-
Whisk
-
Electric mixer (optional but helpful for cream cheese)
-
Measuring cups and spoons
-
Rubber spatula
-
Butter knife for swirling
Must-Know Tips
-
Room temperature ingredients are essential for smooth batters - plan ahead
-
Don't overbake - the brownies will continue to set as they cool
-
Use a light hand when swirling to maintain the distinct layers
-
Line your pan properly for easy removal and clean up
Professional Secrets
-
Sift your cocoa powder to avoid lumps in the batter
-
Chill the pan of brownies before cutting for picture-perfect slices
-
Use an offset spatula to spread the batters evenly in the pan
-
Rotate the pan halfway through baking for even cooking

Recipe by
Mason Cole“Sweet cravings are my specialty! I turn sugar, chocolate, and imagination into pure dessert magic.” 🍰✨
Get Delicious Recipes Weekly
Join 25,000+ home cooks getting our best recipes straight to their inbox.
Free forever • No spam • Unsubscribe anytime