
The tradition of serving sweetmeats and confections on elaborate platters dates back centuries to royal courts and celebratory feasts. Originally a display of wealth and hospitality, today's sweet boards capture that same spirit of generosity and celebration. From medieval banquet tables to modern party platters, the art of presenting sweets in an appealing arrangement has always brought people together. This tradition evolved through Renaissance sugar sculptures and Victorian dessert tables, ultimately becoming the accessible, beautiful snack boards we enjoy today.
Why You'll Love It
-
Beautiful presentation that wows guests with minimal effort
-
Customizable to suit any taste or dietary preference
-
Perfect for feeding crowds without constant kitchen work
-
Combines sweet and savory elements for balanced snacking
"This snack board was the star of our party! Everyone kept coming back for more of the delicious treats."
Essential Ingredient Guide
- Fresh fruits: Choose seasonal fruits with vibrant colors - berries, grapes, and sliced apples add freshness and visual appeal
- Assorted cheeses: Select a mix of soft and hard cheeses for variety - brie, cheddar, and gouda offer different textures and flavors
- Sweet spreads: Honey, chocolate spread, or fruit preserves add delicious dipping options and sweet richness
- Nuts and dried fruits: Provide crunch and chewiness - almonds, walnuts, and dried apricots work beautifully
- Cookies and crackers: Offer both sweet and neutral bases for building bites - choose varieties that complement your other ingredients
- Small chocolates: Use quality chocolate pieces for that final sweet touch that makes the board feel special
Complete Cooking Process
-
Ingredient Readiness:
All components should be at room temperature before arranging. Cheeses spread better, fruits taste sweeter, and chocolates have the perfect texture when not too cold.
-
Flavor Development:
The magic happens as flavors mingle on the board - sweet fruits balance salty cheeses, while nuts add earthy notes that tie everything together beautifully.
-
Texture Control:
Strategic placement prevents sogginess - keep crisp crackers separate from juicy fruits, and arrange soft cheeses away from items that might make them weep.
-
Finishing Touches:
Just before serving, drizzle honey over cheeses, sprinkle sea salt on chocolate, and add fresh herb sprigs for that final professional touch.
-
Serving Timing:
Assemble the board about 30 minutes before guests arrive - this allows flavors to develop while keeping everything fresh and appealing.
-
Start with your largest items first as anchors
-
Create visual flow by repeating colors throughout
-
Leave small bowls for spreads to contain drips
-
Add height with stacked items for dimension
Pro Tips
I've found that the key to a beautiful board is thinking about it like you're painting a picture. You want colors to flow naturally, textures to complement each other, and little surprises tucked in for discovery. Don't worry about perfection - sometimes the most charming arrangements happen when you let things fall naturally.
Another thing I've learned over the years is that people love having choices. When I make my Halloween dinner spread, I always include plenty of options so everyone finds something they enjoy. The same principle applies here - variety is what makes a snack board truly special.
 Snacks
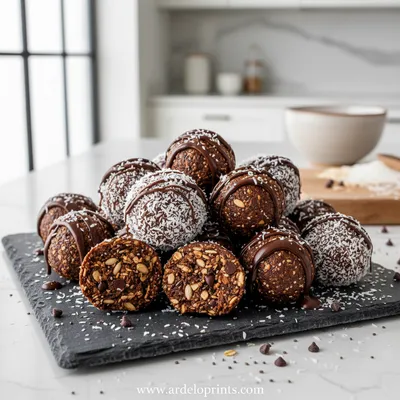
Chocolate Coconut Energy Balls Recipe
Healthy no-bake snacks combining rich chocolate flavor with coconut goodness for quick energy boosts.
The essence of the dish
What makes this sweet snack board truly special is how it transforms simple ingredients into a celebratory experience. It's not just about the food - it's about creating a centerpiece that invites conversation, encourages sharing, and makes everyone feel welcomed. The beauty lies in the combination of colors, textures, and flavors arranged with care.
A fun fact or historical angle
The concept of serving assorted sweets on platters dates back to medieval times when wealthy households would display 'subtleties' - elaborate sugar sculptures and sweetmeats meant to impress guests between courses.
Flavor or sensory focus
Your guests will notice the delightful contrast between creamy cheeses and crisp fruits, the way sweet chocolate melts against salty nuts, and the visual feast of vibrant colors arranged artfully across the board.
You Must Know
-
Room temperature ingredients taste best and have ideal textures
-
Arrange from largest to smallest items for visual balance
-
Include something for every taste preference
-
Leave space between items for easy grabbing
Frequently Asked Questions
→ How far in advance can I assemble the snack board?
You can prep components up to a day ahead, but assemble the full board about 30 minutes before serving to keep everything fresh and prevent sogginess.
→ What's the best board size to use?
For 6-8 people, a 12x18 inch board works well. For larger crowds, use multiple smaller boards or one very large platter.
→ How do I keep fruits from browning?
Toss apple and pear slices with a little lemon juice, and add delicate berries just before serving to maintain their perfect condition.
→ Can I make this board ahead for a party?
Absolutely! Prepare all components and store them separately, then arrange everything about 30 minutes before your guests arrive.
→ What if I have guests with allergies?
Keep common allergens in separate sections and label them. You can also create a small separate board for specific dietary needs.
→ How much should I make per person?
Plan for about 4-6 ounces of food per person if this is an appetizer, or 8-10 ounces if it's the main focus of your gathering.
Nutrition Facts
per serving
280
Calories
8g
Protein
32g
Carbs
15g
Fat
Taste Profile
Sweet with balanced salty and creamy notes
Ingredient Substitutions
Don't have an ingredient? Try these alternatives
Similar creamy texture with slight flavor variations
Choose another firm cheese that cubes well
Recipe Variations
Try these delicious twists on the original
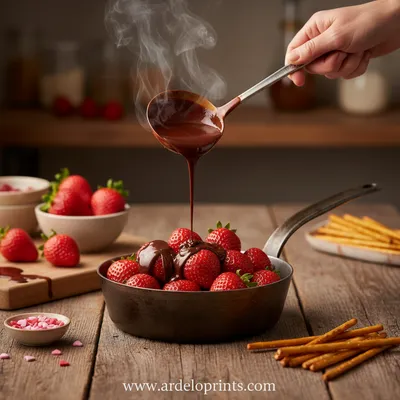
Chocolate Lover's Board
Focus on chocolate-dipped fruits, brownie bites, chocolate bars, and chocolate-covered nuts
Seasonal Fruit Board
Feature fruits currently in season with complementary cheeses and minimal added sweets
Common Mistakes to Avoid
Learn from others' mistakes for perfect results
- Overcrowding the board making it difficult to access items
- Using fruits that release too much juice onto other components
- Not considering dietary restrictions of guests
- Arranging items without considering color balance
Meal Prep & Storage
Make Ahead Tips
You can wash and dry fruits, cube cheeses, and prepare all components up to 24 hours ahead. Store separately in airtight containers in refrigerator
Leftover Ideas
Disassemble the board and store components separately. Fruits and cheeses will keep for 2-3 days refrigerated
Perfect Pairings
Serve this with...
Cooking Timeline
Shop for ingredients, wash fruits, cube cheeses
Remove cheeses from refrigerator to come to room temperature
Slice apples and pears, assemble the complete board
Serve immediately to guests
 Lunch
Lunch
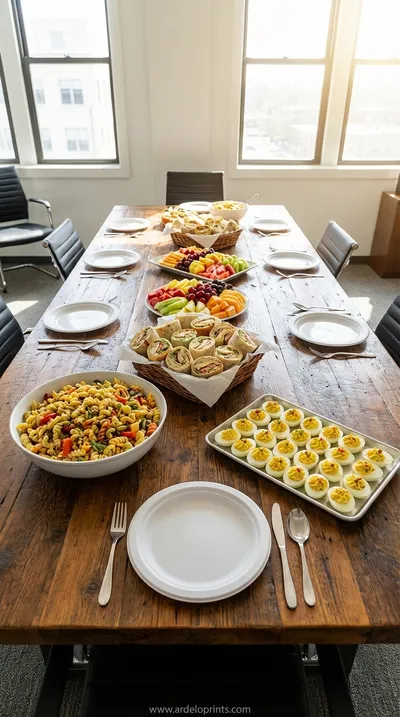
Perfect Potluck Pasta Salad
Colorful pasta salad loaded with crisp vegetables and tangy dressing. Always a hit!
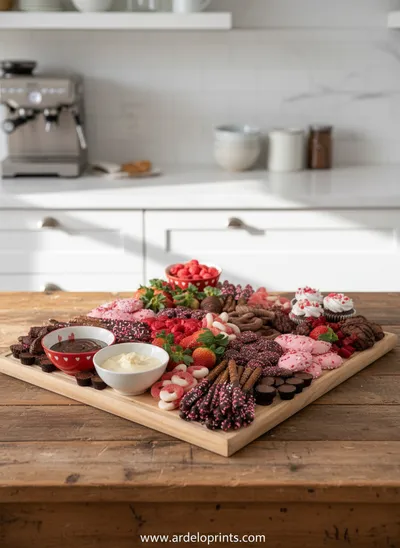
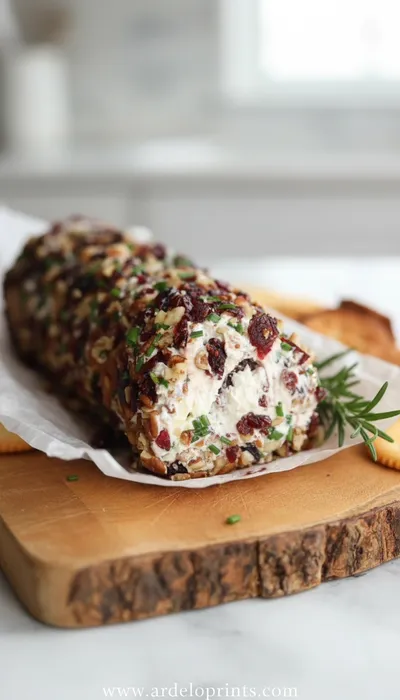
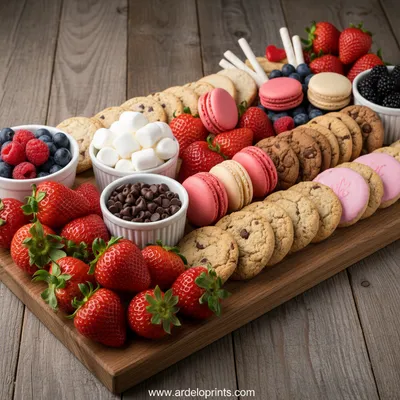
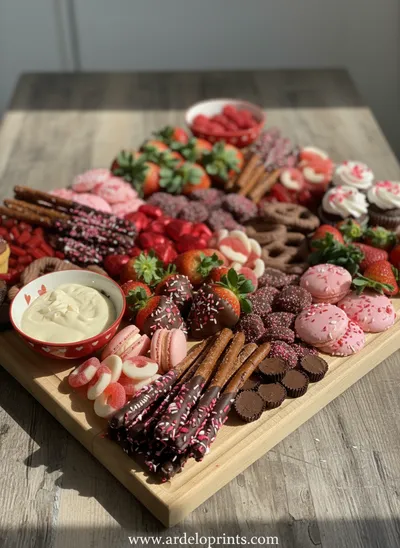
Sweet Snack Board: Easy Party Platter Ideas
Create a stunning sweet snack board loaded with delicious treats perfect for parties and gatherings. This beautiful platter combines fruits, cheeses, cookies, and candies in an artful arrangement that will delight all your guests.
Timing
Prep Time
20 Minutes
Cook Time
0 Minutes
Total Time
20 Minutes
Recipe Details
Ingredients
Fresh Fruits
-
01
2 cups mixed berries (strawberries, raspberries, blueberries)
-
02
1 bunch red grapes
-
03
2 apples, sliced
-
04
1 pear, sliced
-
05
1 cup cherries
Cheeses
-
01
8 oz brie cheese, wheel
-
02
6 oz cheddar cheese, cubed
-
03
4 oz gouda cheese, sliced
-
04
4 oz goat cheese log
Sweet Components
-
01
1/2 cup mixed chocolates
-
02
1/2 cup chocolate-covered pretzels
-
03
1/2 cup biscotti cookies
-
04
1/4 cup honey for drizzling
-
05
1/4 cup fruit preserves
Crunchy Elements
-
01
1/2 cup mixed nuts (almonds, walnuts)
-
02
1/2 cup dried fruits (apricots, dates)
-
03
Assorted crackers
-
04
1/2 cup granola clusters
Instructions
Start by placing your largest items as anchors. Position the brie wheel, cheese cubes, and small bowls for honey and preserves around the board, spacing them evenly to create balance.
Arrange your fresh fruits in clusters around the cheeses. Group berries together, create grape bunches, and fan out apple and pear slices. Leave some space between fruit groups for other components.
Fill in the gaps with your crunchy elements. Scatter nuts and dried fruits throughout, place crackers in open areas, and tuck chocolate-covered pretzels and biscotti where they fit naturally.
Add your final touches - place chocolate pieces strategically, drizzle honey over the brie, and sprinkle the granola clusters. Step back and adjust any items that need better visual balance.
Let the board sit at room temperature for about 20 minutes before serving. This allows cheeses to soften and flavors to meld beautifully together.
Notes & Tips
-
1
Use seasonal fruits for the best flavor and value
-
2
Keep nut allergies in mind - you can create a separate nut-free section
-
3
The board can be customized for any theme or holiday
-
4
Have small plates and napkins available for guests
 Snacks
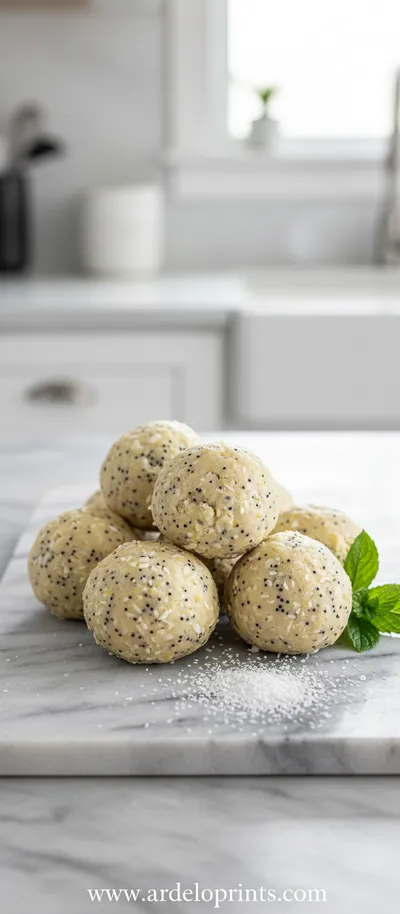
No-Bake Lemon Poppyseed Protein Balls Recipe
A healthy, energy-boosting snack that's quick to make and perfect for any time of day.
Tools You'll Need
-
Large wooden board or platter
-
Small bowls for spreads
-
Cheese knife
-
Serving utensils
-
Cutting board
-
Sharp knife for fruit slicing
Must-Know Tips
-
Arrange from center outward for the most pleasing presentation
-
Mix textures and colors throughout for visual interest
-
Include both sweet and slightly savory elements for balance
-
Don't overcrowd - leave some breathing space between items
Professional Secrets
-
Room temperature cheeses, Much better flavor and spreadability
-
Odd numbers arrangement, Creates more visual appeal
-
Height variation, Use small bowls or stack items for dimension
-
Color repetition, Tie the board together with repeated hues

Recipe by
Lily_HarperFrom crispy bites to soft nibbles, I’m all about snack-time happiness made simple and delicious.
Get Delicious Recipes Weekly
Join 25,000+ home cooks getting our best recipes straight to their inbox.
Free forever • No spam • Unsubscribe anytime