I remember making these with my kids when they were little. Their eyes would light up with that perfect mix of delight and a tiny bit of fright, especially when we pushed in the almond 'nails.' It's one of those recipes that feels like pure magic, transforming simple bread into something wonderfully creepy. We'd always make a double batch because, well, they're breadsticks! And everyone wants one (or five). It’s moments like these, gathered around the kitchen, that really make the season for me. So much more than just a recipe, you know? It’s about making memories.
Why You'll Love These Spooky Breadsticks
-
They're a total showstopper for any Halloween gathering. People will talk about them!
-
Surprisingly easy to make, even if you're new to working with yeast.
-
The perfect blend of spooky fun and savory deliciousness.
-
You can get the kids involved in shaping them – it’s part of the fun!
-
They pair beautifully with your favorite dipping sauces, like marinara or a creamy garlic dip.
-
Homemade breadsticks always taste better, honestly.
Oh my goodness, these witch finger breadsticks were the absolute hit of our Halloween party! Everyone gasped, then laughed, then devoured them. So clever and truly delicious. I'm already planning to make them again next year! These are a must-make!
Essential Ingredient Guide
- Active Dry Yeast: Don't be intimidated by yeast! It's what gives these breadsticks their wonderful rise and fluffy texture. Just make sure your water is warm enough (like a baby's bath, not too hot, not too cold!) to wake it up and get it foamy. That's your green light!
- All-Purpose Flour: The backbone of our breadsticks. No need for anything fancy, just good old all-purpose. Measure it correctly – I usually spoon it into the measuring cup and level it off – to keep things balanced and your dough just right.
- Almond Slices: These are absolutely key for the 'fingernail' effect! They toast up beautifully in the oven and add a lovely nutty crunch. You can use blanched (skinless) or unblanched, whatever you prefer aesthetically for your witchy look.
- Garlic Powder & Parmesan Cheese: For that irresistible savory flavor. These really make the breadsticks taste like a treat, not just a prop. Freshly grated Parmesan always wins for flavor and melt, honestly, so try to use that if you can.
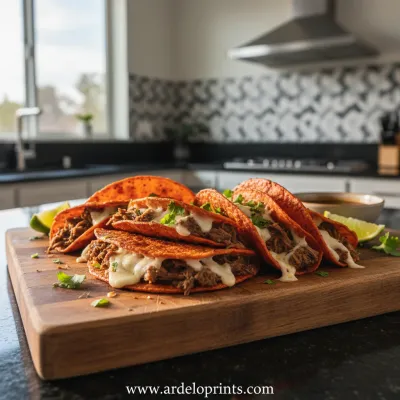
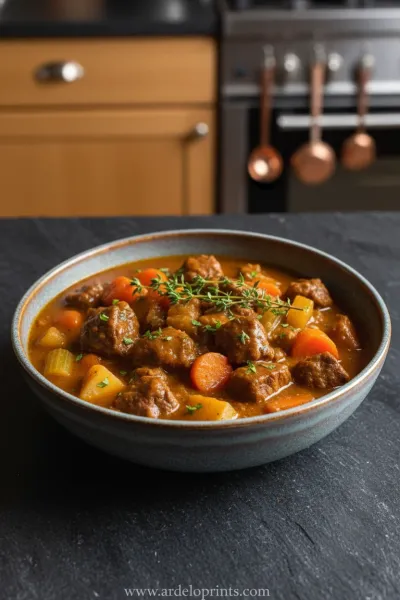
Birria Tacos: Easy & Flavorful Recipe
Tender, slow-braised beef tacos pan-fried to perfection with a rich, savory consomé for dipping.
Complete Cooking Process
-
Activate the Yeast and Mix the Dough:
-
Combine warm water, sugar, and yeast in a bowl. Wait for it to get foamy.
-
Stir in olive oil and salt.
-
Gradually add flour and knead until smooth and elastic. Don't rush it!
-
-
Let the Dough Rise:
-
Lightly grease a bowl with olive oil.
-
Place dough in the bowl, cover, and let rise in a warm spot for about an hour, until doubled. This is the relaxing part!
-
-
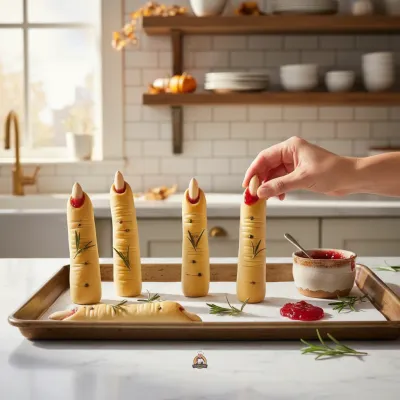
Shape Your Witch Fingers:
-
Gently punch down the dough. You'll hear the air escape, it's satisfying!
-
Divide dough into 12-16 pieces.
-
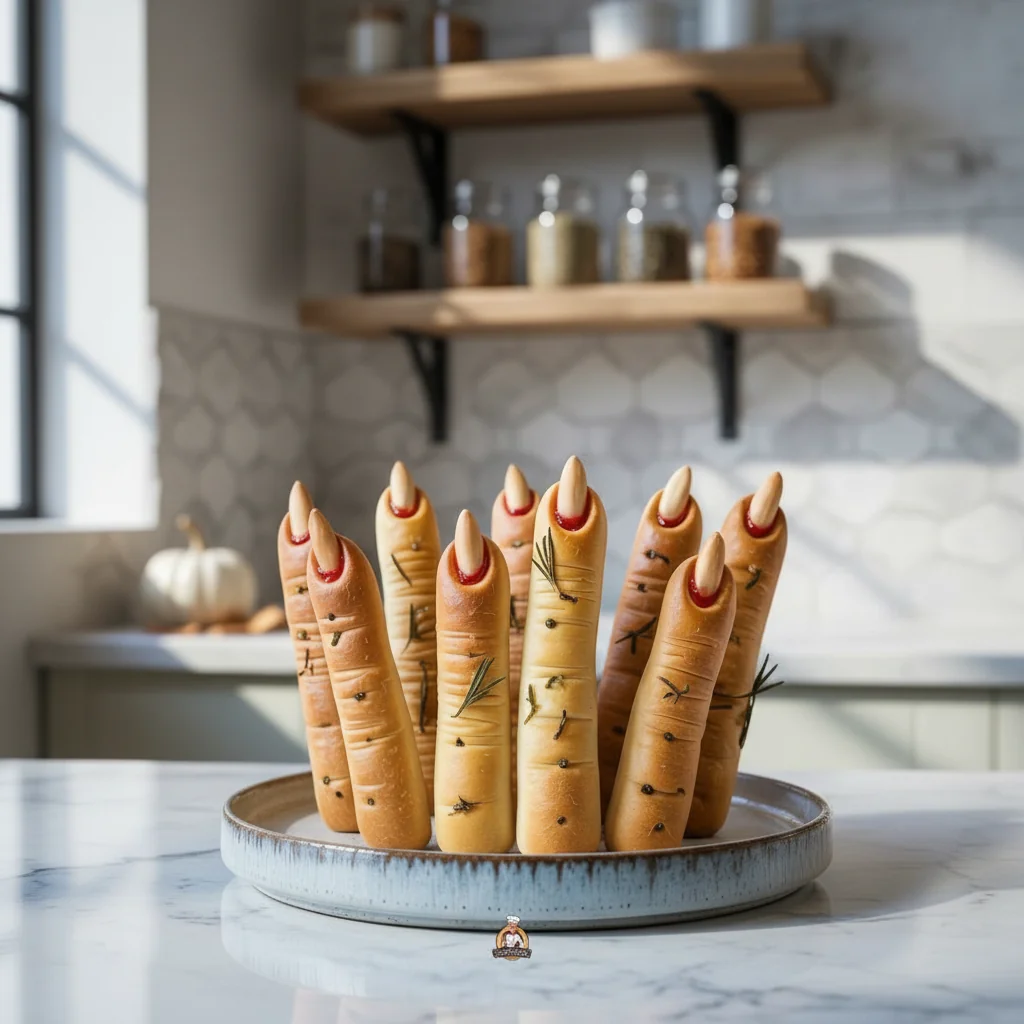
Roll each piece into a finger shape, making them a bit knobby and imperfect, that's the charm!
-
Press almond slices onto one end for the 'fingernails.'
-
Make two indentations per 'finger' for knuckles using a knife or your thumb.
-
-
Bake to Spooky Perfection:
-
Preheat oven and line baking sheets with parchment paper.
-
Brush breadsticks with olive oil and garlic powder mixture.
-
Sprinkle with Parmesan and herbs, if you like.
-
Bake until golden brown. Keep an eye on them, ovens vary!
-
Cool slightly and serve. Wow, look at those!
-
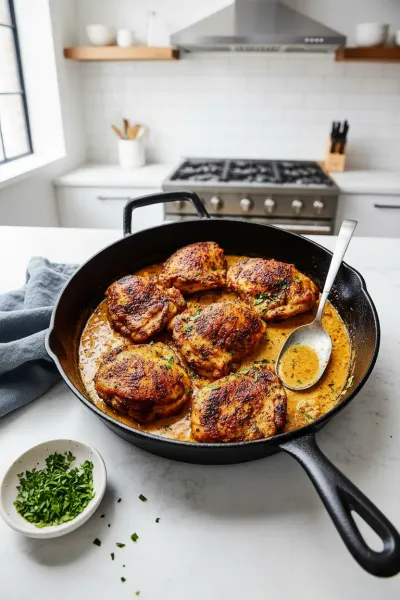
Easy Skillet Chicken Thighs Recipe
Garlic cream sauce skillet chicken thighs for a delicious and simple weeknight dinner.
Frequently Asked Questions About Witch Finger Breadsticks
→ Can I make the dough ahead of time?
Yes, absolutely! You can prepare the dough through the first rise, then punch it down, wrap it tightly, and refrigerate for up to 24 hours. Let it come to room temperature for about 30 minutes before shaping and baking. Super convenient for party planning!
→ What kind of dipping sauce should I use?
Marinara sauce is a classic choice and looks delightfully gruesome for dipping! A creamy garlic Parmesan dip, or even a simple olive oil with balsamic vinegar, would also be fantastic. Get creative!
→ How do I get the 'knuckle' look?
After rolling your dough into finger shapes, simply use the side of a butter knife or your thumb to gently press two indentations into each 'finger,' about a third of the way down from each end. Don't cut through, just create a slight crease. It really sells the effect!
→ Can I make these sweet instead?
You could totally adapt this! Instead of savory toppings, brush with melted butter and sprinkle with cinnamon sugar. For the 'nails,' you could use slivered almonds still, or even a small chocolate chip pressed in. Yum!
→ Are there any substitutions for almonds?
If you have an almond allergy, you can use a pumpkin seed or even a small piece of red bell pepper cut into a nail shape. Get creative with what you have! The goal is just to add that little 'fingernail' touch.
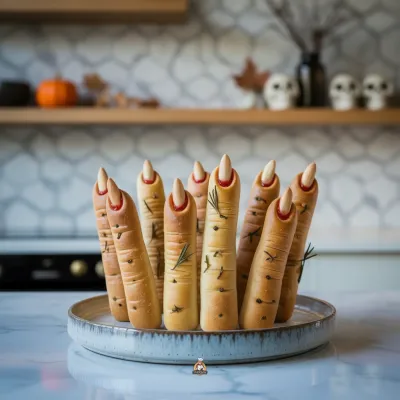
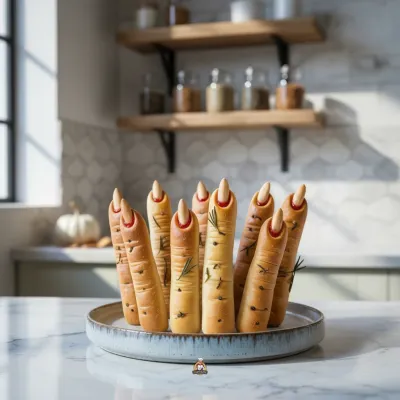
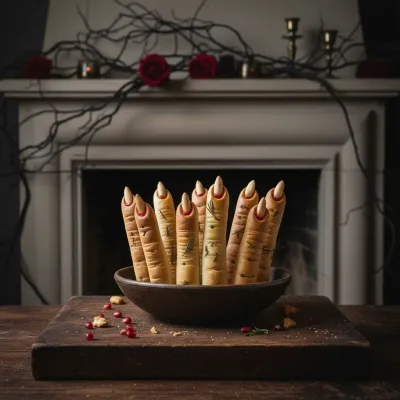
Witch Finger Breadsticks: Spooky Halloween Snack
Make spooky witch finger breadsticks for Halloween! These homemade breadsticks are easy and fun. A perfect eerie snack for your next party.
Timing
Prep Time
30 minutes
Cook Time
15-18 minutes
Total Time
1 hour 30 minutes (includes rise time)
Recipe Details
Ingredients
For the Dough
-
01
1 cup warm water (105-115°F / 40-46°C)
-
02
2 1/4 teaspoons active dry yeast (one standard packet)
-
03
1 teaspoon granulated sugar
-
04
2 1/2 - 3 cups all-purpose flour, plus more for dusting
-
05
2 tablespoons olive oil, plus more for greasing
-
06
1 teaspoon salt
For Topping & Decoration
-
01
2 tablespoons olive oil, or melted butter
-
02
1/2 teaspoon garlic powder
-
03
1/4 cup grated Parmesan cheese (optional)
-
04
12-16 blanched or unblanched almond slices (for 'fingernails')
-
05
Pinch of dried parsley or Italian seasoning (optional)
Instructions
In a large bowl, combine the warm water, sugar, and yeast. Let it sit for 5-10 minutes until foamy. This means your yeast is active! Yay!
Stir in the 2 tablespoons of olive oil and salt. Gradually add 2 1/2 cups of flour, mixing until a shaggy dough forms. Turn the dough out onto a lightly floured surface.
Knead the dough for 5-7 minutes, adding more flour a tablespoon at a time if the dough is too sticky, until it's smooth and elastic. It should spring back when you poke it. Don't add too much flour, though!
Lightly grease a clean bowl with olive oil. Place the dough in the bowl, turning to coat. Cover with plastic wrap or a damp kitchen towel and let it rise in a warm place for about 1 hour, or until doubled in size. This is where the magic happens!
Once risen, gently punch down the dough to release the air. Preheat your oven to 375°F (190°C) and line two baking sheets with parchment paper.
Divide the dough into 12-16 equal pieces. Roll each piece into a 'finger' shape, about 6-8 inches long. Try to make them a bit uneven and knobby, like real fingers! Place them on the prepared baking sheets.
To create knuckles, gently indent each 'finger' in two places with the side of a knife or your thumb. Don't cut through, just make little dimples. For a gruesome touch, press an almond slice firmly onto one end of each finger to create a 'fingernail.'
In a small bowl, whisk together the remaining 2 tablespoons of olive oil (or melted butter) and garlic powder. Brush this mixture over each breadstick. If using, sprinkle with Parmesan cheese and dried herbs.
Bake for 15-18 minutes, or until golden brown and cooked through. Keep an eye on them so they don't get too dark! Let them cool slightly before serving. They're deliciously spooky!
Notes & Tips
-
1
If you don't have active dry yeast, you can use instant yeast; just mix it directly with the flour.
-
2
For a richer flavor, replace a tablespoon of water with milk in the dough.
-
3
A small amount of grated onion or onion powder can be added to the savory topping for extra zing.
-
4
These are so fun to make with kids – let them help with the shaping!
-
5
Don't worry if they're not perfect; the more misshapen, the spookier they look!
Easy Slow Cooker Pot Roast
The ultimate set-it-and-forget-it meal. Tender beef and hearty vegetables simmered to perfection in the slow cooker.
Tools You'll Need
-
Large mixing bowl
-
Measuring cups and spoons
-
Dough scraper (optional, but handy!)
-
Plastic wrap or kitchen towel
-
Baking sheets
-
Parchment paper
-
Small bowl for brushing oil
-
Pastry brush or spoon
Must-Know Tips
-
Ensure your water is the correct temperature for the yeast – too hot will kill it, too cold won't activate it.
-
Don't add too much flour during kneading; the dough should be slightly tacky but not sticky.
-
For extra 'gnarled' fingers, pinch and twist parts of the dough as you roll it out.
-
Press the almond 'nail' in firmly so it doesn't fall off during baking.
-
Vary the sizes and shapes of your fingers for a more realistic, eerie look – perfect imperfections!
Professional Secrets
-
For an extra ghoulish touch, add a tiny drop of green or purple food coloring to the dough mixture. Just a hint!
-
After baking, brush the breadsticks with a mixture of melted butter, fresh minced garlic, and a pinch of dried parsley for an irresistible aroma and taste.
-
For a truly gruesome serving, dip the tips of some breadsticks into marinara sauce right before presenting to mimic fresh 'blood.'
-
Sprinkle a little coarse sea salt on top before baking for a lovely textural crunch and extra flavor.
-
If you want them extra shiny, give them an egg wash (one egg whisked with a tablespoon of water) before the olive oil brush.

Recipe by
Sofia Marin“Dinner is where stories are shared and flavors shine. I craft comforting recipes perfect for family nights.” 🍷🍲
Get Delicious Recipes Weekly
Join 25,000+ home cooks getting our best recipes straight to their inbox.
Free forever • No spam • Unsubscribe anytime