
I remember one crisp autumn afternoon, years ago, when my little ones were just tiny. We'd planned a whole day around baking and decorating Halloween cookies. The kitchen was a sweet mess of flour and powdered sugar, and the air smelled of vanilla and anticipation. My son, bless his heart, tried to make a perfectly symmetrical ghost, and my daughter just splattered orange icing everywhere, giggling. It wasn't about perfection, though. It was about those sticky hands, the shared laughter, and the simple joy of creating something together. Every year, those memories come flooding back, and I still love making these cookies. They're a little piece of home, you know?
Why You'll Adore These Halloween Cookies
-
They're a fantastic activity for all ages, perfect for family bonding or a fun night with friends.
-
The sugar cookies are perfectly tender and hold their shape beautifully—no spreading!
-
Royal icing allows for endless creative and spooky designs.
-
They make incredible party favors or gifts for trick-or-treaters (if you can bear to part with them!).
-
The smell of them baking fills your home with the most wonderful, nostalgic scent.
-
Honestly, they taste as good as they look. That buttery cookie and crisp icing? Yum!
My girlfriends and I made these Halloween cookies for our annual 'ghouls' night, and wow! They were a hit. The recipe is so easy to follow, and the decorating part was just pure fun. We felt like kids again! Absolutely going to be our new tradition.
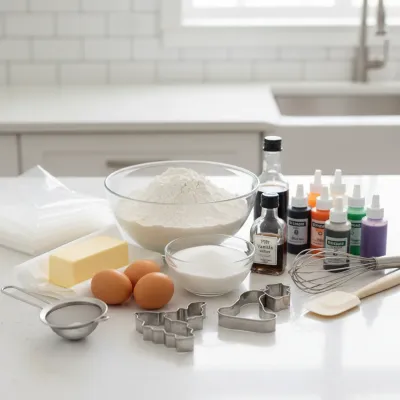
Essential Ingredient Guide
- Unsalted Butter: Make sure it's softened, but not melted! This helps create that light, fluffy texture when creamed with sugar. It's the base of a truly good cookie.
- Granulated Sugar: Don't skimp here; it gives the cookies their perfect sweetness and helps with browning. It's not just a sweetener; it's a structural element too.
- Meringue Powder: This is non-negotiable for royal icing! It provides structure, helps the icing harden, and makes it stable without using raw egg whites. Find it in baking sections of craft stores or specialty food shops.
- Powdered Sugar (Confectioners' Sugar): Sifting is key for a super smooth, lump-free royal icing. It makes all the difference when you're trying to pipe delicate lines. Trust me on this one, it's worth the extra step.
- Gel Food Coloring: Unlike liquid food coloring, gel colors are concentrated and won't thin out your royal icing. You'll get vibrant, rich colors without compromising consistency. A little goes a long way!
Birria Tacos: Easy & Flavorful Recipe
Tender, slow-braised beef tacos pan-fried to perfection with a rich, savory consomé for dipping.
Complete Cooking Process
-
Crafting the Perfect Sugar Cookie Dough:
-
First, you'll cream together the butter and sugar until it's light and airy. This incorporates air, making your cookies tender.
-
Then, gently mix in the eggs and extracts, adding richness and flavor. Vanilla and almond together are just chef's kiss.
-
Combine your dry ingredients separately—flour, baking powder, and salt—then slowly add them to the wet. This prevents overmixing, which can make cookies tough. Nobody wants a tough cookie, right?
-
Divide your dough, wrap it up like little presents, and let it chill. This step is a must for solid cookies that hold their shape beautifully. Patience is a virtue, especially in baking!
-
-
Baking and Cooling Your Spooky Shapes:
-
Once your dough is chilled, roll it out evenly. I always aim for about 1/4 inch thick. This gives a nice, sturdy cookie for decorating.
-
Use your favorite Halloween cookie cutters! Think ghosts, pumpkins, bats, or even little Frankenstein monsters. The kids adore this part.
-
Pop them in the oven until the edges are just barely golden. Pull them out and let them cool completely on a rack. Warm cookies are lovely, but not for icing, oops!
-
-
Mixing Up the Magical Royal Icing:
-
Sift your powdered sugar. Honestly, it makes such a difference for a smooth icing. Then, whisk it with meringue powder.
-
Add warm water and a touch of clear vanilla. Beat it until you have beautiful, stiff, glossy peaks. This is your canvas!
-
Divide the icing and color it with gel food colorings. Think vibrant oranges, deep blacks, ghostly whites, and maybe some ghoulish greens. This is where the artistry really begins.
-
-
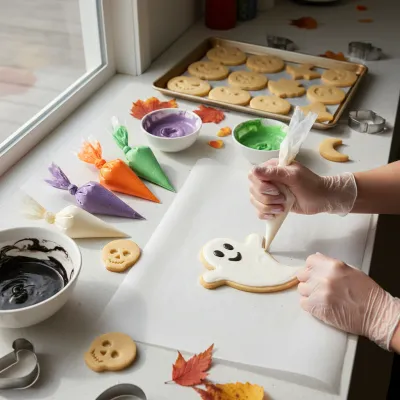
Bringing Your Halloween Creations to Life:
-
First, outline your cooled cookies with a slightly thicker consistency of royal icing. This creates a dam for your flood icing.
-
Once the outline is set (a quick 10-15 minutes), flood the inside with a thinner icing. Use a toothpick to get it all smooth and even. Watching it settle is so satisfying!
-
Let your flooded cookies dry, and I mean really dry, before adding any details. This might be the hardest part, waiting! But it prevents smudges.
-
Finally, get creative with your detail work! Draw faces, spiderwebs, stitches, whatever your spooky heart desires. Embrace the imperfections, that's what makes them charming. These Halloween cookies are meant to be fun, not perfect, yeah?
-
Easy Skillet Chicken Thighs Recipe
Garlic cream sauce skillet chicken thighs for a delicious and simple weeknight dinner.
Your Halloween Cookie Questions, Answered!
→ Can I make the cookie dough ahead of time?
Absolutely! The cookie dough can be made up to 3 days in advance and stored tightly wrapped in the refrigerator. You can even freeze it for up to a month. Just thaw it in the fridge overnight before rolling.
→ What's the best way to get vibrant colors for the icing?
Gel food colorings are your best friend here! They're highly concentrated, so you only need a tiny bit to get bright, rich colors without thinning out your icing. Liquid colors often require too much to achieve the same vibrancy.
→ My royal icing is too thick/thin. How do I fix it?
If it's too thick, add water a tiny drop at a time, stirring well after each addition, until you reach the desired consistency. If it's too thin, add a teaspoon of sifted powdered sugar at a time until it thickens up. It's all about small adjustments!
→ How long do decorated royal icing cookies last?
Once fully dry, royal icing acts as a preservative, so these cookies can last for 2-3 weeks at room temperature in an airtight container. That's pretty amazing, right? Just keep them out of direct sunlight.
→ Can I use butter extract instead of almond extract?
Yes, you can! Or you can just use extra vanilla. The almond extract adds a lovely, subtle depth of flavor that I personally adore, but these Halloween cookies will still be delicious without it.
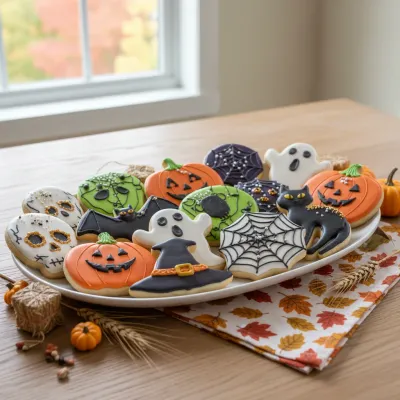
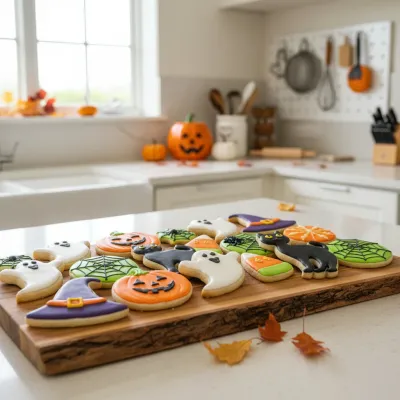
Fun Halloween Cookies Ideas
Fun Halloween cookies ideas with royal icing! These decorated and iced cookies are perfect Halloween treats for baking with friends.
Timing
Prep Time
30 minutes
Cook Time
10-12 minutes
Total Time
2 hours 30 minutes (includes chilling & decorating)
Recipe Details
Ingredients
For the Sugar Cookies
-
01
1 cup (2 sticks) unsalted butter, softened
-
02
1 1/2 cups granulated sugar
-
03
2 large eggs
-
04
1 teaspoon vanilla extract
-
05
1 teaspoon almond extract (optional, but lovely)
-
06
3 cups all-purpose flour
-
07
1 teaspoon baking powder
-
08
1/2 teaspoon salt
For the Royal Icing
-
01
4 cups powdered sugar, sifted
-
02
3 tablespoons meringue powder
-
03
6-8 tablespoons warm water (plus more as needed)
-
04
1/2 teaspoon vanilla extract (clear, if possible)
-
05
Gel food coloring (orange, black, purple, green)
Instructions
Cream together the softened butter and granulated sugar in a large bowl until light and fluffy. This takes about 2-3 minutes with an electric mixer, and honestly, it’s such a satisfying start!
Beat in the eggs one at a time, mixing well after each addition. Then, stir in the vanilla extract and almond extract (if using). It’ll smell amazing already.
In a separate bowl, whisk together the flour, baking powder, and salt. Gradually add the dry ingredients to the wet ingredients, mixing on low speed until just combined. Be careful not to overmix, yeah?
Divide the dough into two disks, wrap each tightly in plastic wrap, and chill in the refrigerator for at least 1 hour. This is super important for preventing spread and getting those crisp edges.
Preheat your oven to 375°F (190°C) and line baking sheets with parchment paper. While the oven warms, take out one disk of dough. On a lightly floured surface, roll it out to about 1/4-inch thickness.
Use your favorite Halloween cookie cutters (ghosts, pumpkins, bats, witches hats!) to cut out shapes. Carefully transfer them to the prepared baking sheets.
Bake for 8-12 minutes, depending on size and thickness, or until the edges are lightly golden. Don't overbake! Let them cool on the baking sheets for a few minutes before transferring to a wire rack to cool completely. Repeat with the second dough disk.
While the cookies cool, prepare the royal icing. In a large bowl, combine the sifted powdered sugar and meringue powder. Slowly add the warm water and vanilla extract, mixing on low speed until combined. Increase speed to medium-high and beat for 5-7 minutes, until stiff, glossy peaks form. It should be thick, like toothpaste.
Divide the icing into several small bowls. Add gel food coloring to each bowl to create your Halloween palette (orange, black, purple, green, white). For outlining, you want a thicker consistency. For flooding (filling in), add a tiny bit more water, drop by drop, until it's like pancake batter and smooths itself out in about 10-15 seconds when a line is drawn through it. Put icing into piping bags with small round tips, or use squeeze bottles for easier flooding.
Now for the fun part: decorating! Outline each cookie shape with the thicker icing. Let this dry for about 10-15 minutes. Then, 'flood' the inside of the outlines with the thinner icing. Use a toothpick to spread it evenly and pop any air bubbles. Let the flooded cookies dry completely, ideally for several hours or overnight, before adding any detail work.
Once the base layer is dry, use the thicker icing and fine tips to add details like ghost eyes, pumpkin smiles, spiderwebs, or witch hat buckles. Get creative! Let all your decorated cookies dry completely before stacking or storing. It's so worth the wait, I promise.
Notes & Tips
-
1
Experiment with different cookie cutter shapes each year—bats, ghosts, black cats, witches' hats, pumpkins!
-
2
A small paintbrush can be used to gently spread flood icing into corners.
-
3
Consider adding edible googly eyes for a super fun and easy decoration!
-
4
If you're new to royal icing, start with simple designs like ghosts or mummies; they're very forgiving.
-
5
For a slightly softer icing, you can add a tiny bit of corn syrup to your royal icing when mixing.
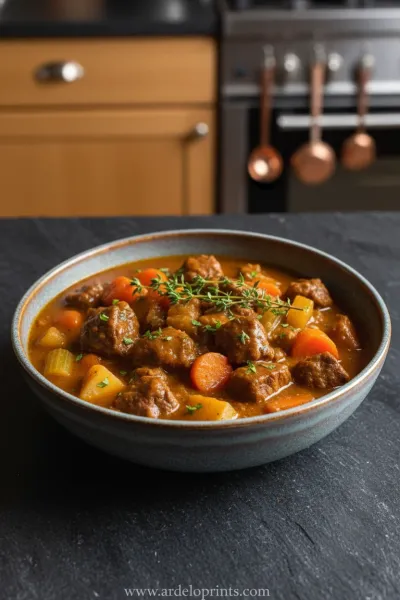
Easy Slow Cooker Pot Roast
The ultimate set-it-and-forget-it meal. Tender beef and hearty vegetables simmered to perfection in the slow cooker.
Tools You'll Need
-
Electric mixer (stand or hand mixer)
-
Large mixing bowls
-
Measuring cups and spoons
-
Rolling pin
-
Halloween cookie cutters
-
Baking sheets
-
Parchment paper
-
Wire cooling rack
-
Piping bags or squeeze bottles
-
Small round piping tips (e.g., PME #1.5, #2)
-
Toothpicks or a scribe tool for spreading icing
-
Small bowls for coloring icing
Must-Know Tips
-
Always chill your cookie dough! This prevents spreading and helps cookies keep their crisp edges.
-
Roll dough to a consistent 1/4-inch thickness for even baking.
-
Use gel food coloring for vibrant icing colors without changing consistency.
-
Allow base icing layers to dry completely before adding details to prevent colors from bleeding.
-
When piping, use consistent pressure and let the icing fall from the tip, rather than pushing it onto the cookie.
Professional Secrets
-
To get perfectly uniform cookies, use a rolling pin with thickness guides.
-
For super smooth flood icing, gently tap the cookie after flooding to help the icing settle and pop air bubbles.
-
If you want to add sprinkles or edible glitter, do so immediately after flooding before the icing sets.
-
When outlining, hold your piping bag at a 45-degree angle, slightly above the cookie, allowing the icing to 'fall' onto the surface.
-
Store leftover royal icing in an airtight container with a piece of plastic wrap pressed directly onto the surface to prevent crusting. Re-whip slightly before using.

Recipe by
Mason Cole“Sweet cravings are my specialty! I turn sugar, chocolate, and imagination into pure dessert magic.” 🍰✨
Get Delicious Recipes Weekly
Join 25,000+ home cooks getting our best recipes straight to their inbox.
Free forever • No spam • Unsubscribe anytime