
The art of the sourdough pizza crust is a beautiful marriage of Neapolitan tradition and the ancient practice of wild fermentation. While modern pizza often relies on commercial yeast for a quick rise, the original methods of bread making in Europe leaned on the natural microbes found in the air and grain, creating a dough that was more digestible and complex in flavor.
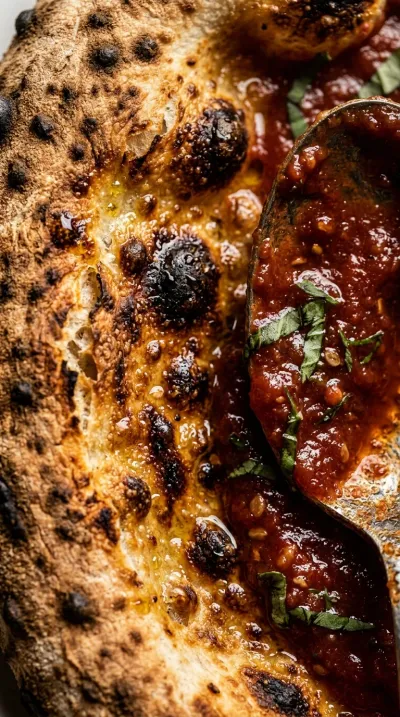
In the heart of Italy, the transition from simple flatbreads to the airy, charred crusts we love today was driven by the heat of wood-fired ovens. This high-temperature environment allows the gases produced by the sourdough fermentation to expand rapidly, creating those coveted large air bubbles and a charred, smoky exterior known as "leopard spotting."
Beyond the taste, the tanginess of a sourdough pizza crust comes from lactic acid bacteria. This process not only adds a sophisticated depth to the dough but also breaks down the gluten, making it gentler on the stomach than standard wheat crusts.
Today, using sourdough discard has become a way for home bakers to honor this slow-food philosophy. It turns a byproduct into a centerpiece, echoing a time when nothing in the kitchen was wasted and every loaf told a story of patience and craft.
Why You'll Love It
-
- Honestly, there is just something about that tangy sourdough flavor that makes a pizza feel like a real meal. It's got this wonderful, rustic soul to it.
-
- I love how it uses 1 cup sourdough discard, so nothing goes to waste in my kitchen. It's just a little bit of magic from the fridge, yeah?
-
- The contrast between the crispy golden bottom and that chewy, airy middle is just... wow. It reminds me of those old-world bakeries I used to visit.
-
- It's a slow, gentle process that actually lets you relax. Well, look, it takes a bit of patience, but the first bite makes it all worth it.
"Honestly, I've tried a dozen different ways to use my discard, but this crust is just different. So chewy and perfectly tangy!"
Essential Ingredient Guide
- 1 cup sourdough discard, room temperature: This is where all that lovely tang comes from. Make sure it's not ice-cold from the fridge, or the dough will be a bit grumpy and slow to rise.
- 2 1/2 cups bread flour: I use this for the strength. It gives the crust that professional chew, so it doesn't just collapse under all your favorite toppings.
- 3 tablespoons olive oil, divided: So, this keeps the crumb tender and gives the edges a gorgeous shimmer. I just love the smell when that reserved tablespoon hits the hot oven.
- 1 teaspoon salt: Just a simple pinch, really, but it's what wakes up all the other flavors. Without it, the bread tastes a bit flat, dang.
- 1 1/4 cups warm water (110°F): Warmth is key here to keep the sourdough happy. I always check it with my finger—it should feel like a cozy bath, not hot.
- 1 teaspoon sugar: Just a tiny bit to help the crust brown beautifully. It doesn't make it sweet, it just adds a touch of warmth to the overall taste.
Complete Cooking Process
-
Getting Ready:
Start by making sure your 1 cup sourdough discard is at room temperature. I like to gather my bread flour and all-purpose flour early so I'm not rushing around the kitchen.
-
Developing the Soul:
The magic happens during those stretch-and-folds. It's a quiet moment where the dough really starts to find its strength and that signature sourdough flavor deepens.
-
Managing the Texture:
Kneading for 4-5 minutes is where we get that elasticity. Then, folding in the olive oil makes the dough glossy and smooth, which leads to a much better bite.
-
The Final Touch:
Brushing the rim with the reserved olive oil is my favorite part. It's the secret to getting those golden, crisp edges that everyone asks about.
-
Perfect Timing:
Slide your pizza onto the preheated stone and bake until the cheese is bubbly. Serve it immediately while the crust is still singing and the toppings are melty.
-
If the dough feels too sticky, sprinkle a little more flour, but don't overdo it or the crust gets dense.
-
For a truly crisp edge, brush the rim of the dough with a thin layer of olive oil before baking.
-
Want a thicker, rustic crust? Just let the dough rise for an extra 1-2 hours at room temperature.
-
Use a pizza stone and preheat it to 475°F for that authentic, oven-baked crunch.
Pro Tips
Just trust your hands and the dough will tell you when it's ready.


Better For You Treats
I love that this crust uses sourdough fermentation, which honestly makes it a bit easier on the tummy. It's got a lower glycemic index than usual dough, so it feels like a more mindful way to enjoy a slice.
Ways to Make it Your Own
You could replace 1 cup of all-purpose flour with 1 cup whole wheat flour for a nuttier vibe. Or, for something punchy, stir 2 teaspoons dried Italian herbs and 1 crushed garlic clove right into the dry mix.
Serving Suggestions
I usually go for fresh basil and a drizzle of olive oil for a classic Margherita. For something a bit fancier, try sautéed mushrooms, caramelized onions, and goat cheese—it's just lovely.
Frequently Asked Questions
→ Can I make the dough ahead of time?
Oh, absolutely. Just wrap your dough balls tightly and keep them in the fridge for up to 24 hours; it actually makes the flavor even better.
→ What if I don't have a pizza stone?
No worries at all, ugh, I've been there. A preheated baking sheet turned upside down works just fine in a pinch.
→ My dough is too sticky to handle, what do I do?
Just sprinkle in a tiny bit more flour as you knead. Just be careful not to add too much, or you'll lose that lovely airy texture.

Nutrition Facts
per serving
620
Calories
22g
Protein
88g
Carbs
14g
Fat
Taste Profile
A balanced, tangy flavor with a deep, wheaty richness.
Ingredient Substitutions
Don't have an ingredient? Try these alternatives
The crust will be softer and less chewy.
Works well as a neutral alternative with a high smoke point.
Recipe Variations
Try these delicious twists on the original
Whole Wheat Sourdough Pizza Crust
Replace 1 cup of all-purpose flour with 1 cup whole wheat flour for added fiber and a nuttier, more rustic flavor.
Garlic Herb Sourdough Pizza Crust
Add 2 teaspoons dried Italian herbs and 1 crushed garlic clove to the dry mix for a bold, herby, garlicky punch.
Common Mistakes to Avoid
Learn from others' mistakes for perfect results
- Adding too much flour during kneading, which makes the crust dense.
- Skipping the resting periods, which makes the dough spring back when stretching.
- Putting the pizza on a cold stone, resulting in a soggy bottom.
Meal Prep & Storage
Make Ahead Tips
You can wrap the dough balls in plastic and keep them in the fridge for up to 24 hours, which actually helps the flavor develop.
Leftover Ideas
If you have leftover baked crust, reheat it in the oven at 350°F for 5 minutes to bring back the crunch.
Perfect Pairings
Serve this with...
Cooking Timeline
Combine and mix dry and wet ingredients
Knead dough and incorporate olive oil
First rest and stretch-and-fold sequence
Divide, shape, and final relax
Shape and bake at 475°F
 Desserts
Peanut Butter Oatmeal Chocolate Chip Cookies
A quick, 5‑ingredient cookie that’s soft, chewy, and packed with peanut butter and oats.

Sourdough Pizza Crust – Crispy Chewy Tangy Dough
A warm, golden sourdough pizza crust that hits that perfect balance of a crisp outer edge and a soft, airy center. The subtle tang of the sourdough discard makes every slice feel like it came from a cozy village bakery.
Timing
Prep Time
10 Minutes
Cook Time
12 Minutes
Total Time
70 Minutes
Recipe Details
Ingredients
Dough Base
-
01
1 cup sourdough discard, room temperature
-
02
2 1/2 cups bread flour
-
03
1 cup all-purpose flour
-
04
1 teaspoon salt
-
05
1 teaspoon sugar
-
06
1 1/4 cups warm water (110°F)
Finishing
-
01
3 tablespoons olive oil, divided
Instructions
First, find your largest mixing bowl and stir together the 2 1/2 cups bread flour, 1 cup all-purpose flour, salt, and sugar. It's just a simple start, really.
Give those dry ingredients a good stir until everything is evenly distributed. No clumps here, please.
Now, gently pour in the 1 cup sourdough discard, room temperature and the 1 1/4 cups warm water (110°F). Stir it with a wooden spoon until the dough starts to come together into a shaggy mass.
Move the dough onto a lightly floured surface—or just keep it in the bowl if that's easier—and knead for 4–5 minutes. You're looking for it to feel smooth and just a bit elastic under your palms.
Fold in 2 tablespoons of olive oil. Keep kneading until the dough looks glossy and that oil is fully worked in. Oh, and remember to save that last tablespoon of olive oil for the crust later.
Cover your dough with a damp cloth and let it have a little nap at room temperature for 20 minutes. This lets the gluten develop properly.
Time for some stretch-folds. Lift and fold the dough over itself at 45-degree angles, rotate 90 degrees, and repeat about 3–4 times. Let it rest for another 25 minutes. Patience is key here.
Gently punch the dough down—don't be too rough—and divide it into two equal portions. Shape them into smooth balls and let them relax on a parchment-lined tray for 10 minutes.
Preheat your oven to 475°F (245°C) with your pizza stone sitting in the middle rack. Lightly dust your pizza peel with flour or semolina, place one dough ball on it, and stretch or roll it into a 12-inch disk.
Brush the crust with the reserved olive oil, then add your favorite sauce and toppings. Bake on the preheated stone for 10–12 minutes until the crust is a beautiful golden brown and the cheese is bubbly. Repeat for the second pizza.
Notes & Tips
-
1
The sourdough discard makes this so much more interesting than a standard crust.
-
2
Make sure your water is exactly 110°F so you don't shock the dough.
-
3
The stretch-and-fold method is what gives the crust those lovely airy bubbles.

Tools You'll Need
-
Large mixing bowl for combining the flour and liquids
-
Dough scraper or wooden spoon for initial mixing
-
Pizza stone for that professional, crispy bottom
-
Parchment paper to keep the dough from sticking
-
Pizza peel for sliding the pizza into the oven
-
Oven
Must-Know Tips
-
Avoid over-flouring, If the dough feels too sticky during kneading, sprinkle a little more flour, but don't go overboard or the crust will be dense.
-
Crispy edges, For an extra crisp edge, brush the rim of the dough with a thin layer of olive oil before baking.
-
Custom thickness, If you prefer a thicker, more rustic crust, let the dough rise for an additional 1–2 hours at room temperature before shaping.
Professional Secrets
-
The double-rest period (20 mins then 25 mins) ensures the gluten is relaxed for easier stretching.
-
Using a preheated pizza stone at 475°F mimics a commercial deck oven.
-
The addition of a small amount of sugar helps with the golden browning (Maillard reaction) at high heat.
What readers are saying
Community reviews from home cooks like you
Will definitely make this again. I really liked how the 1 cup sourdough discard, room temperature and 2 1/2 cups bread flour came together. It took slightly longer than the recipe said. Highly recommend giving it a try.
I wanted to love this dish, but it didn't quite work for me. It took slightly longer than the recipe said. I think with some tweaks it could be really good.
Decent result for the effort. The temperature flavor was nice, but i found it a bit sweet for my taste. I might try it again with some adjustments.
Will definitely make this again. I really liked how the 1 cup sourdough discard, room temperature and 2 1/2 cups bread flour came together. Will be making this regularly.

Recipe by
Grace Lawson“Butter, sugar, and a little love — that’s my baking philosophy! Let’s make your kitchen smell amazing.” 🍰❤️
Get Delicious Recipes Weekly
Join 25,000+ home cooks getting our best recipes straight to their inbox.
Free forever • No spam • Unsubscribe anytime