
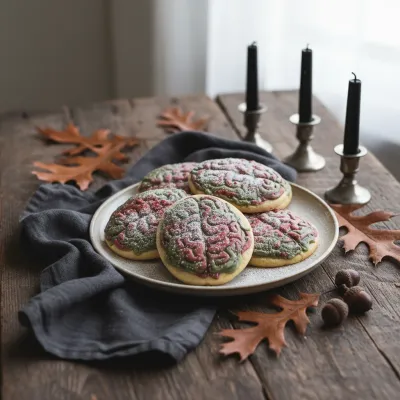
I remember the first time I tried to make these. It was for a small Halloween gathering with some friends, and I wanted something that would really make everyone giggle and gasp a little. I had this vision of squiggly, brain-like patterns, and a touch of something… bloody. Well, after a bit of experimenting with food coloring and a piping bag (and maybe a few messy, non-brain-like attempts, oops!), these spooky little treats came to life. Seeing the kids' eyes widen and the adults chuckle? That's the real magic. It's not about perfection, it's about the joy, you know?
Why You'll Adore Making These Spooky Treats
-
They are genuinely fun to decorate—a perfect activity for family or friends!
-
The sugar cookies are buttery, soft, and totally delicious on their own.
-
The 'brain' effect is surprisingly easy to achieve, even for beginner decorators.
-
They're a guaranteed showstopper at any Halloween party or gathering.
-
You can customize the 'gore' level from subtly spooky to truly frightful!
-
It brings out that wonderful, playful side of Halloween baking.
My friend Rachel brought these to our Halloween potluck, and wow! They were such a conversation starter. Everyone loved how creepy they looked but how delicious they tasted. Definitely making these for my next party!
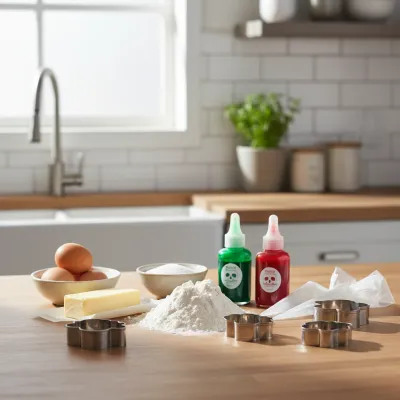
Essential Ingredient Guide
- Softened Butter: Make sure your butter is truly at room temperature. This helps it cream properly with the sugar, creating a light, airy base for your cookies. If it's too cold, your dough will be tough; too warm, and it'll be greasy.
- Chilling the Dough: Don't skip this step! Chilling prevents the cookies from spreading too much in the oven, giving you perfectly shaped rounds for your brain designs. It also makes the dough much easier to handle.
- Gel Food Coloring: Gel food coloring is your best friend here! It gives vibrant colors without adding too much liquid to your icing, keeping it thick and pipeable. A little goes a long way, especially for those bright reds!
- Piping Bag/Ziploc Bag: For those intricate brain patterns, a piping bag with a small round tip is ideal. If you don't have one, a Ziploc bag with a tiny corner snipped off will do the trick in a pinch. Just practice on a piece of parchment first!
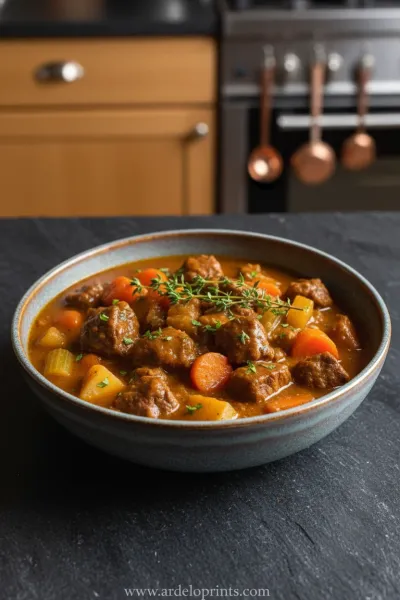
Birria Tacos: Easy & Flavorful Recipe
Tender, slow-braised beef tacos pan-fried to perfection with a rich, savory consomé for dipping.
Complete Cooking Process
-
Making the Perfect Cookie Base:
-
Cream butter and sugar until fluffy, incorporating air for soft cookies.
-
Add eggs and vanilla, mixing well for flavor and moisture.
-
Combine dry ingredients separately to ensure even distribution.
-
Gently mix wet and dry ingredients until just combined—no tough cookies here!
-
Chill the dough for at least an hour; this is key for shape and texture.
-
-
Baking Your Brains (Not Literally!):
-
Preheat oven and prepare baking sheets with parchment paper.
-
Roll out chilled dough to 1/4 inch thickness, using a round cutter.
-
Bake until edges are just golden, about 10-12 minutes.
-
Cool cookies completely on a wire rack before decorating.
-
-
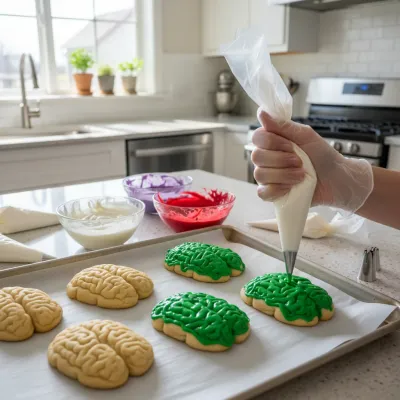
Bringing the Zombie Look to Life:
-
Prepare royal icing, adding milk gradually for a pipeable consistency.
-
Tint icing with pink or light gray gel food coloring.
-
Transfer icing to a piping bag with a small round tip.
-
Pipe a central wavy line, then squiggly lines to create the brain texture.
-
Allow the 'brain' icing to set for 15-20 minutes.
-
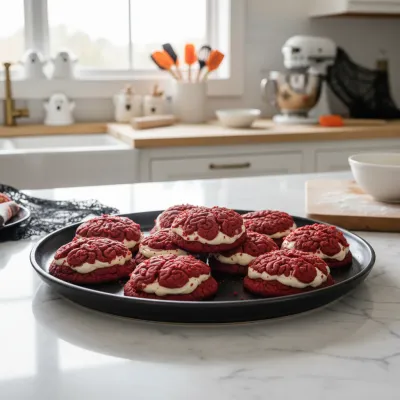
Use red gel or raspberry jam for spooky 'blood' effects, dabbing and dragging.
-
Easy Skillet Chicken Thighs Recipe
Garlic cream sauce skillet chicken thighs for a delicious and simple weeknight dinner.
Spooky FAQs for Your Brainy Bake
→ Can I make the cookie dough ahead of time?
Absolutely! The cookie dough can be made up to 3 days in advance and stored in the refrigerator. You can even freeze it for up to a month. Just thaw in the fridge overnight before rolling.
→ What if my icing is too thin or too thick?
If your icing is too thin, slowly add more sifted powdered sugar until it reaches the right consistency. If it's too thick, add milk a tiny drop at a time until it's pipeable. It’s all about finding that balance!
→ Can I use different cookie cutters?
Of course! While round cookies make great 'brains,' you could also use oval cutters or even cookie cutters shaped like heads or skulls for a different kind of spooky effect. Get creative!
→ How do I store these cookies?
Once the icing is completely set, store the cookies in an airtight container at room temperature for up to 5 days. Layer them with parchment paper to prevent sticking or smudging the decoration.
→ What kind of red 'blood' works best?
Red gel food coloring (undiluted) applied with a toothpick creates a really vivid, almost wet-looking blood effect. For a more natural or jam-like appearance, a bit of raspberry jam or cherry syrup can be dabbed on. Have fun with it!
Zombie Brain Cookies: Spooky Halloween Treat
Make deliciously spooky zombie brain cookies for Halloween! These fun and frightful treats are a hit at any party. Impress with your spooky baking skills!
Timing
Prep Time
30 minutes
Cook Time
10-12 minutes
Total Time
1 hour 30 minutes (includes chilling)
Recipe Details
Ingredients
For the Sugar Cookies
-
01
1 cup (2 sticks) unsalted butter, softened
-
02
1 1/2 cups granulated sugar
-
03
2 large eggs
-
04
1 teaspoon vanilla extract
-
05
3 cups all-purpose flour
-
06
1 teaspoon baking powder
-
07
1/2 teaspoon salt
For the Brain Icing
-
01
4 cups powdered sugar, sifted
-
02
4-6 tablespoons milk (or heavy cream for richer icing)
-
03
1 teaspoon vanilla extract
-
04
Pink or light gray gel food coloring
-
05
Red gel food coloring or raspberry jam for 'blood'
Instructions
In a large bowl, cream together the softened butter and granulated sugar until light and fluffy. This takes a good 2-3 minutes, so keep going!
Beat in the eggs one at a time, then stir in the vanilla extract. Scrape down the sides of the bowl to make sure everything is incorporated.
In a separate medium bowl, whisk together the flour, baking powder, and salt. Gradually add the dry ingredients to the wet ingredients, mixing until just combined. Don't overmix, hon, or your cookies might get tough.
Divide the dough in half, flatten each half into a disc, wrap tightly in plastic wrap, and chill in the refrigerator for at least 1 hour. This is super important for easy rolling and shaping!
Preheat your oven to 375°F (190°C) and line baking sheets with parchment paper.
On a lightly floured surface, roll out one disc of chilled dough to about 1/4 inch thickness. Use a round cookie cutter (about 2.5-3 inches) to cut out circles. Gently place them on the prepared baking sheets, leaving a little space between each.
Bake for 10-12 minutes, or until the edges are lightly golden. They might look a little pale in the center, and that's okay! Let them cool on the baking sheets for 5 minutes before transferring to a wire rack to cool completely.
While the cookies cool, prepare the icing: In a medium bowl, whisk together the sifted powdered sugar, 4 tablespoons of milk, and vanilla extract until smooth. Add more milk, a tiny bit at a time, until you reach a thick but pipeable consistency. Now, add a few drops of pink or light gray gel food coloring and mix until you get that perfectly 'brainy' hue.
Transfer about half of the colored icing to a piping bag fitted with a small round tip (like Wilton 3 or 4). If you don't have a piping bag, a Ziploc bag with a tiny corner snipped off works just as well!
Take a cooled cookie and pipe a wavy line down the center. Then, pipe squiggly lines horizontally from the center line to the edge on both sides, making them look like brain convolutions. Repeat for all cookies.
Once the pink/gray icing has set a bit (about 15-20 minutes), take your red gel food coloring or raspberry jam. Use a toothpick or a very fine brush to dab and drag 'blood' effects into the crevices and edges of your brain cookies. This is where you can get really creative and gory, haha!
Let the cookies sit until the icing is completely set, which might take an hour or two. Then, display your deliciously spooky creations and wait for the gasps and compliments!
Notes & Tips
-
1
For a deeper red 'blood', use red velvet emulsion or gel food coloring.
-
2
You can make smaller cookies for a larger yield or bigger ones for extra impact.
-
3
A touch of lemon juice in the icing can add a nice bright flavor contrast.
-
4
If you want to skip chilling, use 1/2 cup less flour, but expect more spread.
-
5
Kids absolutely love decorating these, so get them involved in the fun!
Easy Slow Cooker Pot Roast
The ultimate set-it-and-forget-it meal. Tender beef and hearty vegetables simmered to perfection in the slow cooker.
Tools You'll Need
-
Electric mixer (stand or hand-held)
-
Large mixing bowls
-
Measuring cups and spoons
-
Whisk
-
Plastic wrap
-
Rolling pin
-
Round cookie cutter (approx. 2.5-3 inches)
-
Baking sheets
-
Parchment paper
-
Wire cooling rack
-
Piping bags or Ziploc bags
-
Small round piping tip (optional, but helpful)
-
Toothpicks or fine brush for 'blood' detail
Must-Know Tips
-
Always use room temperature butter for the best cookie texture.
-
Chill your dough! It prevents spreading and makes shaping easier.
-
Don't overmix the dough once flour is added, or cookies will be tough.
-
Let cookies cool completely before icing to prevent melting or smudging.
-
Practice piping on parchment paper first to get a feel for the 'brain' lines.
Professional Secrets
-
Add a tiny pinch of almond extract to the cookie dough for an extra layer of flavor.
-
For really vivid pink/gray icing, use a high-quality gel food coloring, not liquid.
-
Use a fine-tipped brush for applying the 'blood' details for precision and varied effects.
-
Dust your rolling surface with powdered sugar instead of flour for a slightly softer cookie.
-
For extra shine on the 'blood,' mix a tiny bit of corn syrup with your red food coloring.

Recipe by
Grace Lawson“Butter, sugar, and a little love — that’s my baking philosophy! Let’s make your kitchen smell amazing.” 🍰❤️
Get Delicious Recipes Weekly
Join 25,000+ home cooks getting our best recipes straight to their inbox.
Free forever • No spam • Unsubscribe anytime