
It all started with my grandmother's recipe box, honestly. She had this faded index card for 'party rolls' that was practically falling apart. I'd watch her make them for family gatherings, her hands moving with such gentle confidence. She'd always say, 'The secret is in the roll, darling - not too tight, not too loose.' I can still smell the yeasty warmth of her kitchen.
When I had my own family, I tweaked her recipe just a bit, switching to puff pastry because, well, modern life calls for shortcuts sometimes. But the heart of it remained the same - that beautiful spiral of filling, the anticipation as they bake, the way they disappear from platters faster than you can blink. They've seen us through soccer games, bridal showers, even that time we hosted twenty relatives for Thanksgiving.
What I love most is how they bridge generations. My teenage son will still sneak them when he thinks I'm not looking, just like he did when he was six. And my husband? He'll always take 'just one more' with that guilty smile. These pinwheels have become part of our family's story, little edible bookmarks in the chapters of our lives.
Why You'll Love It
-
Effortless elegance - Honestly, these look far more impressive than they are difficult to make. The beautiful spiral pattern makes them look like you spent hours in the kitchen, when really it's just a matter of rolling and slicing. I love that moment when guests' eyes light up seeing them arranged on a platter - they always assume I worked much harder than I actually did. The puff pastry does all the heavy lifting, rising into these gorgeous, golden layers that feel truly special.
Perfect for busy days - As a mom of two, I'm always looking for recipes that can multitask. These pinwheels work equally well for school lunches, after-school snacks, or last-minute guests. I often keep the components prepped in the fridge so I can assemble them quickly when hunger strikes. There's something so satisfying about having a homemade treat ready in minutes that feels both comforting and a little fancy.
Crowd-pleasing versatility - What I adore about this recipe is how adaptable it is. You can switch up the cheeses, add different herbs, or even incorporate other fillings based on what you have on hand. They're equally at home at a sophisticated cocktail party as they are at a kids' playdate. I've never met anyone who doesn't light up when offered one of these warm, flaky bites.
Make-ahead magic - The beauty of these pinwheels is that you can prepare them up to the baking point and freeze them. On hectic mornings or when unexpected company drops by, I can just pop them straight from the freezer to the oven. That little bit of foresight makes me feel like I've got my life together, even when everything feels chaotic.
"My kids begged me to make these again the very next day! They're the perfect combination of flaky, cheesy, and savory - absolutely irresistible."
Essential Ingredient Guide
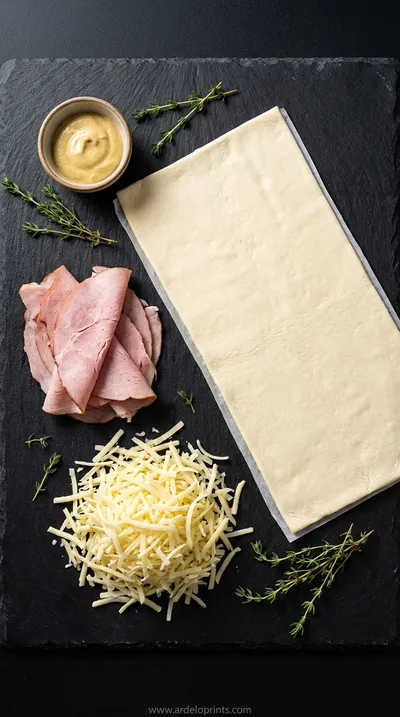
- Puff Pastry: Using quality puff pastry makes all the difference here. I always thaw mine slowly in the refrigerator overnight rather than rushing it on the counter. That slow thaw helps maintain those beautiful layers that will puff up so impressively in the oven. When you unroll it, don't worry if it cracks a bit - just press the seams together gently with your fingers. The buttery scent as it bakes always takes me back to my grandmother's kitchen.
- Turkey Ham: I prefer using thinly sliced turkey ham because it rolls beautifully without tearing. Look for slices that are uniform in thickness so you get consistent spirals in every pinwheel. Pat them dry with a paper towel before arranging on the pastry - this helps prevent the filling from making the dough soggy. The savory saltiness against the buttery pastry is what makes these so addictive.
- Cheese: A good melting cheese is key here. I often use a combination of mozzarella for its stretch and a sharper cheddar for flavor. Grating your own cheese makes a world of difference - pre-shredded cheese contains anti-caking agents that can affect melting. That moment when the cheese bubbles and browns at the edges? That's pure culinary happiness right there.
 Desserts
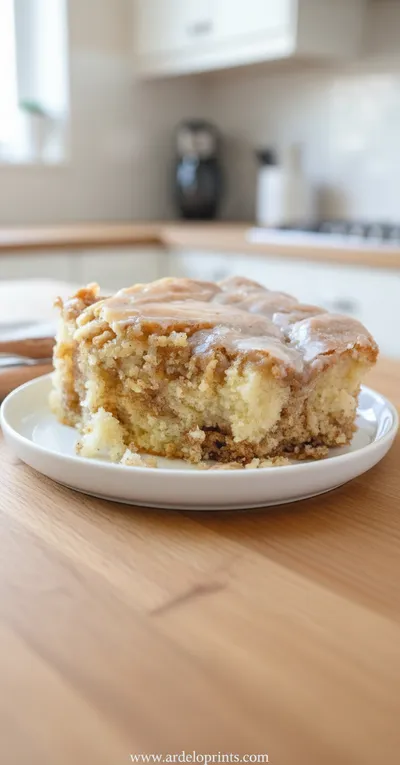
Cinnamon Roll Cake Recipe
Fluffy cinnamon roll cake with caramelized swirl, ideal for breakfast or snack.
Complete Cooking Process
-
Preparation:
Start by gently unrolling your thawed puff pastry on a lightly floured surface. I like to use a silicone baking mat for this because it prevents sticking without adding too much extra flour. Arrange your turkey ham slices in a single layer, slightly overlapping them to cover the entire surface. Then sprinkle your cheese evenly, going all the way to the edges but leaving about half an inch at the far end to help with sealing.
The rolling part requires a gentle touch - start from the edge closest to you and roll away from yourself, keeping it snug but not tight. I always feel like I'm wrapping a precious gift when I do this step. Once rolled, give it a gentle press along the seam to seal, then wrap in plastic and chill for about 20 minutes. This resting time helps the pastry firm up for clean slicing.
-
Baking:
Preheat your oven to 400°F and line a baking sheet with parchment paper. Take your chilled log and slice it into half-inch rounds using a sharp serrated knife. I like to use a gentle sawing motion rather than pressing down, which helps maintain the spiral shape. Arrange them about an inch apart on the baking sheet - they need room to puff up and become golden.
Bake for 15-18 minutes until beautifully puffed and golden brown. The smell that fills your kitchen is absolutely heavenly - buttery pastry mingling with melting cheese and savory ham. Let them cool on the baking sheet for just a minute before transferring to a wire rack. That brief resting time helps the cheese set slightly so it doesn't ooze out when you pick them up.
-
Serving:
I love serving these warm when the cheese is still delightfully stretchy. Arrange them on a beautiful platter, maybe with some fresh herbs sprinkled around for color. They're perfect alongside a simple green salad or as part of a larger spread of appetizers for gatherings. For bigger events, I sometimes make a double batch and set them out with other favorites like taco cups.
If I'm packing them for lunches, I let them cool completely before wrapping individually. They travel surprisingly well and make ordinary lunchboxes feel special. My daughter loves finding these in her lunch alongside some carrot sticks and fruit - it's our little secret indulgence during the school day.
-
Chill before slicing - This is non-negotiable for clean cuts that maintain their shape
-
Don't overfill - Too much cheese can leak out during baking
-
Use a sharp knife - Serrated works best for cutting through the layers neatly
-
Bake until golden - Underbaked pastry won't have that satisfying flakiness
Pro Tips
Remember, even if your first attempt isn't perfect, they'll still taste delicious. My early batches had some, well, interesting shapes, but no one ever complained!
The Comfort of Simple Pleasures
There's something profoundly comforting about these pinwheels that goes beyond their delicious flavor. Maybe it's the tactile pleasure of rolling the dough, or the way they bring people together around a platter. I've served these at everything from bridal showers to football watch parties, and they never fail to disappear first.
What I've learned over the years is that the best recipes are often the simplest ones. These pinwheels require no fancy techniques or hard-to-find ingredients, yet they feel special every single time. They're the culinary equivalent of a warm hug - familiar, comforting, and always welcome.
You Must Know
-
Thaw pastry slowly in the refrigerator for best results
-
Pat ham slices dry to prevent soggy bottoms
-
Chill the rolled log before slicing for clean cuts
-
Bake until golden brown for maximum flakiness
Frequently Asked Questions
→ Can I make these ahead of time?
Absolutely! You can prepare the pinwheels up to the slicing point, then freeze them on a baking sheet before transferring to a freezer bag. When ready to bake, just arrange them on a parchment-lined sheet and add a few extra minutes to the baking time. I often keep a batch in the freezer for unexpected guests or busy weeknights. The frozen ones actually hold their shape beautifully during baking.
→ What's the best way to reheat leftovers?
For the crispiest results, reheat them in a 350°F oven for about 5-7 minutes. The microwave will make them soft, so I only use that if I'm really in a hurry. If you're packing them for lunch, they're actually quite nice at room temperature too - the cheese firms up but still tastes delicious. I sometimes include them in picnic baskets alongside other favorites like cucumber sandwiches.
→ Can I use different fillings?
Oh yes, the possibilities are endless! I've made them with spinach and feta, roasted vegetables, even barbecue chicken. The key is to keep the fillings relatively dry and evenly distributed. If you're using vegetables, sauté them first to remove excess moisture. For something different, try my chicken pinwheels variation which uses a creamy ranch mixture.
→ Why did my pinwheels come out flat?
This usually happens if the pastry was overhandled or the filling was too wet. Make sure your pastry is cold when it goes into the oven - that's what creates the steam that makes it puff. Also, avoid stretching the dough as you roll it, and be sure to pat your turkey ham dry. If your kitchen is particularly warm, you might need to chill the assembled log for a bit longer before baking.
→ Can I make these for a large crowd?
These are perfect for parties! I've doubled and even tripled the recipe for big events. Just work in batches when rolling and slicing to keep everything organized. They bake beautifully when arranged on multiple baking sheets - just rotate the sheets halfway through baking for even browning. They pair wonderfully with other party favorites like mini pizzas or pigs in a blanket for a varied appetizer spread.
Nutrition Facts
per serving
95
Calories
4g
Protein
7g
Carbs
6g
Fat
Taste Profile
Savory and rich with buttery pastry notes
Ingredient Substitutions
Don't have an ingredient? Try these alternatives
Will be softer but still delicious - reduce baking time slightly
Any thinly sliced deli meat works well here
Recipe Variations
Try these delicious twists on the original
Spinach and Feta
Replace ham with sautéed spinach and use feta cheese for a Mediterranean twist
Pizza Pinwheels
Use pizza sauce, pepperoni, and mozzarella for a kid-friendly version
Common Mistakes to Avoid
Learn from others' mistakes for perfect results
- Overhandling the pastry - causes toughness
- Using warm ingredients - prevents proper rising
- Overfilling with cheese - leads to leaking
- Not chilling before slicing - results in messy spirals
- Baking at wrong temperature - affects flakiness
Meal Prep & Storage
Make Ahead Tips
You can prepare the pinwheels up to the slicing point and refrigerate overnight. Alternatively, freeze the sliced pinwheels on a baking sheet before transferring to a freezer bag. They bake beautifully from frozen - just add a few extra minutes to the cooking time. The assembled log can also be frozen for up to 2 months. Thaw in the refrigerator before slicing and baking. This make-ahead flexibility makes them perfect for busy holidays or unexpected guests when you want to serve something homemade without last-minute stress.
Leftover Ideas
Leftover pinwheels reheat well in a 350°F oven for 5-7 minutes. They're also delicious chopped up and added to salads or omelets the next day. For lunchboxes, they travel well at room temperature and make ordinary meals feel special. If you have more leftovers than expected, consider repurposing them into a breakfast casserole by layering with eggs and vegetables. The savory flavors work beautifully in many different contexts, proving their versatility beyond just appetizer duty.
Perfect Pairings
Serve this with...
Cooking Timeline
Preheat oven, prepare baking sheet, gather ingredients
Assemble pinwheels - roll, fill, and slice
Arrange on baking sheet, brush with egg wash
Bake until golden brown and puffed
Cool slightly before serving
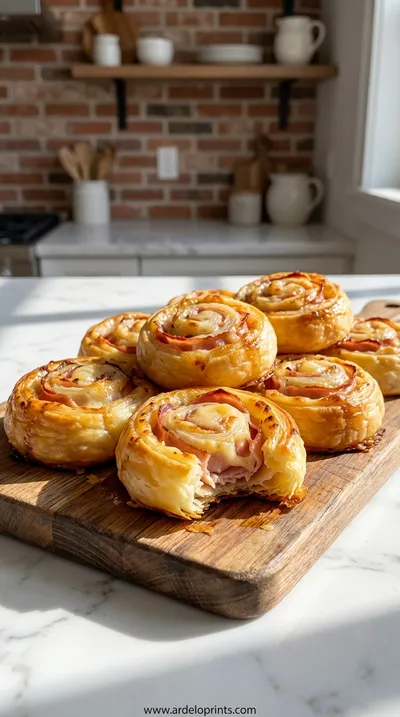
Ham and Cheese Pinwheels: Easy Appetizer Recipe
Flaky pastry savory pinwheels perfect for parties.
Timing
Prep Time
15 Minutes
Cook Time
18 Minutes
Total Time
33 Minutes
Recipe Details
Ingredients
Main Ingredients
-
01
1 sheet puff pastry, thawed
-
02
8 oz thinly sliced turkey ham
-
03
1 1/2 cups shredded cheese (mozzarella and cheddar mix)
-
04
1 egg, beaten (for egg wash)
-
05
1 tbsp everything bagel seasoning (optional)
Instructions
Start by preheating your oven to 400°F and lining a baking sheet with parchment paper. Take your thawed puff pastry and unroll it gently on a lightly floured surface. If there are any cracks, just press them together with your fingers - no one will notice once it's baked. I always take a moment to appreciate the smooth, cool feel of the pastry under my hands - it's such a simple pleasure.
Arrange your turkey ham slices in a single layer over the pastry, leaving about half an inch at the top edge. I like to slightly overlap them so every bite has plenty of that savory flavor. Then sprinkle your cheese evenly, making sure to get it all the way to the sides. The combination of white and orange cheeses makes such a pretty spiral when sliced.
Now for the rolling - start from the bottom edge and roll away from yourself, keeping it snug but not tight. Think of it like rolling a yoga mat, with even pressure throughout. When you reach the top, give the seam a gentle press to seal it. If you have time, pop it in the freezer for 10 minutes - this makes slicing much cleaner.
Using a sharp serrated knife, slice the log into half-inch rounds. I like to use a gentle sawing motion rather than pressing down. Arrange them about an inch apart on your prepared baking sheet - they need room to puff up and become golden. Brush the tops lightly with beaten egg - this gives them that beautiful shine.
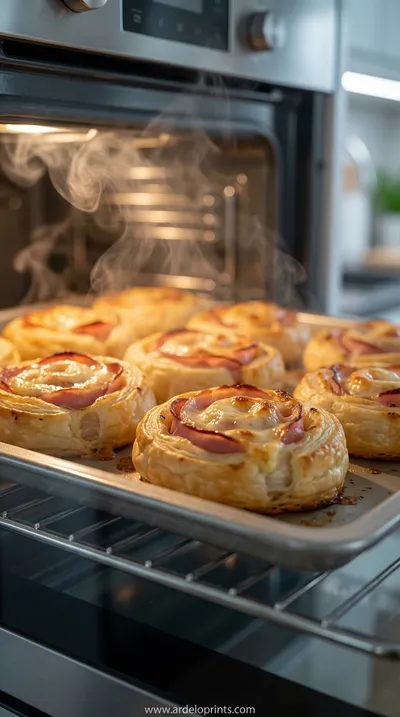
Bake for 15-18 minutes until beautifully puffed and golden brown. The smell that fills your kitchen is absolutely heavenly - buttery pastry mingling with melting cheese and savory ham. Rotate the baking sheet halfway through if your oven has hot spots. You'll know they're done when the cheese is bubbling at the edges and the pastry has risen impressively.
Let them cool on the baking sheet for about 5 minutes before transferring to a wire rack. This brief resting time helps the cheese set slightly. I always sneak one while they're still warm - that first bite of flaky pastry giving way to melted cheese is pure bliss.
Serve warm or at room temperature. I love arranging them on a beautiful platter with some fresh parsley sprinkled around for color. They're perfect alongside a simple green salad or as part of a larger spread. For bigger events, they pair wonderfully with other handheld favorites like pumpkin sliders or chicken wraps.
If you have leftovers (rare in my house!), store them in an airtight container in the refrigerator. They reheat beautifully in the oven for a few minutes. These also make fantastic lunchbox additions - my daughter loves finding them in her lunch alongside some carrot sticks and fruit.
Notes & Tips
-
1
For extra flavor, sprinkle everything bagel seasoning on top before baking - it adds a nice crunch and savory note
-
2
If your pastry feels sticky, chill it for 10 minutes before rolling - cold pastry is much easier to work with
-
3
You can use any melting cheese you like - provolone, gouda, or even pepper jack for a spicy kick
-
4
For a prettier presentation, rotate the pinwheels as you arrange them on the baking sheet so the spirals face different directions
-
5
If making for a party, you can prepare them the day before and refrigerate the sliced pinwheels overnight
 Breakfast
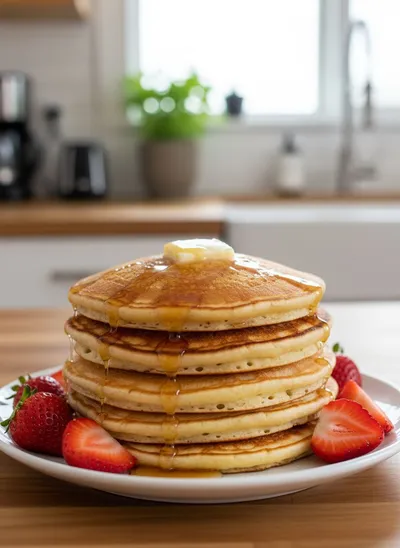
Best Pancakes From Scratch
A step‑by‑step guide to the fluffiest, most comforting pancakes you can create at home, using just pantry staples.
Tools You'll Need
-
Baking sheet - I prefer rimmed sheets to catch any cheese drips
-
Parchment paper - essential for easy cleanup and preventing sticking
-
Rolling pin - helpful if your pastry needs gentle reshaping
-
Sharp knife - serrated works best for clean cuts through the layers
-
Pastry brush - for that beautiful golden egg wash finish
Must-Know Tips
-
Keep ingredients cold - Warm pastry won't puff properly
-
Don't overfill - Too much cheese can leak out during baking
-
Slice evenly - Uniform thickness ensures even baking
-
Space them out - Crowded pinwheels steam instead of browning
Professional Secrets
-
Chill between steps - Cold pastry creates better layers
-
Pat ham dry - Prevents sogginess in the finished pinwheels
-
Use quality cheese - Freshly grated melts better than pre-shredded
-
Rotate baking sheet - Ensures even browning in the oven

Recipe by
Oliver Brooks“Every great meal begins with the perfect bite. My passion is crafting irresistible starters that wow.” 🧀🍢
Get Delicious Recipes Weekly
Join 25,000+ home cooks getting our best recipes straight to their inbox.
Free forever • No spam • Unsubscribe anytime