I remember my aunt making a version of this for a family reunion when I was probably ten. She served it in a brand-new terracotta flower pot, complete with a little trowel for serving and gummy worms peeking out of the top. Wow, it was magical. We all thought she was the most brilliant baker in the world. For me, recreating this dessert is like tapping back into that feeling of wonder. The sound of the Oreos crushing in the bag, the smooth, cool feel of the cream cheese mixture as I fold it together—it all brings me right back to that sunny afternoon. It’s a recipe that feels less about precise measurements and more about feeling and memory. It’s not as sophisticated as some desserts I make, but it has a charm that, honestly, is unmatched.
Why You'll Love This Dirt Dessert
-
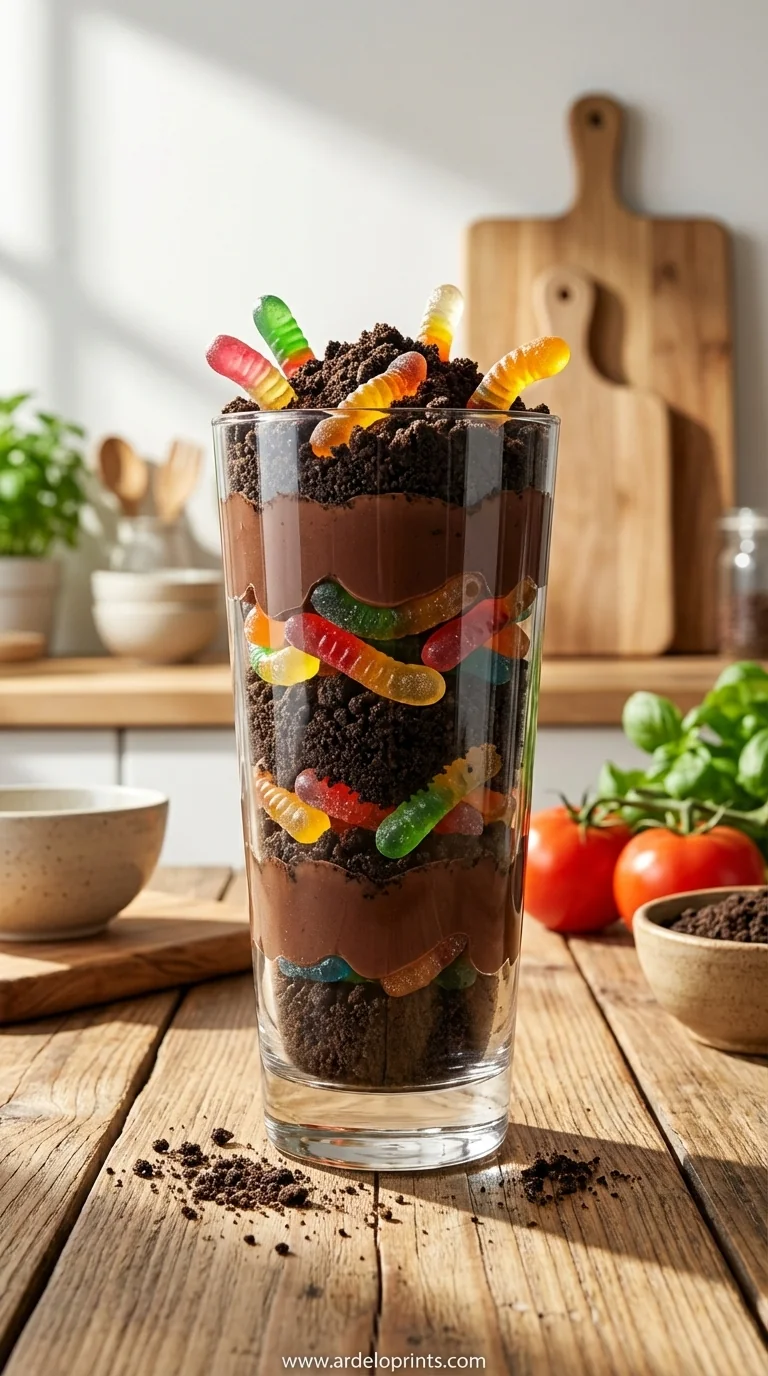
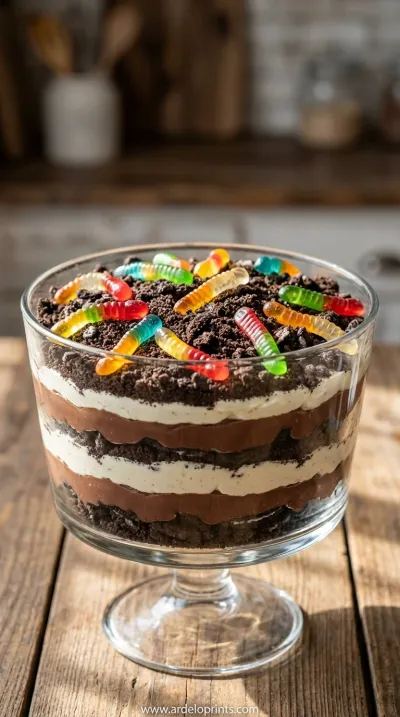
It’s Playful and Fun: I mean, look at it! It's a dessert that's meant to look like a pot of dirt, complete with worms. You can't help but smile when you see it. It’s a perfect centerpiece for a kids' party, a Halloween gathering, or just any time you need a little whimsy in your life. It’s a conversation starter and an instant mood-lifter.
-
Seriously Easy to Make: This is one of those wonderful no-bake recipes that feels impressive without causing any stress. There's no oven involved, just some simple mixing and layering. It's a great one to make with kids because they can help crush the cookies and layer everything without any risk of getting burned. It’s as easy as making no-bake cheesecake.
-
Absolutely Delicious: The combination of textures and flavors is just divine. You have the soft, rich, and tangy cream cheese layer, the sweet and creamy pudding, and the crunchy, chocolatey Oreo crumbs. Every spoonful is a perfect balance of creamy, crunchy, and cool. It’s pure comfort, much like my favorite banana bread.
-
Perfect for a Crowd: This recipe is so easy to scale up for a big party or potluck. You can make it in a big trifle bowl, a 9x13 inch pan, or even individual cups. It travels well and can be made ahead of time, which is, honestly, a lifesaver when you're hosting.
This recipe is pure joy! It brought back so many childhood memories and was an absolute hit at our family gathering.
Essential Ingredient Guide
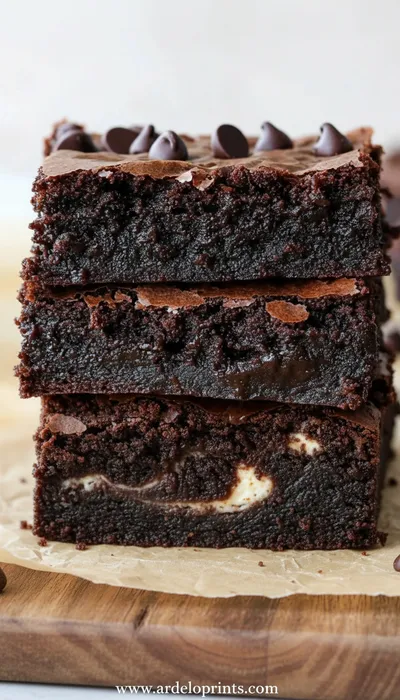
- Oreo Cookies: The star of the show! For the best 'dirt' texture, you need the classic chocolate sandwich cookies. I use a food processor for a fine, uniform crumb, but placing them in a zip-top bag and crushing them with a rolling pin is honestly just as effective and a little more therapeutic. Don't remove the cream filling; it adds to the richness and helps the crumbs clump just right. The chocolatey flavor reminds me of these delicious low-calorie brownies.
- Cream Cheese: Please, please use full-fat, block-style cream cheese and make sure it’s softened to room temperature. This is so important! If it’s cold, you’ll end up with little lumps in your creamy layer, and we want it to be perfectly smooth and velvety. Just leave it on the counter for an hour or so before you start, and it will blend beautifully into a dreamy, tangy whip.
- Instant Vanilla Pudding: The key here is 'instant.' Don't grab the cook-and-serve kind by mistake, oops! The instant pudding mix is what sets up quickly with the cold milk to create that thick, luscious layer. It provides a sweet, creamy base that balances the tang of the cream cheese and the deep chocolate flavor of the cookies. It provides a wonderful, simple sweetness.
 Desserts
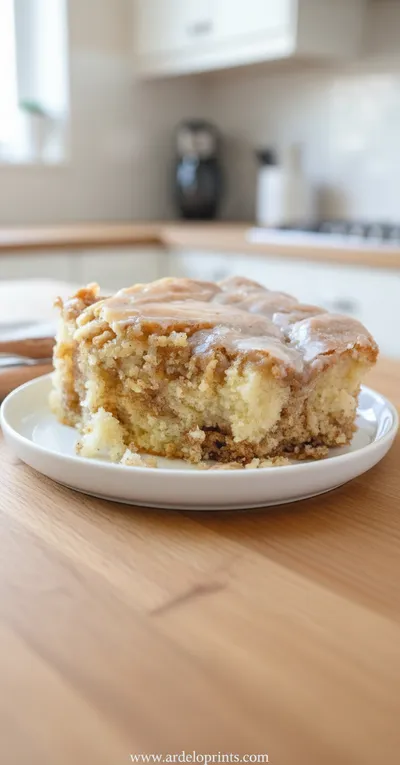
Cinnamon Roll Cake Recipe
Fluffy cinnamon roll cake with caramelized swirl, ideal for breakfast or snack.
Complete Cooking Process
-
Creating the 'Dirt':
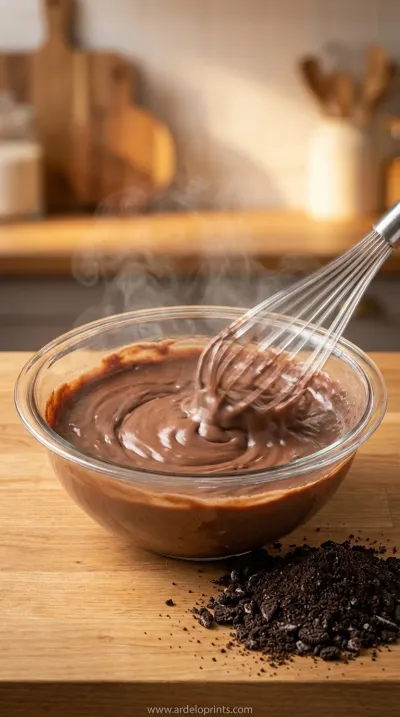
The first step is always the most fun—making the dirt! I pulse the entire package of Oreo cookies, cream filling and all, in a food processor until they resemble fine crumbs. If you don't have a food processor, a sealed plastic bag and a rolling pin work wonders. I actually love the slight variation in texture you get from crushing by hand. Once they're crushed, I mix in the melted butter. This small step is a game-changer; it makes the crumbs richer and helps them set a little, kind of like a cookie crust.
-
Whipping the Creamy Base:
Next, we create that dreamy, tangy layer. In a large bowl, I beat the softened cream cheese with the powdered sugar until it's completely smooth and light. It's so important that the cream cheese is at room temperature to avoid any lumps. Then, I gently fold in the whipped topping. I do this by hand with a spatula, using big, sweeping motions to keep the mixture light and airy. You want to see beautiful, fluffy white clouds forming.
-
Layering the Dessert:
Now for the artistry. I press about two-thirds of the buttery Oreo crumbs into the bottom of my serving dish to create a firm base. Then, I carefully spread the cream cheese mixture over the crumbs, followed by the prepared vanilla pudding layer. I use an offset spatula to get the layers nice and even, like frosting a cake. The final touch is sprinkling the remaining Oreo crumbs over the top, making sure to cover the entire surface so it really looks like a pot of fresh soil.
-
The Final Chill:
This last step is crucial for letting all the flavors meld together and for the dessert to set properly. I cover the dish with plastic wrap and let it chill in the refrigerator for at least four hours, but honestly, overnight is even better. This allows the Oreo crumbs to soften just a little bit, creating the perfect spoonable texture. Right before serving is when I add the gummy worms, pushing them partway into the 'dirt' so they look like they're crawling out. It’s the final touch that makes everyone smile, just like my ghost Oreo truffles.
 Desserts
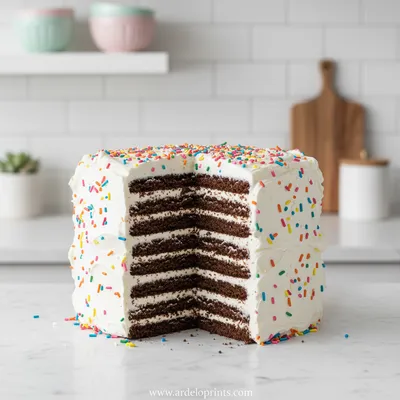
Easy Ice Cream Sandwich Cake
Cool, creamy ice cream sandwich cake that's simple, fun, and perfect for any sweet craving.
Frequently Asked Questions
→ Can I make this dessert ahead of time?
Absolutely, and I actually recommend it! Making it at least 4-6 hours ahead, or even the day before, gives the flavors a chance to meld and the dessert time to set properly. The Oreo crumbs will soften slightly, creating a wonderful cake-like texture that is just divine. Just be sure to cover it tightly and store it in the refrigerator. I'd wait to add the gummy worms until just before serving so they stay soft and chewy.
→ Can I use a different kind of pudding?
For sure! While classic vanilla is traditional, chocolate pudding is a fantastic choice for a double-chocolate version that is incredibly rich and decadent. I’ve also heard of people using butterscotch or cheesecake-flavored pudding with great results. Feel free to experiment and find your favorite combination. It’s a very forgiving recipe. I love experimenting with recipes, like when I made chickpea cookie dough.
→ What if I don't have whipped topping?
If you prefer to use real whipped cream, you absolutely can! You'll want to whip about 2 cups of heavy whipping cream with a few tablespoons of powdered sugar and a splash of vanilla extract until stiff peaks form. The texture will be slightly different—a bit richer and less stable—but it will be just as delicious. Just keep in mind it might not hold up for as long in the fridge.
→ Are there any fun variations I can try?
Oh, so many! For a Halloween twist, you can add candy pumpkins and use Milano cookies as 'tombstones,' which is similar to my Halloween Oreo brownies. For a springtime version, you could add edible flowers or mint sprigs. Some people even like to add a layer of peanut butter mousse or crushed Butterfinger candies for extra texture and flavor. The possibilities are really endless!
→ How do I store leftovers?
Leftovers should be stored, tightly covered, in the refrigerator. They will keep well for about 3 to 4 days. After a day or two, the Oreo crumbs will become quite soft, which I honestly find delicious, but the texture will change from the first day. It’s one of those desserts that seems to get better as it sits.
→ Can I make this gluten-free?
Yes, you can easily adapt this recipe to be gluten-free! Simply use your favorite brand of gluten-free chocolate sandwich cookies in place of the Oreos. Also, be sure to double-check that your instant pudding mix is certified gluten-free, as some brands can contain modified food starch derived from wheat. The rest of the ingredients are typically naturally gluten-free.
→ What's the best way to serve Oreo Dirt Dessert?
I love serving it in individual clear cups or small mason jars for parties. It makes serving so easy and looks incredibly charming. For a family-style meal, a big trifle bowl with a large serving spoon works beautifully. For a really fun touch, especially for kids, you can serve it in small, clean terracotta pots with a little shovel as a spoon. It really elevates the whole 'dirt' theme.
Nutrition Facts
per serving
450
Calories
5g
Protein
52g
Carbs
25g
Fat
Taste Profile
A beautifully sweet and creamy dessert with rich chocolate notes and a tangy finish from the cream cheese.
Ingredient Substitutions
Don't have an ingredient? Try these alternatives
To make this recipe gluten-free, simply swap for a GF-certified brand. The taste and texture are nearly identical.
Whip 2 cups of heavy cream with 1/2 cup of powdered sugar until stiff peaks form. The result is richer but slightly less stable, so it's best served the same day.
Feel free to change the pudding flavor to customize the dessert to your liking. Chocolate pudding creates an extra-decadent treat.
Recipe Variations
Try these delicious twists on the original
Peanut Butter Dirt Dessert
Add a cup of creamy peanut butter to the cream cheese mixture for a rich, nutty flavor that pairs wonderfully with the chocolate Oreos.
Mint Chocolate Dirt Dessert
Use mint Oreos instead of regular ones and add a few drops of peppermint extract to the cream cheese layer for a refreshing twist.
Golden Dirt Dessert
For a vanilla lover's dream, use Golden Oreos and butterscotch or cheesecake-flavored pudding instead of vanilla.
Common Mistakes to Avoid
Learn from others' mistakes for perfect results
- Using cold cream cheese, which results in a lumpy filling.
- Not letting the dessert chill long enough, causing it to be runny.
- Using 'Cook & Serve' pudding instead of 'Instant.' The recipe will not set properly.
- Overmixing the whipped topping into the cream cheese, which deflates the mixture and makes it heavy.
Meal Prep & Storage
Make Ahead Tips
This dessert is perfect for making ahead! You can assemble the entire thing up to 24 hours in advance. Just cover it tightly and keep it refrigerated. In fact, the flavors meld and the texture improves with an overnight chill. Just remember to hold off on adding the gummy worms until you're ready to serve to keep them from getting hard.
Leftover Ideas
Leftovers are a treat! Store them covered in the fridge for up to 4 days. The cookie crumbs will get softer each day, creating a delicious, cake-like texture. It's wonderful on its own, or you can even scoop it into a bowl with some fresh fruit. It's a dessert that keeps on giving.
Perfect Pairings
Serve this with...
Cooking Timeline
Crush Oreo cookies and mix with melted butter. Press two-thirds into the bottom of the serving dish.
Beat cream cheese and powdered sugar until smooth. Fold in the thawed whipped topping.
Whisk instant pudding mix and cold milk together until it begins to thicken. Let it set for 5 minutes.
Layer the cream cheese mixture, then the pudding mixture over the Oreo crust. Top with remaining Oreo crumbs.
Cover and chill in the refrigerator for at least 4 hours. Decorate with gummy worms just before serving.

Oreo Dirt Dessert: Fun & Yummy Recipe
Make Oreo dirt dessert! A blend of pudding, cream cheese, and Oreo layers looks like dirt but tastes amazing.
Timing
Prep Time
20 Minutes
Cook Time
0 Minutes
Total Time
4 Hours 20 Minutes (includes chilling)
Recipe Details
Ingredients
For the Dirt Layers
-
01
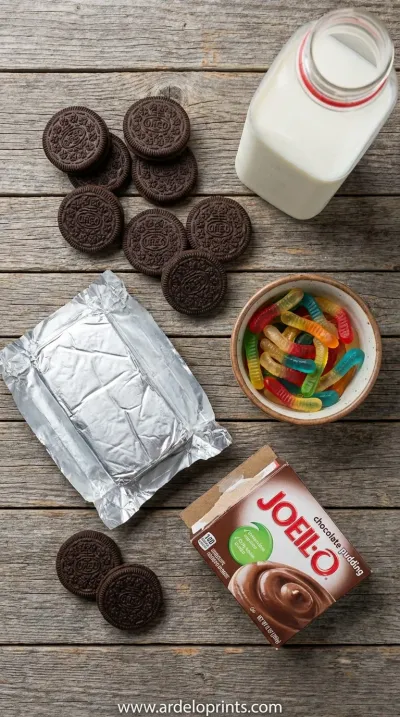
1 package (14.3 oz) Oreo cookies
-
02
1/4 cup unsalted butter, melted
For the Creamy Filling
-
01
8 oz cream cheese, softened to room temperature
-
02
1 cup powdered sugar
-
03
1 container (8 oz) frozen whipped topping, thawed
-
04
2 packages (3.4 oz each) instant vanilla pudding mix
-
05
3 1/2 cups cold milk
For Decoration
-
01
1 package gummy worms
Instructions
First things first, let's make our 'dirt.' Take your Oreo cookies and pulse them in a food processor until they're fine crumbs. If you're feeling a little more hands-on, pop them in a large zip-top bag, seal it tight, and give them a good whack with a rolling pin. It's surprisingly satisfying! Once they're crushed, pour them into a bowl and drizzle the melted butter over top, stirring with a fork until all the crumbs are lightly coated. This little bit of butter makes the flavor so much richer.
Now for the creamy layers. In a large bowl, beat the softened cream cheese and powdered sugar together with a hand mixer until it's perfectly smooth and fluffy, with no little lumps. This is where patience pays off! Gently fold the thawed whipped topping into this mixture until just combined. You want to keep it light and airy, so use a spatula and gentle, sweeping motions. Set this lovely cloud-like mixture aside for a moment.
In another bowl, let's prepare the pudding. Whisk your two packages of instant pudding mix with the cold milk for about two minutes. You'll feel it start to thicken up quite quickly, which is always so satisfying. Let it stand for about five minutes to allow it to set completely. It will become nice and firm, ready for layering. This part reminds me of making fall treats like my Pumpkin Cupcakes.
Let's build our masterpiece. Grab a 9x13 inch pan or a large trifle bowl. Press about two-thirds of the buttery Oreo crumb mixture into the bottom to create a firm, even base. Carefully spread the cream cheese mixture over the crumbs. Next, spread the prepared pudding layer over the cream cheese mixture. Finally, sprinkle the remaining Oreo crumbs evenly over the top. Cover it with plastic wrap and let it chill in the refrigerator for at least 4 hours. Just before serving, poke a few gummy worms into the top to complete the effect. It's always the best part!
Notes & Tips
-
1
Make sure your cream cheese is truly at room temperature. It makes a world of difference in getting that smooth, creamy texture without any lumps. I usually just set it on the counter an hour before I start.
-
2
Don't overmix when you fold in the whipped topping! You want to keep all that lovely airiness that makes the cream cheese layer so light and fluffy. Use gentle, sweeping motions with a spatula.
-
3
Chilling is not optional! This dessert needs at least four hours for the layers to set and the flavors to meld together. Honestly, it’s even better the next day, making it a perfect make-ahead dessert for parties. It's as convenient as my Oreo ghost truffles.
 Desserts
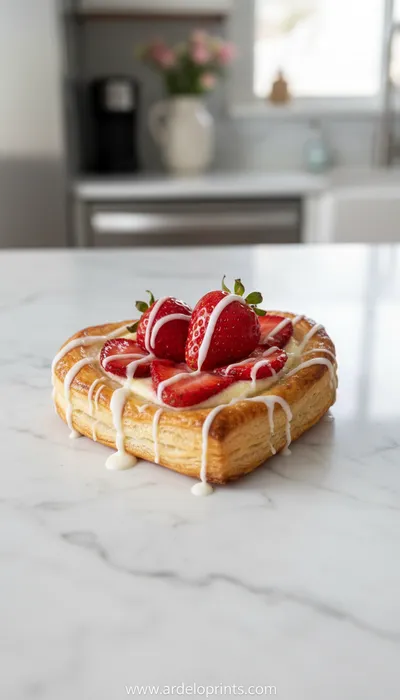
Strawberry Puff Pastry Danishes Recipe
Flaky puff pastry filled with sweet strawberry filling, perfect for a special breakfast or dessert.
Tools You'll Need
-
Food Processor or Rolling Pin: This is essential for turning your Oreo cookies into the fine, soil-like 'dirt' that makes this dessert so iconic. A food processor makes quick work of it, but honestly, a zip-top bag and a rolling pin are just as effective and allow for a bit more rustic texture.
-
Electric Hand Mixer: While you could mix the cream cheese and sugar by hand, an electric mixer makes it so much easier to achieve that perfectly smooth, light, and airy consistency. It ensures there are no lumps of cream cheese, which is key to the velvety texture of the filling.
-
Large Mixing Bowls: You'll need a few bowls for this recipe—one for the Oreo crumbs, one for the cream cheese mixture, and another for the pudding. Having a set of nesting bowls is always a good idea in the kitchen; it keeps things organized and makes the process feel calm and collected.
-
Trifle Bowl or 9x13 Pan: The presentation is part of the fun! A clear glass trifle bowl beautifully showcases the distinct layers of dark crumbs and creamy filling. However, a standard 9x13 inch glass baking dish works just as well for serving a crowd at a potluck or party.
Must-Know Tips
-
Room Temp Cream Cheese is Key: I can't stress this enough. Softened cream cheese is your best friend for a lump-free, velvety smooth filling. Cold cream cheese will fight you every step of the way.
-
Let it Chill: The magic happens in the fridge. Chilling allows the pudding to set fully and the flavors to deepen. Rushing this step will result in a soupy dessert, and nobody wants that.
-
Layer Gently: When spreading the layers, use an offset spatula or the back of a spoon to gently guide the mixtures into place. This prevents the layers from mixing together and keeps those beautiful, distinct lines.
Professional Secrets
-
A Pinch of Salt: Add a tiny pinch of salt to your cream cheese mixture. It sounds counterintuitive for a sweet dessert, but it actually enhances the sweetness and balances the tang of the cream cheese perfectly.
-
Double the 'Dirt': For an extra decadent dessert with more crunch, reserve some of the Oreo crumbs to create a thin middle layer between the cream cheese and pudding mixtures. It adds a wonderful textural surprise.
-
Infuse the Milk: For a more grown-up flavor, you can gently warm the milk with a vanilla bean pod before chilling it completely to make the pudding. It adds a layer of deep, authentic vanilla flavor that is just incredible.

Recipe by
Mason Cole“Sweet cravings are my specialty! I turn sugar, chocolate, and imagination into pure dessert magic.” 🍰✨
Get Delicious Recipes Weekly
Join 25,000+ home cooks getting our best recipes straight to their inbox.
Free forever • No spam • Unsubscribe anytime